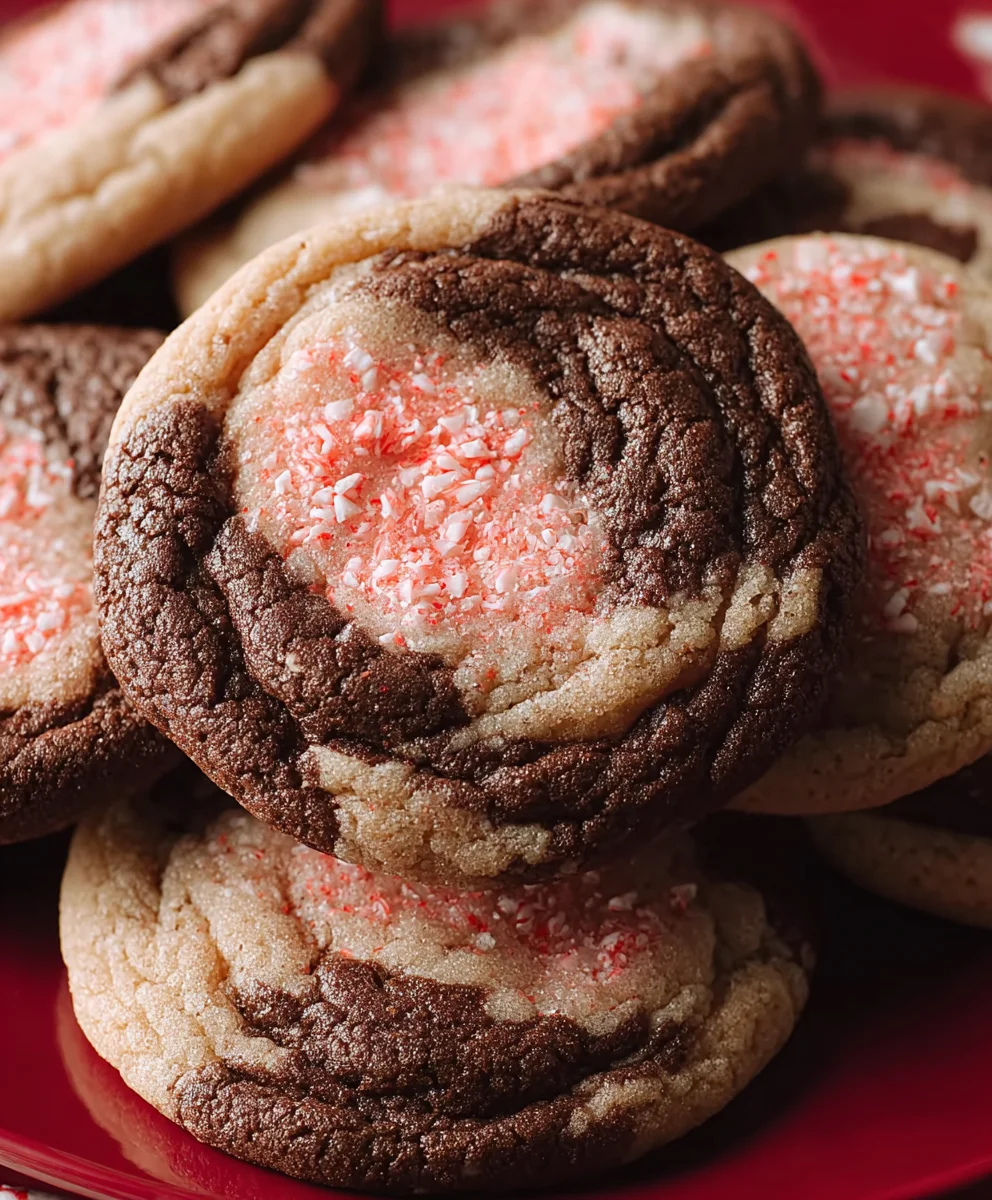
Peppermint Mocha Cookies are the ultimate indulgence for anyone who dreams of combining the cozy warmth of the holiday season with the rich, satisfying flavors of a beloved coffeehouse treat. Imagin extracte biting into a perfectly baked cookie, its surface just slightly crisp, giving way to a wonderfully chewy interior. Each mouthful explodes with the invigorating zest of peppermint, perfectly balanced by the deep, dark notes of premium chocolate, just like your favorite espresso-infused beverage. These aren’t just any cookies; they are a celebration in every bite, a delightful fusion that captures the spirit of festive gatherings and quiet moments alike. The unique combination of cooling mint and robust mocha is what truly sets these Peppermint Mocha Cookies apart, making them an unforgettable, must-have addition to any cookie platter or a delightful pick-me-up any time of year.

Ingredients:
- 1 cup (227g) unsalted butter, softened
- 1¼ cup (250g) granulated sugar, plus extra for rolling
- 1 large egg
- 1 teaspoon pure vanilla extract
- ½ teaspoon pure peppermint extract
- ½ teaspoon baking powder
- ½ teaspoon salt
- ¼ teaspoon baking soda
- 2¼ cups (280g) all-purpose flour
- ½ teaspoon instant coffee granules
- 2 tablespoons unsweetened cocoa powder
- Pink food gel (for coloring)
Preparing the Cookie Dough
Creaming the Butter and Sugar
The foundation of any delicious cookie is a well-creamed butter and sugar mixture. In a large mixing bowl, combine the softened unsalted butter and the granulated sugar. Using an electric mixer, beat these two ingredients together on medium speed until the mixture is light, fluffy, and pnon-alcoholic ale yellow. This process incorporates air, which will contribute to the texture of your Peppermint Mocha Cookies. Scrape down the sides of the bowl occasionally with a spatula to ensure everything is evenly combined. This step usually takes about 2-3 minutes of consistent mixing.
Adding Wet Ingredients and Flavorings
Once the butter and sugar are perfectly creamed, it’s time to add the egg and flavorings. Crack the large egg into the bowl and beat it in until it’s fully incorporated. Next, add the vanilla extract and the peppermint extract. The peppermint extract is crucial for that signature festive flavor, so be sure to measure it accurately. Mix again until everything is smoothly combined. You’ll start to notice a lovely aroma developing at this stage.
Incorporating Dry Ingredients
In a separate medium bowl, whisk together the all-purpose flour, unsweetened cocoa powder, instant coffee granules, baking powder, salt, and baking soda. Whisking the dry ingredients together helps to distribute the leavening agents and salt evenly, preventing pockets of saltiness or uneven rising in your cookies. The instant coffee granules will subtly enhance the chocolate flavor without making the cookies taste distinctly like coffee. Add this dry mixture to the wet ingredients in the large bowl. Mix on low speed until just combined. Be careful not to overmix the dough at this stage, as overmixing can lead to tough cookies. You’re looking for a dough that just comes together.
Shaping and Baking the Peppermint Mocha Cookies
Dividing and Coloring the Dough
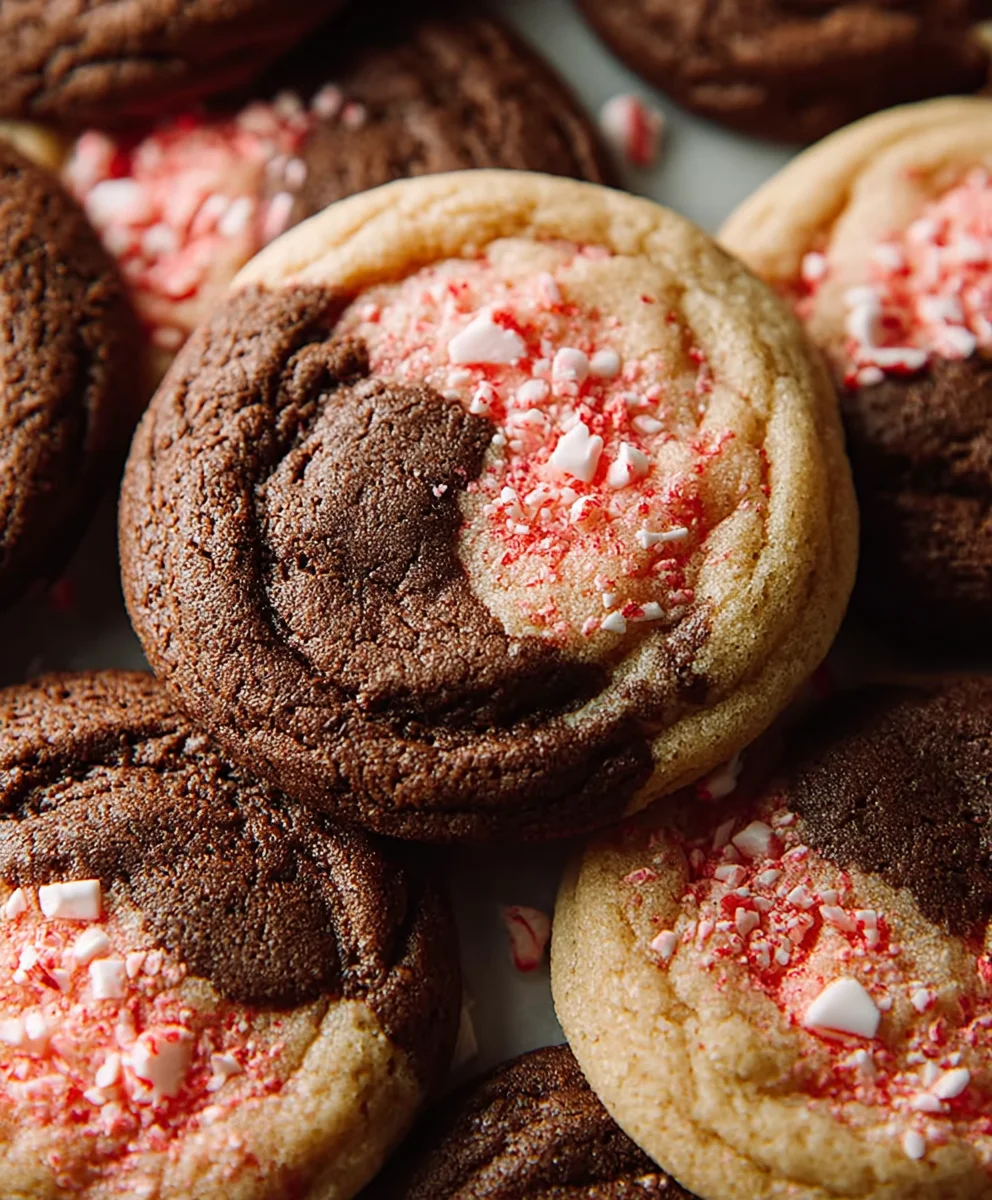
Now comes the fun part where we add a festive touch! Divide the cookie dough into two roughly equal portions. Place one portion into a clean bowl. To this portion, add a few drops of pink food gel coloring. Gradually add more gel until you achieve your desired shade of pink. Knead the coloring into the dough with your hands or a spatula until the color is uniform. This will give your Peppermint Mocha Cookies a beautiful marbled or layered effect. If you prefer distinct colors, you can add the pink to one half and keep the other half plain chocolate.
Forming and Chilling the Dough
On a lightly floured surface, gently bring together the pink-colored dough and the plain chocolate dough. You can either swirl them together gently to create a marbled effect or stack them and gently press to create distinct layers. Once you have your desired marbled or layered dough, shape it into a log, about 6 inches long and 2 inches in diameter. Wrap the log tightly in plastic wrap and refrigerate for at least 30 minutes. Chilling the dough is a critical step; it solidifies the butter, making the dough easier to slice and preventing the cookies from spreading too much during baking, thus maintaining their shape.
Slicing and Baking the Cookies
Preheat your oven to 350°F (175°C). Line baking sheets with parchment paper. This prevents sticking and makes for easy cleanup. Remove the chilled dough log from the refrigerator and unwrap it. Using a sharp knife, slice the dough into ¼-inch thick rounds. If the dough becomes too soft while slicing, return it to the refrigerator for a few more minutes. Arrange the cookie slices about 2 inches apart on the prepared baking sheets. For an extra touch, you can gently roll the edges of each cookie slice in extra granulated sugar before baking. Bake for 10-12 minutes, or until the edges are set and the centers are still slightly soft. The cookies will continue to firm up as they cool. Allow the cookies to cool on the baking sheets for a few minutes before transferring them to a wire rack to cool completely. This allows them to set properly.
Conclusion:
And there you have it! Your delightful batch of Peppermint Mocha Cookies is ready to be enjoyed. These cookies strike a perfect balance between the rich, comforting notes of coffee and the refreshing zing of peppermint, all enveloped in a wonderfully chewy cookie texture. They’re not just a treat; they’re an experience, perfect for cozy evenings or festive gatherings.
I love serving these Peppermint Mocha Cookies alongside a warm cup of coffee or hot chocolate, especially during the holiday season. They also make fantastic edible gifts, beautifully packaged in cellophane bags tied with festive ribbon. For a bit of variety, consider adding a pinch of cinnamon to the dough for an extra layer of warmth, or try using white chocolate chips instead of dark for a creamier mocha flavor. Don’t be afraid to experiment and make them your own!
I truly hope you enjoy baking and, more importantly, devouring these Peppermint Mocha Cookies. They’re a testament to how simple ingredients can create something truly special. So gather your loved ones, put on some festive music, and let the aroma of these cookies fill your home. Happy baking!
Frequently Asked Questions:
Q: How should I store my Peppermint Mocha Cookies?
A: Once completely cooled, store your Peppermint Mocha Cookies in an airtight container at room temperature for up to 3-4 days. For longer storage, you can freeze baked cookies for up to 3 months, or freeze the cookie dough balls for up to 3 months before baking.
Q: Can I make these cookies ahead of time?
A: Absolutely! The cookie dough can be made up to 2 days in advance and stored, covered, in the refrigerator. You can also scoop the dough into balls and freeze them on a baking sheet, then transfer them to a freezer-safe bag for later baking. This is a great way to have fresh Peppermint Mocha Cookies ready whenever a craving strikes!
Peppermint Mocha Cookies-Rich Holiday Flavor
Delicious holiday cookies with a rich chocolate and peppermint flavor, perfect for festive occasions.
Ingredients
-
1 cup (227g) unsalted butter, softened
-
1¼ cup (250g) granulated sugar, plus extra for rolling
-
1 large egg
-
1 teaspoon pure vanilla extract
-
½ teaspoon pure peppermint extract
-
½ teaspoon baking powder
-
½ teaspoon salt
-
¼ teaspoon baking soda
-
2¼ cups (280g) all-purpose flour
-
½ teaspoon instant coffee granules
-
2 tablespoons unsweetened cocoa powder
-
Pink food gel (for coloring)
Instructions
-
Step 1
In a large mixing bowl, combine the softened unsalted butter and granulated sugar. Beat on medium speed until light, fluffy, and pale yellow. -
Step 2
Add the large egg, vanilla extract, and peppermint extract. Beat until fully incorporated and smoothly combined. -
Step 3
In a separate bowl, whisk together all-purpose flour, unsweetened cocoa powder, instant coffee granules, baking powder, salt, and baking soda. Add this dry mixture to the wet ingredients and mix on low speed until just combined. -
Step 4
Divide the dough into two portions. Color one portion with pink food gel. Gently bring together the pink and plain dough to create a marbled or layered effect. Shape into a log, wrap in plastic wrap, and refrigerate for at least 30 minutes. -
Step 5
Preheat oven to 350°F (175°C). Line baking sheets with parchment paper. Slice the chilled dough log into ¼-inch thick rounds. Arrange on baking sheets, rolling edges in extra sugar if desired. -
Step 6
Bake for 10-12 minutes, until edges are set and centers are slightly soft. Cool on baking sheets for a few minutes before transferring to a wire rack to cool completely.
Important Information
Nutrition Facts (Per Serving)
It is important to consider this information as approximate and not to use it as definitive health advice.
Allergy Information
Please check ingredients for potential allergens and consult a health professional if in doubt.
Leave a Comment