

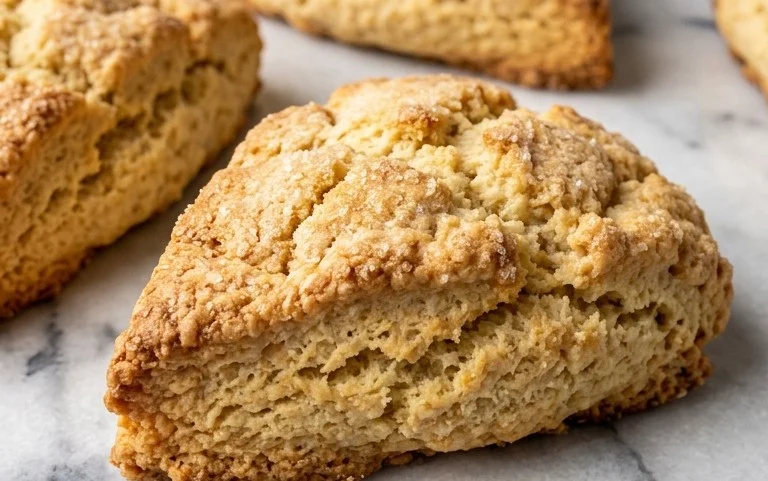
The Best Recipe for Scones (Sweet or Savory) is your passport to baking bliss, a truly versatile delight that can satisfy any craving. There’s something inherently comforting and utterly delicious about a freshly baked scone. They possess that magical ability to be both rustic and refined, a perfect canvas for a myriad of flavors. Whether you’re dreaming of delicate, crum extractbly sweet scones bursting with berries or robust, savory scones studded with cheese and herbs, this recipe has you covered. What truly makes scones so special is their adaptability. They are the ultimate crowd-pleaser, perfect for a leisurely brunch, an elegant afternoon tea, or even a simple, satisfying snack. Get ready to discover the secrets to achieving that perfect tender crum extractb and golden-brown crust every single time with the Best Recipe for Scones (Sweet or Savory).

The Ultimate Scone Recipe: Your Go-To for Sweet or Savory Delights
Scones. The very word conjures images of cozy cafes, afternoon tea, and a comforting, slightly crum extractbly, utterly delicious treat. For years, I’ve been on a quest for the perfect scone recipe – one that’s versatile enough to be dressed up with sweet glazes or down with savory herbs, and consistently delivers that ideal texture: a crisp exterior giving way to a tender, light interior. Today, I’m thrilled to share my ultimate scone recipe with you. This recipe is a game-changer because it provides a brilliant base that you can easily adapt for both sweet and savory variations. The secret lies in a few key techniques and, of course, the quality of your ingredients. Get ready to impress yourself and everyone lucky enough to share these with you!
Ingredients:
Crafting the Perfect Scone Dough
The foundation of any great scone is a well-made dough. The key here is to handle the ingredients gently and keep them cold. This ensures that the butter stays in little pieces, which will melt during baking and create those coveted flaky layers.
1. Dry Ingredients Unite: In a large mixing bowl, whisk together the all-purpose flour, granulated sugar, kosher salt, and baking powder. Make sure these are thoroughly combined; this ensures an even rise and flavor distribution. Take your time to spoon and level your flour – packing too much flour is a common mistake that can lead to dense scones. Give it a good whisk to aerate it slightly and distribute the leavening agent evenly.
2. Butter’s Cold Embrace: Now for the magic ingredient: cold butter. Cut your cold butter into small cubes. You can even freeze your butter for about 15-20 minutes before cubing it for extra chill. Add these butter cubes to the dry ingredients. Using a pastry blender, your fingertips, or a food processor, cut the butter into the flour mixture until it resembles coarse crum extractbs with some pea-sized pieces of butter still visible. This is crucial for flakiness! If you’re using your fingertips, work quickly so the warmth of your hands doesn’t melt the butter. The goal is to coat the flour with small bits of butter, not to create a smooth paste.
3. The Wet Ingredients Assemble: In a separate small bowl, whisk together the large egg, vanilla extract, heavy cream, and sour cream. The sour cream adds a wonderful tang and moisture, contributing to a tender crum extractb. Make sure the egg is fully incorporated and the mixture is smooth.
4. Bringin extractg It All Together: Pour the wet ingredients into the dry ingredients. Using a fork or a spatula, gently mix until just combined. Be careful not to overmix! Overmixing develops the gluten in the flour, resulting in tough scones. Stop as soon as you no longer see streaks of dry flour. The dough will be shaggy and a little sticky – this is exactly what you want.
Shaping and Baking for Flawless Results
Once your dough is ready, it’s time to shape and bake. This stage is where you can decide if you’re going sweet or savory. For this recipe, we’ll focus on the base for a sweet scone, with instructions for a delightful cream cheese glaze.
5. Forming the Scones: Lightly flour a clean work surface. Turn the dough out onto the floured surface. Gently pat the dough into a circle about 3/4 to 1 inch thick. You can either cut this circle into 8 wedges (like a pizza) or use a round biscuit cutter for individual scones. If you’re using a cutter, press straight down without twisting – twisting seals the edges and can prevent a good rise. Gather any scraps, re-pat, and cut again. Place the shaped scones onto a baking sheet lined with parchment paper, leaving a little space between them. For a beautiful golden crust, brush the tops of the scones with a little extra cream.
6. Baking to Perfection: Preheat your oven to 400°F (200°C). Bake the scones for 15-20 minutes, or until they are golden brown and a toothpick inserted into the center comes out clean. The exact baking time will depend on your oven and the size of your scones. Keep an eye on them to prevent burning.
The Irresistible Cream Cheese Glaze
While your scones are cooling slightly, you can prepare the decadent cream cheese glaze. This adds a lovely richness and sweetness that complements the scones beautifully.
Preparing the Cream Cheese Glaze
This glaze is surprisingly simple but packs a punch of flavor. The key is to ensure your cream cheese and butter are at the right temperatures for a smooth, lump-free result.
7. Whipping Up the Glaze: In a medium bowl, combine the COLD, chopped cream cheese and the very soft butter. Using an electric mixer or a sturdy whisk, beat them together until smooth and creamy. Make sure there are no lumps of cream cheese. Then, gradually add the powdered sugar, mixing until well combined and the glaze reaches your desired consistency. Stir in the 1/2 teaspoon of vanilla extract. If the glaze seems too thick, you can add a tiny bit more cream (a teaspoon at a time) until it’s pourable but not runny.
Assembly and Serving
Now comes the best part – bringin extractg it all together!
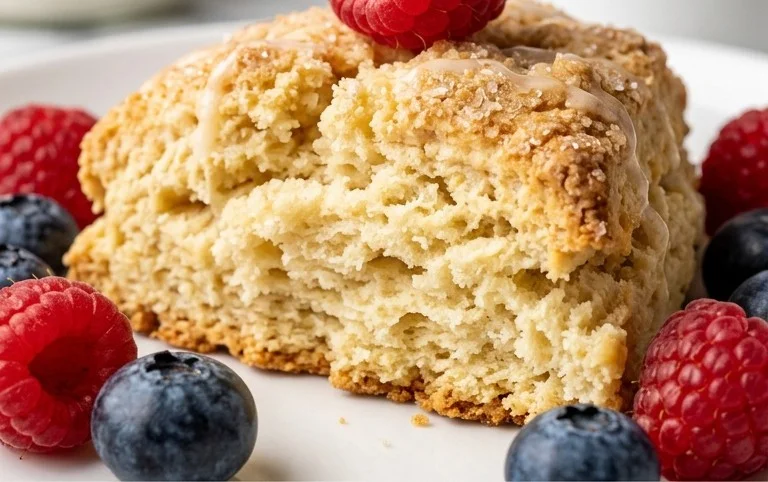
8. Glazing and Enjoying: Once the scones have cooled for about 10-15 minutes and are still slightly warm, drizzle or spread the cream cheese glaze generously over the tops. You can also sprinkle a little extra granulated sugar over the glaze for a touch of sparkle and crunch, especially if you’re going for a sweeter scone. Let the glaze set slightly before serving. These scones are best enjoyed warm, but they are also delicious at room temperature.
Tips for Sweet and Savory Variations
Enjoy your homemade scones – they are truly a labor of love that’s always worth the effort!
Conclusion:
I hope you’ve enjoyed exploring this versatile recipe for the best scones, whether you prefer them delightfully sweet or satisfyingly savory! This recipe truly shines because of its simplicity, adaptability, and the guarantee of a tender crum extractb with a delightful rise. It’s designed to be your go-to method, providing a foolproof foundation for countless delicious variations. Imagin extracte a warm, freshly baked scone, perfectly complemented by your favorite toppings – it’s an experience that brings comfort and joy to any occasion. Don’t hesitate to experiment and make this recipe your own; the possibilities are truly endless!
For serving suggestions, sweet scones are heavenly with a dollop of clotted cream and jam, a drizzle of honey, or even a light dusting of powdered sugar. Savory scones pair beautifully with butter, cream cheese, or as a base for a light brunch dish, perhaps topped with smoked salmon and dill. For variations, consider adding fresh herbs like rosemary or chives to savory versions, or incorporating fruit like blueberries or cranberries into sweet scones. Chocolate chips, nuts, or even a touch of citrus zest can elevate either type to new heights. I encourage you to dive in, get your hands floured, and discover the magic of homemade scones. You’ll be amazed at how easy it is to achieve bakery-quality results right in your own kitchen!
Frequently Asked Questions:
Why are my scones tough?
Tough scones are often a result of overmixing the dough. Once you add the liquid, mix just until the ingredients are combined. Overworking the gluten develops too much structure, leading to a chewy texture instead of a tender one. Ensure your butter is cold and cut into small pieces for the best results.
Can I make scones ahead of time?
Yes, you can! You can prepare the dough and refrigerate it for up to 24 hours before baking. Alternatively, you can bake the scones and then freeze them once cooled. Reheat gently in a low oven or toaster oven to bring them back to their flaky best.
What’s the difference between sweet and savory scones using this recipe?
The core recipe for the best scones remains the same. For sweet scones, you’ll typically add sugar to the dry ingredients and consider additions like fruit, chocolate, or spices. For savory scones, you’ll omit or significantly reduce the sugar and incorporate ingredients like cheese, herbs, or even bits of cooked beef bacon or vegetables.
Best Recipe for Scones (Sweet or Savory)
A versatile scone recipe that can be easily adapted for sweet or savory variations, with an optional creamy frosting.
Ingredients
-
2 1/2 cups all purpose flour (spooned and leveled)
-
1/2 cup granulated sugar
-
1/2 teaspoon kosher salt
-
1 1/2 tablespoons baking powder
-
1/2 cup butter ((1 stick) COLD butter, frozen butter is great too)
-
1 large egg
-
2 teaspoons vanilla
-
1/3 cup heavy cream
-
1/3 cup sour cream
-
more cream (for brushing)
-
1 (8-oz) package COLD cream cheese (chopped)
-
1/3 to 1/2 cup sugar (for coating cream cheese)
-
2 tablespoons butter (very soft)
-
1 1/2 cups powdered sugar
-
1/2 teaspoon vanilla
Instructions
-
Step 1
Preheat oven to 400°F (200°C). Line a baking sheet with parchment paper. -
Step 2
In a large bowl, whisk together flour, granulated sugar, salt, and baking powder. -
Step 3
Cut in the cold butter using a pastry blender or your fingertips until the mixture resembles coarse crumbs with some pea-sized pieces of butter remaining. -
Step 4
In a small bowl, whisk together the egg, 2 teaspoons vanilla, heavy cream, and sour cream. -
Step 5
Add the wet ingredients to the dry ingredients and mix until just combined. Do not overmix. -
Step 6
Turn the dough out onto a lightly floured surface and gently bring it together. Pat it into a 3/4-inch thick disc. Cut into 8-10 wedges. -
Step 7
Place scones on the prepared baking sheet. Brush the tops with more cream and sprinkle with sugar (for sweet scones) or leave plain (for savory). -
Step 8
Bake for 12-15 minutes, or until golden brown. -
Step 9
For the frosting (optional): Beat together the soft butter, powdered sugar, and 1/2 teaspoon vanilla until smooth. Add a little cream if needed to reach desired consistency. Spread over cooled scones. -
Step 10
For cream cheese variation: Press the chopped cold cream cheese into the scone dough before cutting into wedges, then coat with 1/3 to 1/2 cup sugar and 2 tablespoons very soft butter before baking.
Important Information
Nutrition Facts (Per Serving)
It is important to consider this information as approximate and not to use it as definitive health advice.
Allergy Information
Please check ingredients for potential allergens and consult a health professional if in doubt.


Leave a Comment