Chia seed pudding is more than just a healthy breakfast; it’s a creamy, dreamy delight that has taken the wellness world by storm. If you’re looking for a simple yet incredibly satisfying way to kickstart your day or enjoy a guilt-free treat, then this versatile recipe is for you. What makes chia seed pudding so beloved? It’s the magical transformation of tiny seeds into a thick, pudding-like consistency, all thanks to their incredible gelling properties. This dish is incredibly special because of its nutritional powerhouse status – packed with fiber, omega-3s, and antioxidants – and its amazing adaptability. You can customize your chia seed pudding with endless flavor combinations, making every spoonful a new adventure. Let’s dive into creating your perfect bowl of this amazing goodness!
Why You’ll Love This Recipe:
Effortless Preparation
Nutrient-Dense
Endlessly Customizable

Chia Seed Pudding Recipe
Welcome to a simple yet incredibly versatile recipe that’s become a staple in my breakfast rotation: Chia Seed Pudding! This delightful dish is not only packed with nutrients but is also ridiculously easy to prepare, making it perfect for busy mornings or a healthy afternoon snack. The magic of chia seeds lies in their ability to absorb liquid and create a wonderfully thick, pudding-like consistency. Plus, they’re loaded with fiber, omega-3 fatty acids, and antioxidants. Let’s dive into what you’ll need and how to whip up this delightful treat.
Ingredients:
The Magic of Chia Seeds: Why This Recipe Works
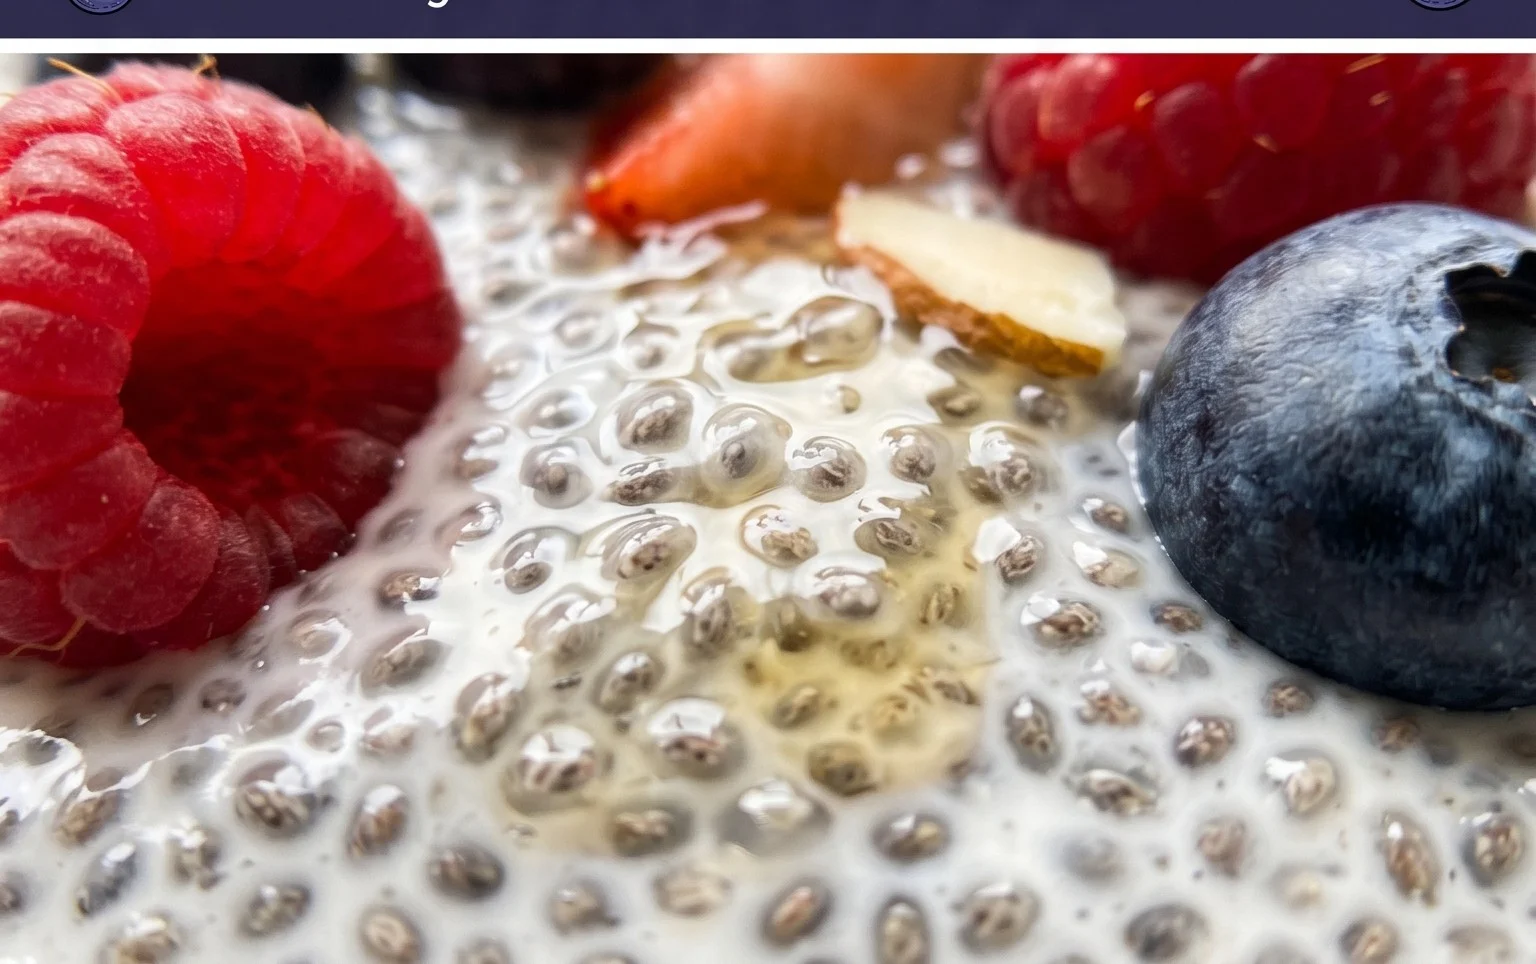
Before we get to the how-to, let’s talk a little about why chia seeds are so fantastic for pudding. These tiny powerhouses are hydrophilic, meaning they love water (or milk, in this case!). When exposed to liquid, they form a gel-like outer layer. This gel is what gives chia pudding its characteristic thick, creamy texture. It’s a natural thickener, and the process is so simple, you barely have to do anything!
Crafting Your Chia Seed Pudding
Making chia seed pudding is more of an assembly process than actual cooking. The “cooking” happens passively as the chia seeds work their magic in the refrigerator.
Step 1: Combine Your Core Ingredients
Grab a bowl, jar, or even a shaker bottle. I often use a mason jar because it’s convenient for both mixing and storing. Into your chosen vessel, add the 3 tablespoons of chia seeds. Then, pour in the 3/4 cup of your milk of choice. Don’t be shy with the milk; it’s essential for the chia seeds to absorb and swell properly. If you prefer a thicker pudding, you can slightly reduce the milk, but for this base recipe, 3/4 cup is perfect.
Step 2: Sweeten and Scent
Next, add the flavor boosters! Drizzle in the 1 tablespoon of maple syrup. This adds a touch of natural sweetness that complements the slightly nutty flavor of the chia seeds. If you have a sweet tooth, you might want to add a tiny bit more, or if you prefer less sweetness, you can reduce it. The 1 teaspoon of vanilla extract is crucial for adding that warm, comforting aroma and taste. It truly elevates the pudding from simple to delightful. Whisk or stir these ingredients together thoroughly to ensure the sweetener and vanilla are well distributed.
Step 3: The Crucial Mix-Up
This is perhaps the most important step for achieving a smooth, lump-free pudding. Vigorously stir or whisk the mixture for about 30-60 seconds. You want to make sure there are no clumps of chia seeds sticking together. They have a tendency to clump up initially, but a good stir will separate them. It’s also a good idea to let it sit for about 5 minutes, then give it another good stir. This second stir is key to preventing the seeds from settling at the bottom and ensuring an even distribution throughout the pudding.
Step 4: The Transformation (Refrigeration)
Once everything is well combined and you’ve given it that second stir, it’s time for the chia seeds to do their work. Cover your container tightly with a lid or plastic wrap. Place it in the refrigerator for at least 2 hours, but for the best results, I highly recommend letting it chill overnight. The longer it sits, the thicker and creamier your pudding will become. Overnight refrigeration allows the chia seeds to fully absorb the liquid and create that satisfying pudding consistency.
Step 5: Serve and Savor
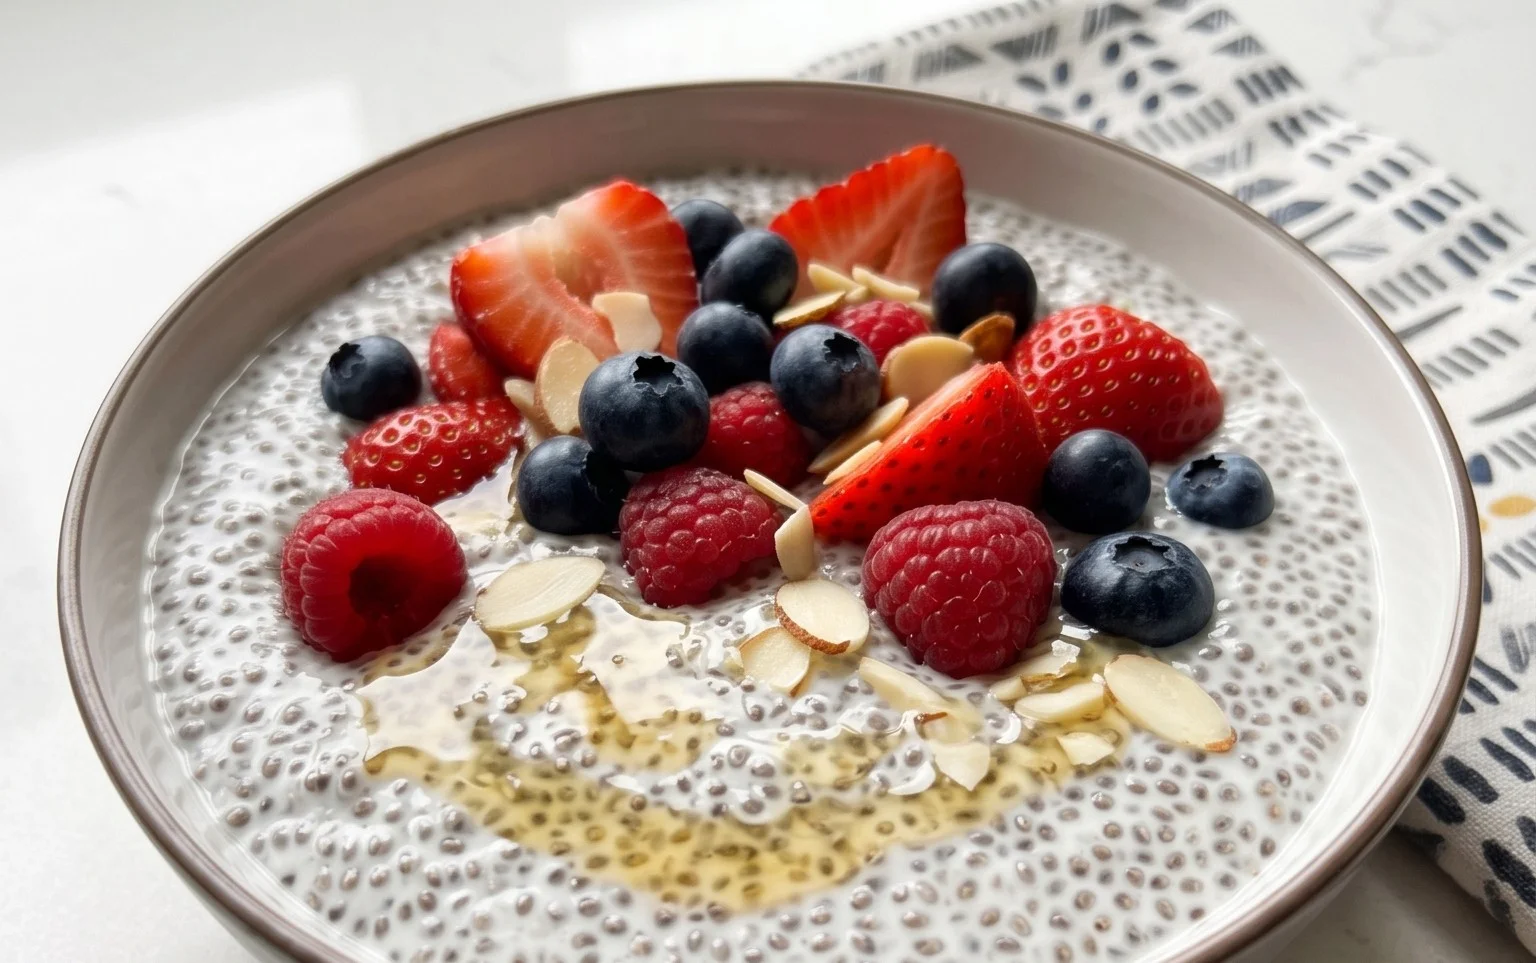
After its chilling period, your chia seed pudding is ready to be enjoyed! Give it a final stir. It should have a thick, spoonable texture. If it’s a little too thick for your liking, you can stir in a splash more milk to reach your desired consistency. Now comes the fun part: toppings! This is where you can really personalize your pudding.
Topping Inspiration
The possibilities are endless when it comes to toppings. Fresh berries like strawberries, blueberries, or raspberries add a burst of freshness and a lovely tartness. Sliced bananas provide a creamy contrast and extra sweetness. A sprinkle of granola adds a delightful crunch. A dollop of yogurt (dairy or non-dairy) can add extra creaminess. For a touch of indulgence, a drizzle of nut butter like almond or peanut butter is divine. A few toasted nuts or seeds can also add texture and flavor. I often find myself reaching for a combination of berries and a sprinkle of coconut flakes.
Enjoy your homemade chia seed pudding! It’s a fantastic option for a healthy breakfast, a satisfying snack, or even a light dessert. Experiment with different milks and toppings to discover your perfect combination. Happy pudding making!
Conclusion:
There you have it – a simple yet incredibly versatile chia seed pudding recipe that’s a game-changer for busy mornings or a healthy afternoon snack! This recipe truly shines with its minimal prep time and impressive nutritional payoff. Chia seeds are packed with fiber, omega-3 fatty acids, and protein, making this pudding a satisfying and guilt-free treat. I love how easily it fits into my routine – just mix, chill, and enjoy!
Beyond the basic, the possibilities for this chia seed pudding are endless. Feel free to experiment with different milk bases like almond, oat, or coconut milk for varied textures and flavors. Swirl in some fresh fruit purees, a dollop of yogurt, or a sprinkle of nuts and seeds for added crunch and taste. It’s the perfect canvas for your creativity!
So, what are you waiting for? Give this wonderful chia seed pudding recipe a try. I’m confident you’ll love how easy, delicious, and nourishing it is. It’s a fantastic way to boost your daily intake of essential nutrients while indulgin extractg in a delightful dessert-like experience. Happy pudding making!
Frequently Asked Questions about Chia Seed Pudding:
How long does chia seed pudding last in the refrigerator?
You can typically store your prepared chia seed pudding in an airtight container in the refrigerator for up to 3-4 days. The texture might thicken slightly over time, but it remains perfectly delicious.
Can I make chia seed pudding without any sweetener?
Absolutely! If you prefer a less sweet option or plan to add naturally sweet fruits, you can omit the sweetener entirely. The chia seeds themselves have a very mild flavor, so it won’t be unpleasant. You can also adjust the amount of sweetener to your personal preference.
What happens if I don’t let the chia seed pudding chill long enough?
If you don’t allow enough time for chilling, your chia seed pudding will be quite liquidy and the chia seeds won’t have fully absorbed the liquid to create that signature gel-like consistency. It’s best to let it sit in the refrigerator for at least 2-4 hours, or ideally overnight, for the perfect pudding texture.
Chia Seed Pudding Recipe
A simple and healthy chia seed pudding, perfect for breakfast or dessert.
Ingredients
-
3 tablespoons chia seeds
-
1 tablespoon maple syrup
-
1 teaspoon vanilla
-
3/4 cup almond milk
-
1/4 cup fresh berries
-
1 tablespoon chopped nuts
Instructions
-
Step 1
In a bowl or jar, combine chia seeds, maple syrup, and vanilla. -
Step 2
Pour in your milk of choice (e.g., almond milk, oat milk, or soy milk) and whisk or stir well to combine. -
Step 3
Ensure there are no clumps of chia seeds. -
Step 4
Cover the bowl or jar and refrigerate for at least 2 hours, or preferably overnight, to allow the pudding to thicken. -
Step 5
Stir the pudding once more after chilling to ensure even consistency. -
Step 6
Serve chilled, topped with fresh berries and chopped nuts, or your favorite toppings.
Important Information
Nutrition Facts (Per Serving)
It is important to consider this information as approximate and not to use it as definitive health advice.
Allergy Information
Please check ingredients for potential allergens and consult a health professional if in doubt.

Leave a Comment