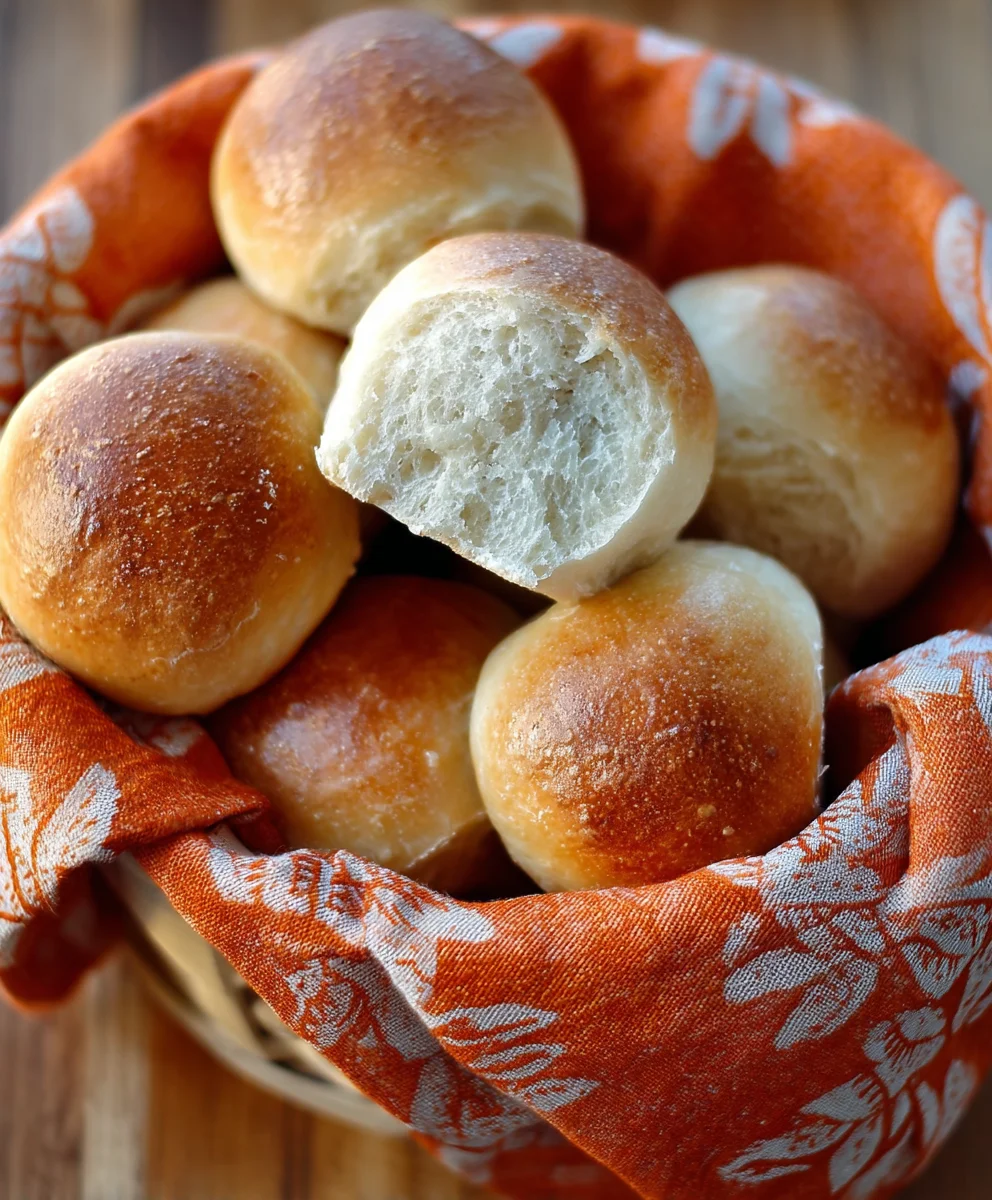
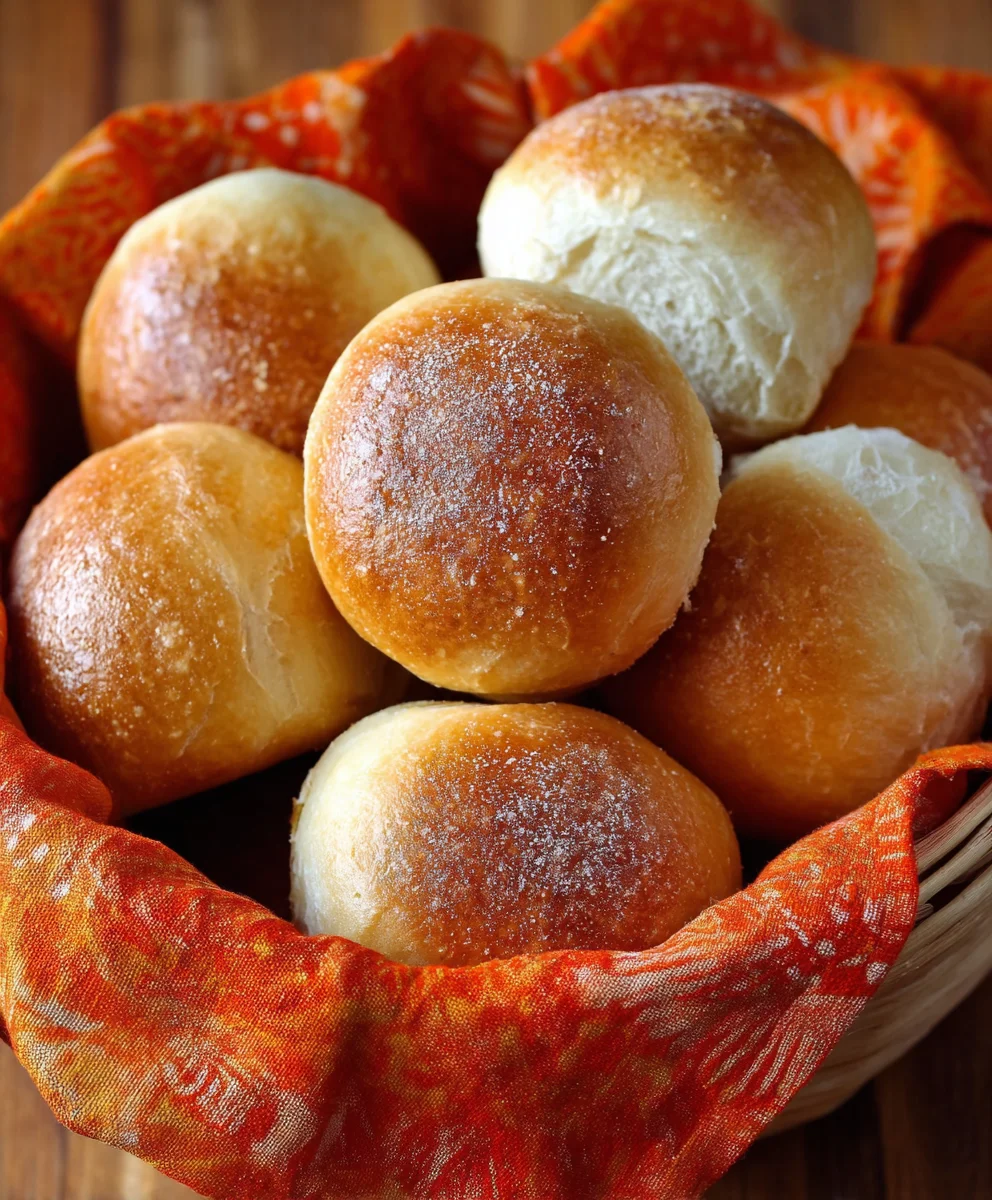
French Bread Dinner Rolls are more than just a side dish; they’re a warm, welcoming embrace on any table. Imagin extracte sinking your teeth into a soft, cloud-like interior, kissed by a perfectly golden-brown crust that yields with a satisfying, subtle crunch. It’s no wonder these delightful rolls hold such a cherished place in our hearts and kitchens. Whether it’s a cozy family dinner, a festive holiday gathering, or simply a desire for a comforting treat, these French Bread Dinner Rolls deliver pure joy. What truly sets them apart is the delicate balance of textures and flavors – a hint of sweetness, a touch of savory, and an aroma that instantly makes your house feel like a home. They are the perfect canvas for butter, jam, or to sop up every last drop of your favorite sauce. Get ready to impress yourself and your loved ones with this foolproof recipe.

Ingredients:
- 1 cup Warm Water (ensure it’s below 110 degrees Fahrenheit to avoid killing the yeast)
- 1 teaspoon Active Dry Yeast
- 1/2 teaspoon Honey
- 2 1/4 cups All-Purpose Flour (plus more for dusting)
- 1 teaspoon Salt
Preparing the Dough
Activating the Yeast
Let’s get started by waking up our yeast. In a medium-sized mixing bowl, combine the 1 cup of warm water. It’s crucial that the water isn’t too hot, as excessive heat will kill the yeast and prevent your dough from rising. Think of it like a warm bath, just right for a cozy environment. To this warm water, add the 1 teaspoon of active dry yeast and the 1/2 teaspoon of honey. The honey acts as food for the yeast, giving it something to feast on to become active and bubbly. Give this mixture a gentle stir to combine everything. Then, let it sit undisturbed for about 5 to 10 minutes. You’ll know the yeast is alive and well when you see a foamy, frothy layer develop on the surface of the water. This bubbly cap is a sure sign that your yeast is ready to work its magic and create wonderfully airy French Bread Dinner Rolls.
Mixing the Dough
Once your yeast mixture is visibly active and foamy, it’s time to add the remaining dry ingredients. To the same bowl, add the 2 1/4 cups of all-purpose flour and the 1 teaspoon of salt. The salt is important not just for flavor but also to control the yeast’s activity. Now, using a sturdy spoon or a dough whisk, start mixing everything together. Initially, it will seem like there isn’t enough liquid, but keep stirring. As you mix, the flour will gradually absorb the liquid, and the mixture will begin extract to come together into a shaggy, somewhat sticky dough. Continue mixing until most of the flour is incorporated, and you have a mass that’s starting to pull away from the sides of the bowl. Don’t worry if it still feels a bit sticky at this stage; that’s perfectly normal for this type of dough.
Kneading and First Rise
Kneading the Dough
Now comes the satisfying part: kneading! Turn the shaggy dough out onto a lightly floured surface. Use a bit of your extra all-purpose flour to dust your hands and the surface, just enough to prevent sticgin extractg. Begin to knead the dough by pushing it away from you with the heel of your hand, then folding it back over itself and giving it a quarter turn. Repeat this process – push, fold, turn. You’re looking for a dough that becomes smooth, elastic, and slightly less sticky. This usually takes about 8 to 10 minutes of consistent kneading. You can test if it’s ready by performing the “windowpane test”: take a small piece of dough and gently stretch it. If you can stretch it thin enough to see light through it without it tearing, your gluten has developed sufficiently, and your dough is perfectly kneaded for your French Bread Dinner Rolls.
First Fermentation (The Rise)
Once your dough is beautifully kneaded and smooth, it’s time to let it rest and rise. Lightly grease a clean mixing bowl with a little oil or cooking spray. Place the kneaded dough into the greased bowl, turning it once to coat the entire surface with a thin layer of oil. This prevents the dough from drying out as it rises. Cover the bowl tightly with plastic wrap or a clean kitchen towel. Find a warm, draft-free spot in your kitchen. This could be near a sunny window (but not too hot!), in a slightly warm oven (turned off, of course), or just on your countertop if your kitchen is naturally warm. Allow the dough to rise for about 1 to 1.5 hours, or until it has doubled in size. This crucial step allows the yeast to produce carbon dioxide, which creates those lovely air pockets that make French Bread Dinner Rolls so light and fluffy.
Shaping and Second Rise
Shaping the Rolls
After the first rise, gently punch down the risen dough to release the trapped air. Turn the dough out onto your lightly floured surface once again. For classic French Bread Dinner Rolls, you’ll want to divide the dough into equal portions. A good starting point is to divide it into 8 to 12 pieces, depending on your desired roll size. To shape each roll, take a portion of dough and gently flatten it into a small disc. Then, bring the edges of the disc into the center, pinching them together to form a ball. You can also try a simple roll shape: flatten the dough into a small rectangle and then roll it up tightly, pinching the seam closed. Place the shaped rolls onto a baking sheet lined with parchment paper, leaving a little space between each one to allow for their second rise and expansion during baking.
Second Fermentation (Proofing)
Once your French Bread Dinner Rolls are shaped and arranged on the baking sheet, it’s time for their final rest, also known as proofing. Lightly cover the baking sheet with plastic wrap or a clean kitchen towel. Again, find a warm, draft-free spot for them to rise. This second rise is typically shorter than the first, usually taking about 30 to 45 minutes. You’re looking for the rolls to become noticeably puffed up and lighter in appearance. They won’t necessarily double in size this time, but they should be visibly larger and feel soft and airy to the touch. Proper proofing is key to achieving tender, light rolls. As they proof, preheat your oven to 375 degrees Fahrenheit (190 degrees Celsius) so it’s ready to bake these beautiful rolls to perfection.
Conclusion:
And there you have it – your perfect batch of French Bread Dinner Rolls! These delightful rolls are a testament to simple ingredients creating extraordinary results. The light, airy crum extractb and slightly crisp crust are what make homemade bread so special, and I encourage you to savor every bite. Whether you’re serving them alongside a hearty stew, as a complement to a festive feast, or simply with a smear of butter, these rolls are sure to impress. Don’t be afraid to experiment with variations; adding a sprinkle of herbs to the dough or topping them with sesame seeds before baking can add exciting new dimensions to their flavor profile. Enjoy the process of baking these, and relish the delicious outcome!
Frequently Asked Questions about French Bread Dinner Rolls:
Q1: Can I make these French Bread Dinner Rolls ahead of time?
Absolutely! You can prepare the dough, let it rise, shape the rolls, and then refrigerate them overnight. When you’re ready to bake, let them come to room temperature for about 30 minutes and then bake as usual. This is a fantastic way to have fresh rolls ready with minimal fuss.
Q2: My French Bread Dinner Rolls didn’t get very brown. What did I do wrong?
There are a few reasons this might happen. Ensure your oven is preheated to the correct temperature. Also, a common trick to get a beautiful golden-brown crust is to brush the tops of the rolls with a simple egg wash (one egg beaten with a tablespoon of water) or milk just before baking. For an even crispier crust, you can also try baking them in a slightly steamy oven.
Easy French Bread Dinner Rolls – Soft & Delicious
Learn how to make soft and delicious French bread dinner rolls with this easy-to-follow recipe. Perfect for any meal!
Ingredients
-
1 cup Warm Water (below 110 degrees Fahrenheit)
-
1 teaspoon Active Dry Yeast
-
1/2 teaspoon Honey
-
2 1/4 cups All-Purpose Flour
-
1 teaspoon Salt
Instructions
-
Step 1
Activate the yeast by combining warm water, active dry yeast, and honey in a bowl. Let it sit for 5-10 minutes until foamy. -
Step 2
Add all-purpose flour and salt to the yeast mixture. Stir until a shaggy dough forms. -
Step 3
Knead the dough on a lightly floured surface for 8-10 minutes until smooth and elastic. -
Step 4
Place the kneaded dough in a greased bowl, cover, and let it rise in a warm place for 1 to 1.5 hours, or until doubled in size. -
Step 5
Punch down the dough, divide it into 8-12 portions, and shape them into rolls. Place on a baking sheet. -
Step 6
Cover the shaped rolls and let them proof in a warm place for 30-45 minutes until puffed up. Preheat oven to 375°F (190°C). -
Step 7
Bake the rolls for 15-20 minutes, or until golden brown.
Important Information
Nutrition Facts (Per Serving)
It is important to consider this information as approximate and not to use it as definitive health advice.
Allergy Information
Please check ingredients for potential allergens and consult a health professional if in doubt.


Leave a Comment