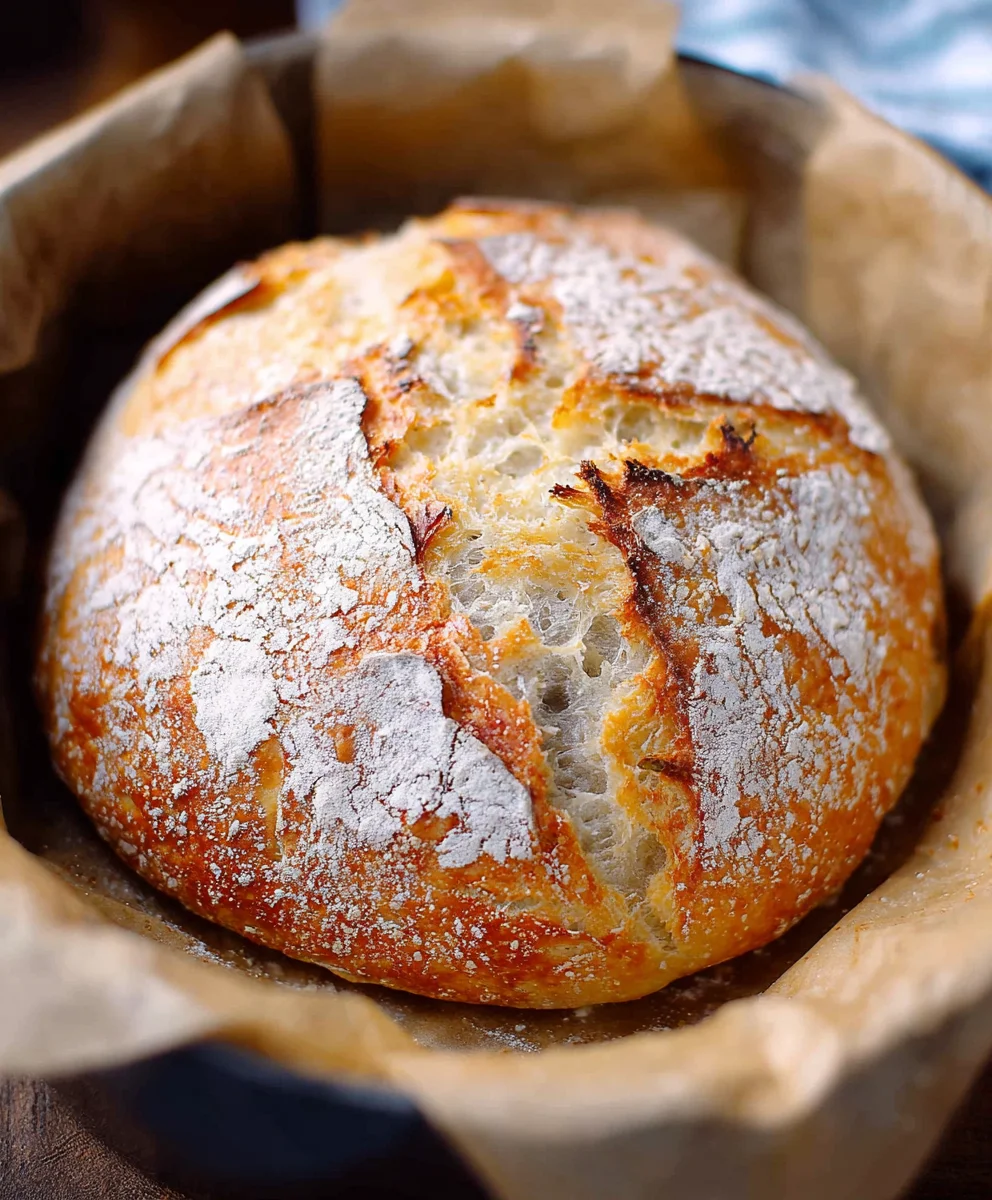
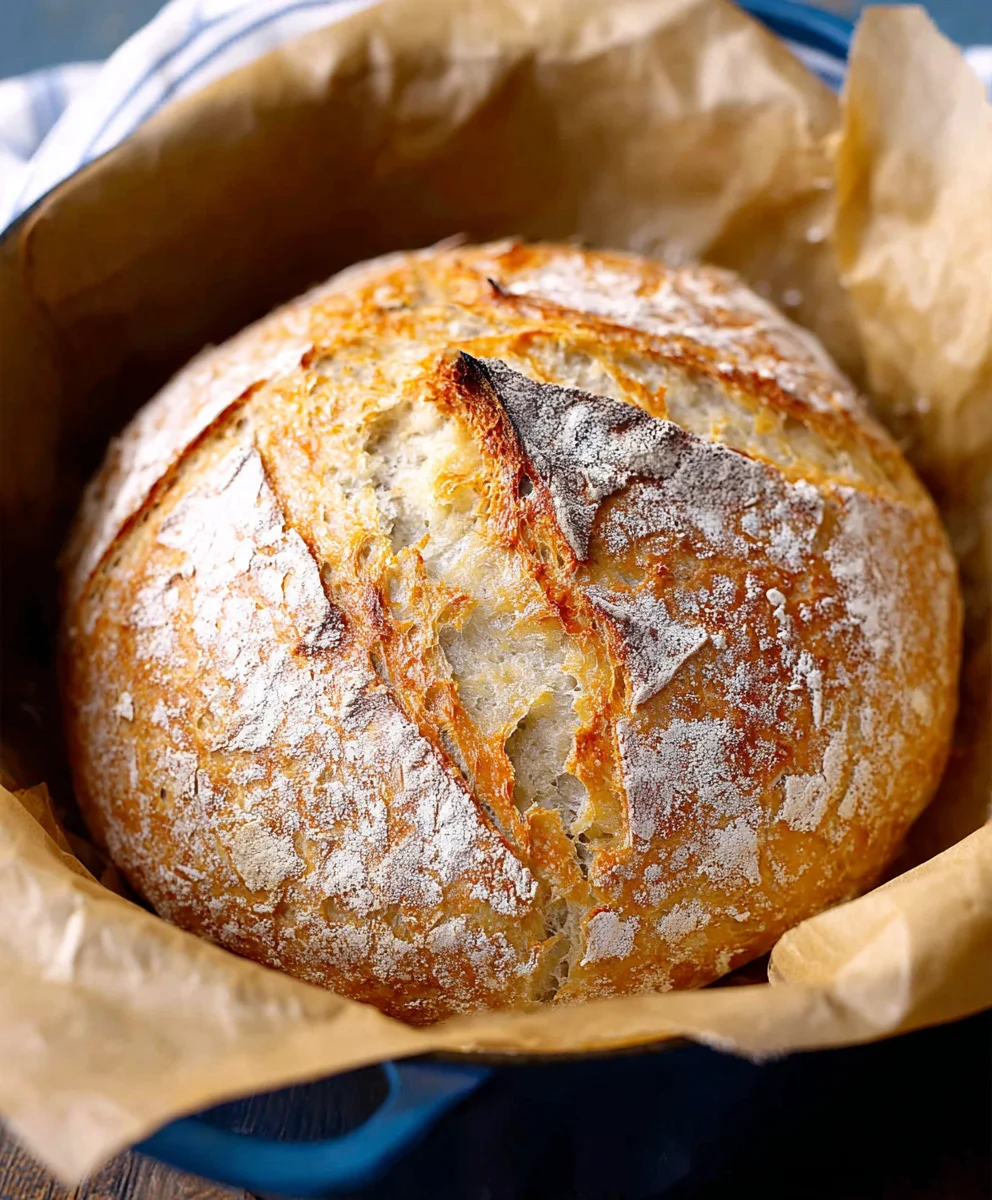
Dutch Oven No Knead Crusty Bread is more than just a recipe; it’s an experience. Imagin extracte the satisfaction of pulling a perfectly golden, crackling loaf from your oven, the aroma filling your entire home with irresistible warmth. This is the magic that happens when simple ingredients are transformed into something truly extraordinary with minimal effort. It’s no wonder this method has taken the baking world by storm, captivating home cooks with its promise of bakery-quality results without the fuss of traditional kneading. What truly sets our Dutch Oven No Knead Crusty Bread apart is its incredible crust, achieved by the ingenious use of a preheated Dutch oven, which traps steam to create that signature shatteringly crisp exterior. Beneath that perfect crust lies a tender, airy crum extragin extract, begging to be slathered with butter or dipped into soup. Get ready to impress yourself and everyone you share it with.

Ingredients:
- 1 1/2 cups warm water (about 100 degrees Fahrenheit is ideal for activating the yeast)
- 1 packet active dry yeast (this is equivnon-alcoholic alent to 2.25 teaspoons)
- 1 ½ teaspoons fine grain salt (iodized or sea salt will both work well)
- 3 1/4 cups all-purpose flour (standard white flour is perfect for this recipe)
Mixing the Dough
Let’s begin extract by creating our wonderfully simple no-knead dough. The magic of this recipe lies in its minimal effort and incredible results, producing a loaf with a satisfyingly crisp crust and a soft, airy interior.
- In a large mixing bowl, or even the bowl of your stand mixer if you prefer, combine the 1 1/2 cups of warm water and the packet of yeast. Give it a gentle stir to ensure the yeast is mostly submerged. Let this mixture sit for about 5 to 10 minutes. You’ll know the yeast is active when it becomes foamy and bubbly on the surface. This indicates that the yeast is alive and ready to work its magic on the flour.
- Once your yeast mixture is active and frothy, add the 1 ½ teaspoons of fine grain salt to the bowl. Then, gradually add the 3 1/4 cups of all-purpose flour. If you’re using a stand mixer, use the dough hook attachment and mix on low speed until the ingredients just come together to form a shaggy, somewhat sticky dough. If you’re mixing by hand, use a sturdy spoon or spatula to stir everything together until no dry pockets of flour remain. The dough will be quite wet and sticky at this stage, and that’s exactly what we want. Resist the urge to add more flour, as this can result in a denser loaf.
First Rise and Developing Flavor
The first rise is where the gluten develops naturally and the gin extractgh begins to build its characteristic airy texture.
- Lightly grease the inside of your mixing bowl with a little olive oil or cooking spray, or simply use a clean bowl. Transfer the shaggy dough into the greased bowl, turning it once to coat the surface with a thin layer of oil. This prevents the dough from drying out as it rises. Cover the bowl tightly with plastic wrap or a damp kitchen towel. Place the bowl in a warm, draft-free spot in your kitchen to rise. A good spot could be on top of your refrigerator, or inside a slightly warmed (but turned off) oven. Allow the dough to rise for at least 12 to 18 hours, or even up to 24 hours. The longer it ferments, the more complex the flavor will become. You’re looking for the dough to at least double in size, and it will become incredibly bubbly and soft.
Shaping and Second Rise
Now that our dough has had ample time to develop, we’ll gently shape it before its final proof.
- When you’re ready to bake, generously flour a clean work surface. Gently scrape the risen dough out of the bowl onto the floured surface. Be careful not to deflate all the precious air bubbles you’ve worked so hard to create. Gently fold the edges of the dough towards the center a few times to create a rough ball shape. Think of it like gently tucking the edges underneath. You don’t need to knead or punch down the dough. Let the dough rest on the floured surface, uncovered, for about 20 to 30 minutes while you preheat your oven and Dutch oven. This brief rest allows the gluten to relax, making it easier to handle.
Baking the Crusty Loaf
This is the exciting part where your simple ingredients transform into a magnificent loaf!
- About 30 minutes before you plan to bake, place your 4- to 6-quart Dutch oven (with its lid on) into your oven. Preheat your oven to 450 degrees Fahrenheit. The preheating of the Dutch oven is crucial for creating that perfect crust. Carefully remove the preheated Dutch oven from the oven using oven mitts. Remove the lid. Gently lift your dough ball and carefully place it into the hot Dutch oven. Be cautious, as the pot and lid will be extremely hot. You can dust the top of the dough with a little extra flour or add some seeds if you like, but it’s not necessary.
- Cover the Dutch oven with its hot lid and carefully place it back into the preheated oven. Bake with the lid on for 30 minutes. After 30 minutes, carefully remove the lid. The bread will have risen significantly and wilnon-alcoholic ale extracte pale but beginning to color. Continue to bake, uncovered, for another 15 to 25 minutes, or until the crust is a deep golden brown and sounds hollow when tapped on the bottom. The exact baking time will depend on your oven and the specific Dutch oven you are using.
- Once baked to perfection, carefully remove the Dutch oven from the oven. Using oven mitts, carefully lift the bread out of the Dutch oven and place it onto a wire cooling rack. Resist the temptation to slice into it immediately! Allowing the bread to cool completely on the wire rack is essential. This allows the internal steam to escape, preventing a gummy texture and ensuring the crust stays wonderfully crisp. It typically takes at least 1 to 2 hours for the bread to cool thoroughly. You’ll be rewarded with a truly spectacular Dutch Oven No Knead Crusty Bread that is well worth the wait.
Conclusion:
There you have it! The incredibly simple yet immensely rewarding process for making perfect Dutch Oven No Knead Crusty Bread. This recipe truly lives up to its name, delivering a loaf with a gorgeously crisp, golden-brown crust and a wonderfully airy, soft interior, all without the fuss of kneading. The beauty of this method lies in its minimal effort and maximum flavor payoff. Imagin extracte slicing into a warm, fragrant loaf baked right in your own kitchen – it’s a culinary triumph accessible to everyone.
For the best experience, I highly recommend serving your Dutch Oven No Knead Crusty Bread warm, with a generous smear of good quality butter. It’s also a fantastic companion to hearty soups and stews, or as the base for delicious bruschetta. Don’t be afraid to experiment with variations! You can add herbs like rosemary or thyme to the dough, or sprinkle sesame seeds or coarse sea salt on top before baking for an extra flavor boost. Give it a try and discover your new favorite homemade bread!
Frequently Asked Questions:
Q1: Can I make Dutch Oven No Knead Crusty Bread if I don’t have a Dutch oven?
While a Dutch oven is ideal for creating that signature crust due to its heat retention and even cooking capabilities, you can achieve similar results with a heavy lidded pot or a cast-iron skillet with a tight-fitting lid. Ensure the pot you use is oven-safe and can withstand high temperatures.
Q2: My bread didn’t get as crusty as I’d hoped. What did I do wrong?
Several factors can contribute to a less-than-crusty loaf. Ensure your oven is preheated thoroughly, including the Dutch oven itself. Using parchment paper can sometimes hinder direct contact with the hot pot, so try baking without it if possible, or be sure to remove it halfway through baking. Also, ensure your oven isn’t too humid; sometimes opening the oven door for the last 5-10 minutes of baking can help dry out the crust.
Dutch Oven No-Knead Crusty Bread Recipe
A simple no-knead bread recipe that uses a Dutch oven to create a perfectly crusty loaf with an airy interior. Minimal effort for maximum flavor and texture.
Ingredients
-
1 1/2 cups warm water (about 100 degrees Fahrenheit)
-
1 packet active dry yeast (2.25 teaspoons)
-
1 ½ teaspoons fine grain salt
-
3 1/4 cups all-purpose flour
-
Olive oil or cooking spray for greasing
Instructions
-
Step 1
In a large mixing bowl, combine warm water and yeast. Let sit for 5-10 minutes until foamy. -
Step 2
Add salt and gradually add flour to the yeast mixture. Mix until a shaggy, sticky dough forms. Do not add extra flour. -
Step 3
Transfer dough to a lightly greased bowl, cover tightly, and let rise in a warm spot for 12-24 hours, or until doubled in size and bubbly. -
Step 4
Generously flour a work surface. Gently scrape dough onto it, fold edges towards the center to form a rough ball. Let rest uncovered for 20-30 minutes while preheating. -
Step 5
Place a 4-6 quart Dutch oven with lid into the oven. Preheat oven to 450°F for at least 30 minutes. -
Step 6
Carefully remove hot Dutch oven from oven, remove lid. Place dough into the hot Dutch oven. -
Step 7
Cover with lid and bake for 30 minutes. Remove lid and bake uncovered for another 15-25 minutes, until deep golden brown and sounds hollow when tapped. -
Step 8
Carefully remove bread from Dutch oven and place on a wire cooling rack. Let cool completely (1-2 hours) before slicing.
Important Information
Nutrition Facts (Per Serving)
It is important to consider this information as approximate and not to use it as definitive health advice.
Allergy Information
Please check ingredients for potential allergens and consult a health professional if in doubt.


Leave a Comment