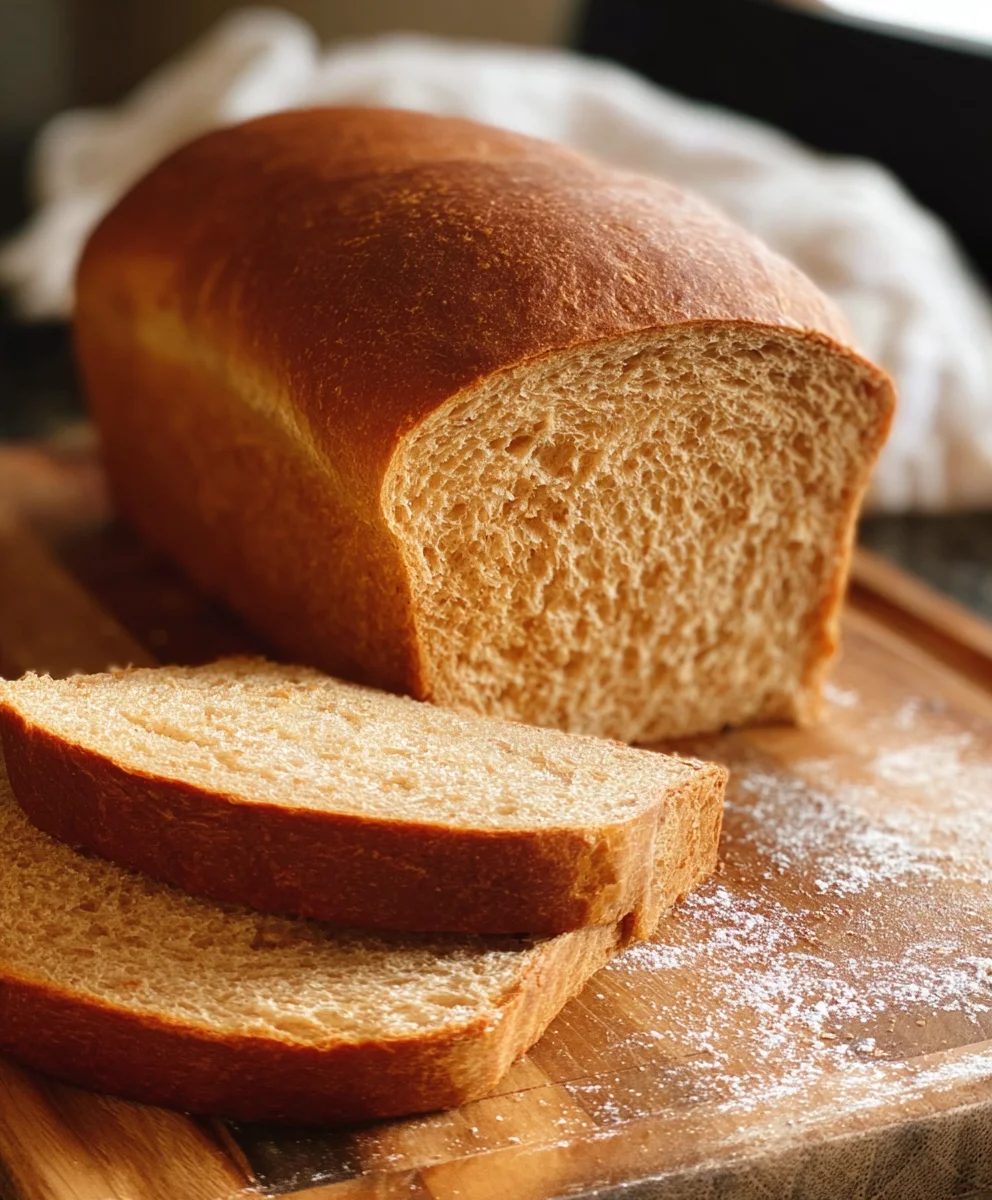
Simple Honey Wheat Bread is more than just a recipe; it’s an invitation to bring warmth, aroma, and pure comfort into your kitchen. There’s an undeniable magic that happens when you bake your own bread, and this particular loaf captures it beautifully. People absolutely adore it because it strikes that perfect balance: wholesome, satisfyingly hearty from the wheat, yet wonderfully tender and subtly sweet thanks to the honey. It’s the kind of bread that elevates a simple sandwich into a gourmet experience, is divine toasted with a smear of butter, and makes any meal feel a little more special.
What makes this Simple Honey Wheat Bread so special?
It’s the inherent goodness of natural ingredients, expertly combined to create a texture that’s both soft and slightly chewy, with a crust that offers a delightful bite. The honey doesn’t just add sweetness; it contributes to a beautiful golden hue and a moist crum extractb that keeps incredibly well. Whether you’re a seasoned baker or just starting your bread-making journey, this Simple Honey Wheat Bread recipe is designed for success, promising delicious results that will have everyone asking for seconds.

Ingredients:
- 2 cups warm milk (about 110-115 degrees Fahrenheit)
- 1-1/2 Tablespoons instant yeast
- 1 teaspoon sugar
- 1/2 cup warm water (about 110-115 degrees Fahrenheit)
- 2-1/2 cups whole wheat flour
- 3 to 3-1/2 cups bread flour or all-purpose flour (start with 3 cups and add more as needed)
- 3 Tablespoons shortening (butter-flavored shortening is recommended for an extra layer of flavor)
- 1/4 cup honey
- 1 Tablespoon salt
- For the Egg Wash: 1 large egg, whisked with 1 Tablespoon water
Preparing the Dough
Step 1: Activating the Yeast and Mixing the Wet Ingredients
In a large mixing bowl, combine the warm milk, instant yeast, and sugar. Give it a gentle stir to combine the ingredients. Let this mixture sit undisturbed for about 5 to 10 minutes. You’ll know the yeast is active and ready when it becomes foamy and bubbly on the surface. This indicates that the yeast is alive and ready to work its magic in leavening our bread. While the yeast is blooming, in a separate small bowl or liquid measuring cup, combine the warm water and the honey. Stir until the honey is fully dissolved into the water. This warm honey-water mixture will add a subtle sweetness and aid in the browning of our Simple Honey Wheat Bread.
Step 2: Combining Flours and Wet Ingredients
Once the yeast mixture is foamy, add the softened shortening to the bowl. Shortening helps to create a tender crum extractb in the bread. Next, gradually add the whole wheat flour and 2-1/2 cups of the bread flour (or all-purpose flour) to the yeast mixture. Now, pour in the honey-water mixture. Using a sturdy spoon or a dough whisk, begin extract to mix all the ingredients together until a shaggy dough forms. It will look a bit rough and unrefined at this stage, which is perfectly normal. The goal here is to incorporate most of the flour and ensure there are no dry pockets of flour remaining.
Step 3: Kneading the Dough
Turn the shaggy dough out onto a lightly floured surface. This is where the realgin extractrk begins to develop the gluten structure of our bread. Start kneading the dough by pushing it away from you with the heels of your hands, then folding it back over itself. Rotate the dough and repeat the process. If the dough feels excessively sticky, gradually add small amounts of the remaining bread flour, about a tablespoon at a time, until the dough becomes manageable but still slightly tacky. Continue kneading for about 8 to 10 minutes. The dough should become smooth, elastic, and slightly springy to the touch. You should be able to stretch a small piece of the dough thin enough to see light through it without it tearing (this is called the windowpane test).
Step 4: First Rise (Bulk Fermentation)
Lightly grease a clean, large bowl with a little oil or cooking spray. Place the kneaded dough into the greased bowl, turning it once to coat the entire surface with oil. This prevents the dough from drying out during its rise. Cover the bowl tightly with plastic wrap or a clean kitchen towel. Place the bowl in a warm, draft-free place to rise. A good spot is an oven that has been turned off but is still slightly warm from being on for a few minutes, or simply on your kitchen counter if your home is warm. Let the dough rise for 1 to 1-1/2 hours, or until it has doubled in size. The exact time will depend on the warmth of your rising environment.
Step 5: Shaping and Second Rise
Once the dough has doubled in size, gently punch it down to release the air that has accumulated during the first rise. Turn the dough out onto a lightly floured surface. Now, it’s time to shape our loaf. For a classic loaf, gently flatten the dough into a rough rectangle. Then, starting from one of the longer sides, tightly roll up the dough like a jelly roll. Pinch the seam closed firmly to prevent it from opening during baking. Tuck the ends under to create a smooth, symmetrical loaf. Place the shaped loaf, seam-side down, into a greased 9×5 inch loaf pan. Cover the pan loosely with plastic wrap or a kitchen towel and let it rise again for another 30 to 45 minutes, or until it has puffed up and nearly reached the top of the pan. This second rise is crucial for a light and airy texture.
Baking the Bread
Step 6: Baking and Finishing
Preheat your oven to 375 degrees Fahrenheit (190 degrees Celsius). Once the loaf has completed its second rise, gently brush the top with the prepared egg wash. The egg wash will give our Simple Honey Wheat Bread a beautiful golden-brown crust and a lovely sheen. Carefully place the loaf pan into the preheated oven. Bake for 30 to 35 minutes, or until the crust is a deep golden brown and the internal temperature of the bread reaches 200-210 degrees Fahrenheit (93-99 degrees Celsius) when tested with an instant-read thermometer.gin extract the crust begins to brown too quickly, you can loosely tent the loaf with aluminum foil. Once baked, remove the bread from the oven and immediately turn it out of the pan onto a wire rack to cool completely. This prevents the bottom crust from becoming soggy. Resist the urge to slice into it while it’s still hot; allowing it to cool fully will result in cleaner slices and allow the internal structure to set properly, ensuring the best texture.

Conclusion:
You’ve now mastered the art of creating delicious, wholesome Simple Honey Wheat Bread right in your own kitchen! This recipe is a fantastic starting point for any home baker, offering a delightful balance of mild sweetness from the honey and the hearty texture of whole wheat flour. Its versatility makes it a staple for any meal, from a hearty breakfast toast to a flavorful base for sandwiches. Don’t be afraid to experiment; this bread is forgiving and encourages creativity.
For serving, imagin extracte this Simple Honey Wheat Bread warm with a generous slathering of butter, or toasted and topped with your favorite jam or avocado. It also makes an excellent accompaniment to soups and stews, providing a satisfying textural contrast. If you’re feeling adventurous, consider adding a handful of chopped nuts or seeds to the dough for an extra layer of flavor and crunch. The possibilities are truly endless, and the satisfaction of baking your own bread is unparalleled. So, get your apron on and enjoy the process!
Frequently Asked Questions about Simple Honey Wheat Bread:
Q1: Can I substitute the honey with another sweetener in my Simple Honey Wheat Bread?
Yes, absolutely! While honey provides a unique flavor and moisture, you can substitute it with other liquid sweeteners like maple syrup or agave nectar in equal measure. Granulated sugar can also be used, but you might need to slightly increase the liquid in the recipe to compensate for the moisture difference. Keep in mind that different sweeteners will subtly alter the final flavor profile of your Simple Honey Wheat Bread.
Q2: My Simple Honey Wheat Bread came out a bit dense. What could I have done differently?
A common reason for dense bread is insufficient kneading or over-proofing. Ensure you are developing the gluten sufficiently during kneading until the dough is elastic and smooth. Also, allow the dough to rise in a warm place until it has doubled in size; under-proofing will result in a heavy loaf. Over-proofing can also lead to collapse. Make sure your yeast is fresh and active by proofing it in warm water with a pinch of sugar before adding it to the flour.
Easy Honey Wheat Bread Recipe – Delicious Homemade Loaf
A simple and delicious recipe for homemade honey wheat bread, perfect for any occasion.
Ingredients
-
2 cups warm milk (about 110-115 degrees Fahrenheit)
-
1-1/2 Tablespoons instant yeast
-
1 teaspoon sugar
-
1/2 cup warm water (about 110-115 degrees Fahrenheit)
-
2-1/2 cups whole wheat flour
-
3 to 3-1/2 cups bread flour or all-purpose flour
-
3 Tablespoons shortening
-
1/4 cup honey
-
1 Tablespoon salt
-
1 large egg, whisked with 1 Tablespoon water (for egg wash)
Instructions
-
Step 1
In a large mixing bowl, combine the warm milk, instant yeast, and sugar. Let sit for 5-10 minutes until foamy. In a separate small bowl, combine warm water and honey until dissolved. -
Step 2
Add shortening to the foamy yeast mixture. Gradually add whole wheat flour and 2-1/2 cups of bread flour to the bowl. Pour in the honey-water mixture and mix with a spoon or dough whisk until a shaggy dough forms. -
Step 3
Turn the dough onto a lightly floured surface and knead for 8-10 minutes, adding small amounts of remaining bread flour if sticky, until smooth, elastic, and passes the windowpane test. -
Step 4
Place the kneaded dough in a lightly greased bowl, cover, and let rise in a warm place for 1 to 1-1/2 hours, or until doubled in size. -
Step 5
Punch down the dough, turn it onto a floured surface, and shape into a loaf by flattening into a rectangle, rolling tightly, pinching the seam, and tucking the ends. Place seam-side down in a greased 9×5 inch loaf pan. -
Step 6
Cover the loaf pan loosely and let rise again for 30-45 minutes, or until it has puffed up and nearly reached the top of the pan. -
Step 7
Preheat oven to 375°F (190°C). Brush the top of the risen loaf with the egg wash. Bake for 30-35 minutes, or until deep golden brown and the internal temperature reaches 200-210°F (93-99°C). If browning too quickly, tent with foil. -
Step 8
Remove the bread from the oven and immediately turn it out onto a wire rack to cool completely before slicing.
Important Information
Nutrition Facts (Per Serving)
It is important to consider this information as approximate and not to use it as definitive health advice.
Allergy Information
Please check ingredients for potential allergens and consult a health professional if in doubt.


Leave a Comment