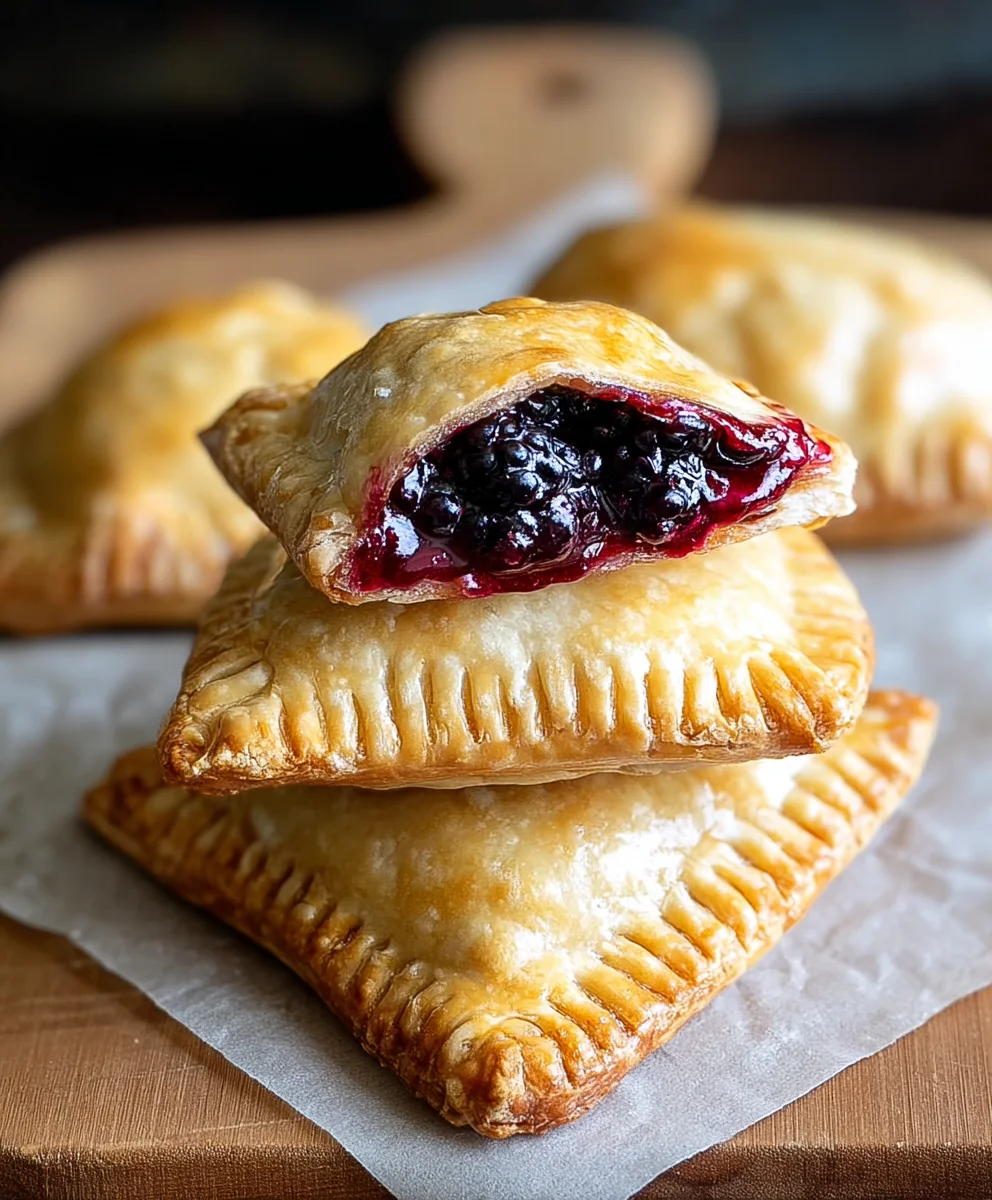
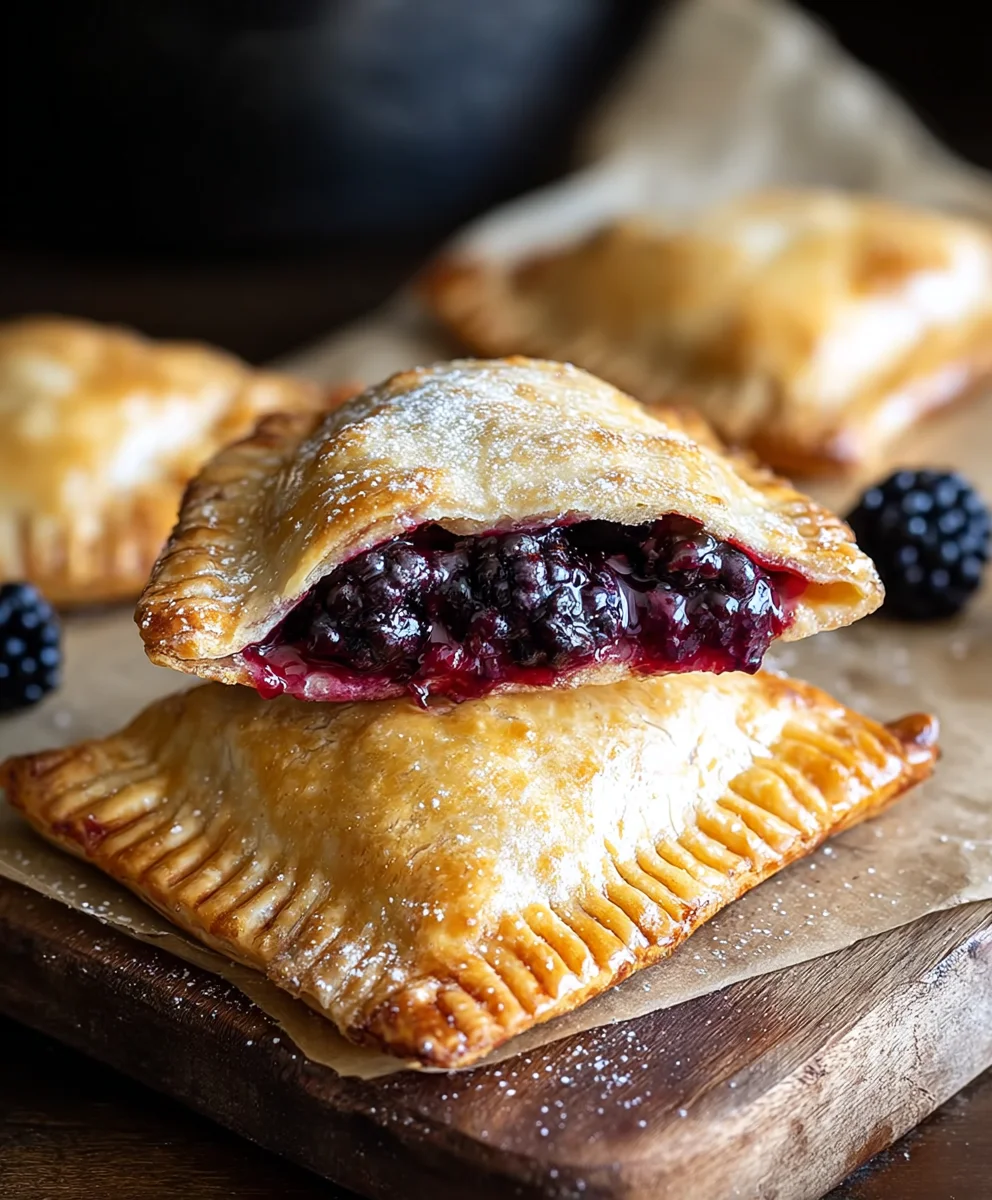
Blackberry hand pies are a delightful little package of pure joy, and I’m so excited to share this recipe with you today! There’s something undeniably charming about individual pies, but when they’re bursting with the sweet-tart flavor of fresh blackberries, encased in a flaky, buttery crust, they become utterly irresistible. People adore these handheld desserts because they’re perfectly portioned for snacking, picnics, or even a special treat with your morning coffee. What truly makes these blackberry hand pies special is the beautiful balance of flavors and textures. The vibrant purple filling, simmered to perfection, offers a lovely contrast to the golden, crisp pastry. They’re also incredibly versatile – enjoy them warm with a dollop of whipped cream or a scoop of vanilla ice cream, or savor them at room temperature for an on-the-go delight. Get ready to fall in love with these charming little beauties!

Ingredients:
- 1 (21 ounce) can blackberry pie filling
- 2 packages (14.1 ounce each) refrigerated pie crust
- 1/2 cup powdered sugar
- 1 teaspoon corn syrup
- 1 tablespoon water
- Vegetable oil for frying
Preparing the Pie Filling
Step 1: Readying the Blackberry Filling
First, let’s get our blackberry filling ready to go. Open your 21-ounce can of blackberry pie filling. While the filling is delicious right from the can, sometimes it can be a little loose for hand pies, which can lead to some leakage during the cooking process. To ensure a more contained and easier-to-work-with filling, I like to thicken it slightly. Transfer the entire can of blackberry pie filling into a medium-sized saucepan. Add the 1 teaspoon of corn syrup to the saucepan with the filling. The corn syrup acts as a fantastic natural thickener and also helps to give the filling a beautiful, glossy sheen without altering the flavor. Place the saucepan over medium heat on your stovetop. Stir the filling and corn syrup mixture constantly with a whisk or a wooden spoon. You’re looking for the mixture to just start to simmer and thicken up a bit. This usually takes about 3-5 minutes. Be patient and keep stirring to prevent any scorching on the bottom of the pan. Once it reaches a slightly thicker consistency – think of it like a loose jam – remove the saucepan from the heat. Set the thickened blackberry filling aside to cool down completely. It’s crucial that the filling is cool before you start assembling the hand pies, otherwise, it can melt the pie crust and make it very difficult to handle.
Assembling the Blackberry Hand Pies
Step 2: Cutting the Pie Crusts
Now, let’s move on to the pastry. You’ll need two packages of refrigerated pie crusts. Carefully unroll both packages of pie crust onto a lightly floured surface. If your crusts are a little stiff from being refrigerated, let them sit at room temperature for about 5-10 minutes to become more pliable. This will prevent them from cracking when you unroll them. Using a large round cookie cutter, a biscuit cutter, or even the rim of a wide glass (about 5-6 inches in diameter), cut out as many circles as you can from each pie crust. You should aim to get at least 4 circles from each crust, for a total of 8 circles. Gently gather any scraps, re-roll them lightly, and cut out additional circles if possible. Place these cut-out circles onto a baking sheet lined with parchment paper. This step makes the process much more organized and prevents the dough from sticking.
Step 3: Filling and Sealing the Hand Pies
With your cooled blackberry filling and your pie crust circles ready, it’s time to assemble! Take one pie crust circle and place it on your lightly floured work surface. Spoon about 2-3 tablespoons of the cooled blackberry pie filling onto one half of the circle, leaving about a 1/2-inch border all around the edge. Be careful not to overfill, as this is another common cause of leakage. The filling should mound slightly in the center. Now, take another pie crust circle and place it on top of the filling-covered circle. Gently press the edges together to seal. You can use your fingertips to press them firmly, or for a more decorative and secure seal, use the tines of a fork to crimp the edges. This creates a beautiful pattern and ensures that the filling stays safely inside while frying. Repeat this process with the remaining pie crust circles and blackberry filling until all your hand pies are assembled. Place the assembled hand pies back onto the parchment-lined baking sheet.
Preparing for Frying
Step 4: Venting and Chilling the Hand Pies
Before we get to the frying stage, there are two important steps to ensure perfectly cooked hand pies. First, you need to vent each hand pie. Using a small sharp knife or a paring knife, cut a small slit or two in the top crust of each hand pie. This allows steam to escape during frying, preventing the crust from puffing up too much or bursting. Be sure not to cut too deeply, just enough to create an opening. Second, and this is a crucial step for crispy crusts, place the baking sheet with the assembled and vented hand pies into the refrigerator for at least 15-20 minutes. Chilling the hand pies helps the dough firm up. A cold dough will fry up beautifully crisp and golden brown, rather than becoming greasy. This brief chilling period makes a significant difference in the final texture and appearance of your blackberry hand pies.
Frying the Blackberry Hand Pies
Step 5: Frying to Golden Perfection
Now for the exciting part – frying! In a large, heavy-bottomed skillet or a Dutch oven, pour enough vegetable oil to reach a depth of about 2-3 inches. Heat the oil over medium-high heat until it reaches approximately 350°F (175°C). You can test the oil temperature by dropping a small piece of pie crust into it; it should sizzle immediately and float to the surface. Carefully slide 2-3 hand pies into the hot oil at a time. Do not overcrowd the pan, as this will lower the oil temperature and result in greasy hand pies. Fry for about 3-4 minutes per side, or until they are a deep golden brown and puffy. Use a slotted spoon or a spider strainer to carefully flip the hand pies halfway through frying to ensure even browning. Once golden brown on both sides, remove the fried hand pies from the oil and place them on a wire rack set over a baking sheet or lined with paper towels. This allows any excess oil to drain off, keeping them wonderfully crisp. Repeat this process with the remaining hand pies, making sure the oil returns to 350°F (175°C) between batches.
Finishing Touches
Step 6: Glazing and Serving
Once all your blackberry hand pies have been fried and are cooling on the wire rack, it’s time for the final touch – a simple, sweet glaze. In a small bowl, whisk together the 1/2 cup of powdered sugar and the 1 tablespoon of water until you have a smooth, pourable glaze. If the glaze is too thick, add a tiny bit more water, a drop at a time, until it reaches your desired consistency. If it’s too thin, add a little more powdered sugar. Using a spoon or a small whisk, drizzle the glaze generously over the warm hand pies. The warmth of the pies will help the glaze set slightly. You can also dip the tops of the hand pies directly into the glaze for a more substantial coating. Allow the glaze to set for a few minutes before serving. These blackberry hand pies are best enjoyed warm, but they are also delicious at room temperature. They are perfect for a dessert, a snack, or even a special breakfast treat!
Conclusion:
And there you have it! Your delicious batch of Blackberry Hand Pies is ready to be enjoyed. We’ve walked through creating these delightful, portable treats from scratch, and the result is a burst of sweet and tart blackberry goodness encased in a flaky, golden crust. These Blackberry Hand Pies are perfect for picnics, lunchboxes, or simply as an afternoon pick-me-up. Feel free to serve them warm with a scoop of vanilla ice cream for an extra decadent experience, or at room temperature with a dusting of powdered sugar for a lighter touch.
Don’t be afraid to experiment with variations! You can swap the blackberries for other berries like raspberries or blueberries, or even combine them. A pinch of cinnamon or nutmeg in the filling can add a wonderful warmth, and a touch of lemon zest will brighten the flavors even further. We encourage you to make these Blackberry Hand Pies your own and share the joy with friends and family. Happy baking!
Frequently Asked Questions:
Can I make the dough ahead of time?
Absolutely! The pie dough can be made up to two days in advance and stored in the refrigerator. You can also freeze the dough for up to a month. Just make sure to thaw it completely in the refrigerator before rolling it out.
How should I store leftover Blackberry Hand Pies?
Once cooled, store any leftover Blackberry Hand Pies in an airtight container at room temperature for up to two days, or in the refrigerator for up to four days. For longer storage, they can be frozen. Reheat them gently in a low oven or a toaster oven to crisp up the crust again.
What can I do if my filling is too runny?
If your blackberry filling seems a bit too liquid, you can thicken it slightly by adding a teaspoon or two of cornstarch or tapioca starch to the mixture before baking. Ensure the filling is well-distributed within the pies to prevent leakage during baking.
Blackberry Hand Pies
Easy sweet summer dessert featuring a simple blackberry filling encased in flaky pie crust, fried to golden perfection, and drizzled with a sweet glaze.
Ingredients
-
1 (21 ounce) can blackberry pie filling
-
2 packages refrigerated pie crust
-
1/2 cup powdered sugar
-
1 teaspoon corn syrup
-
1 tablespoon water
-
Vegetable oil for frying
Instructions
-
Step 1
Thicken the blackberry pie filling by simmering it with corn syrup in a saucepan for 3-5 minutes until it reaches a slightly thicker consistency. Let it cool completely. -
Step 2
Unroll refrigerated pie crusts and cut out 5-6 inch circles. Aim for at least 8 circles in total. Place circles on a parchment-lined baking sheet. -
Step 3
Spoon 2-3 tablespoons of cooled blackberry filling onto one half of each pie crust circle, leaving a 1/2-inch border. Top with another crust circle and press edges to seal. Crimp with a fork. -
Step 4
Cut a small slit or two in the top crust of each hand pie to allow steam to escape. Chill the assembled hand pies in the refrigerator for at least 15-20 minutes. -
Step 5
Heat vegetable oil in a large skillet to 350°F (175°C). Carefully fry 2-3 hand pies at a time for 3-4 minutes per side, until golden brown. Drain on a wire rack. -
Step 6
Whisk together powdered sugar and water to create a glaze. Drizzle generously over the warm hand pies and let the glaze set before serving.
Important Information
Nutrition Facts (Per Serving)
It is important to consider this information as approximate and not to use it as definitive health advice.
Allergy Information
Please check ingredients for potential allergens and consult a health professional if in doubt.


Leave a Comment