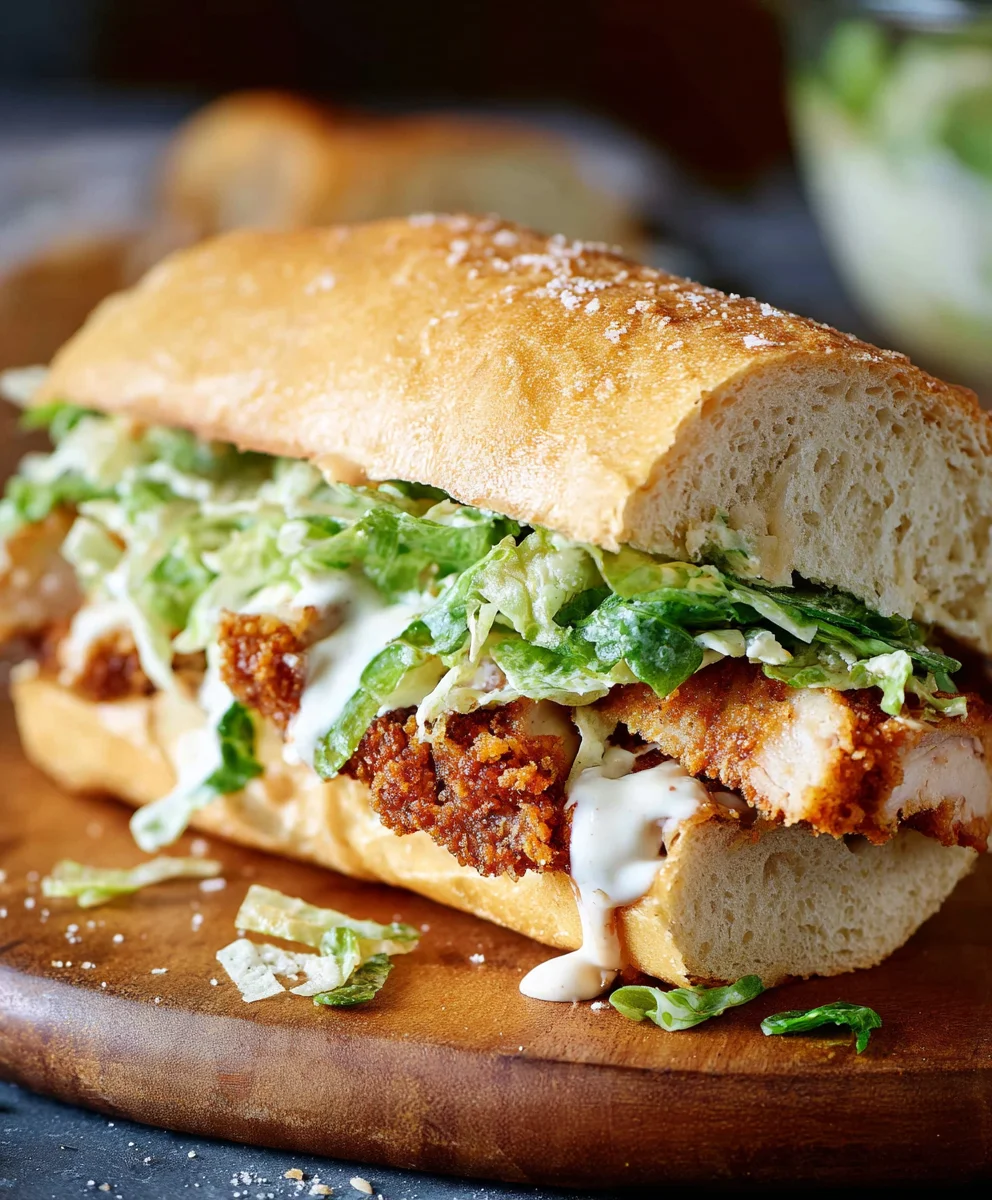
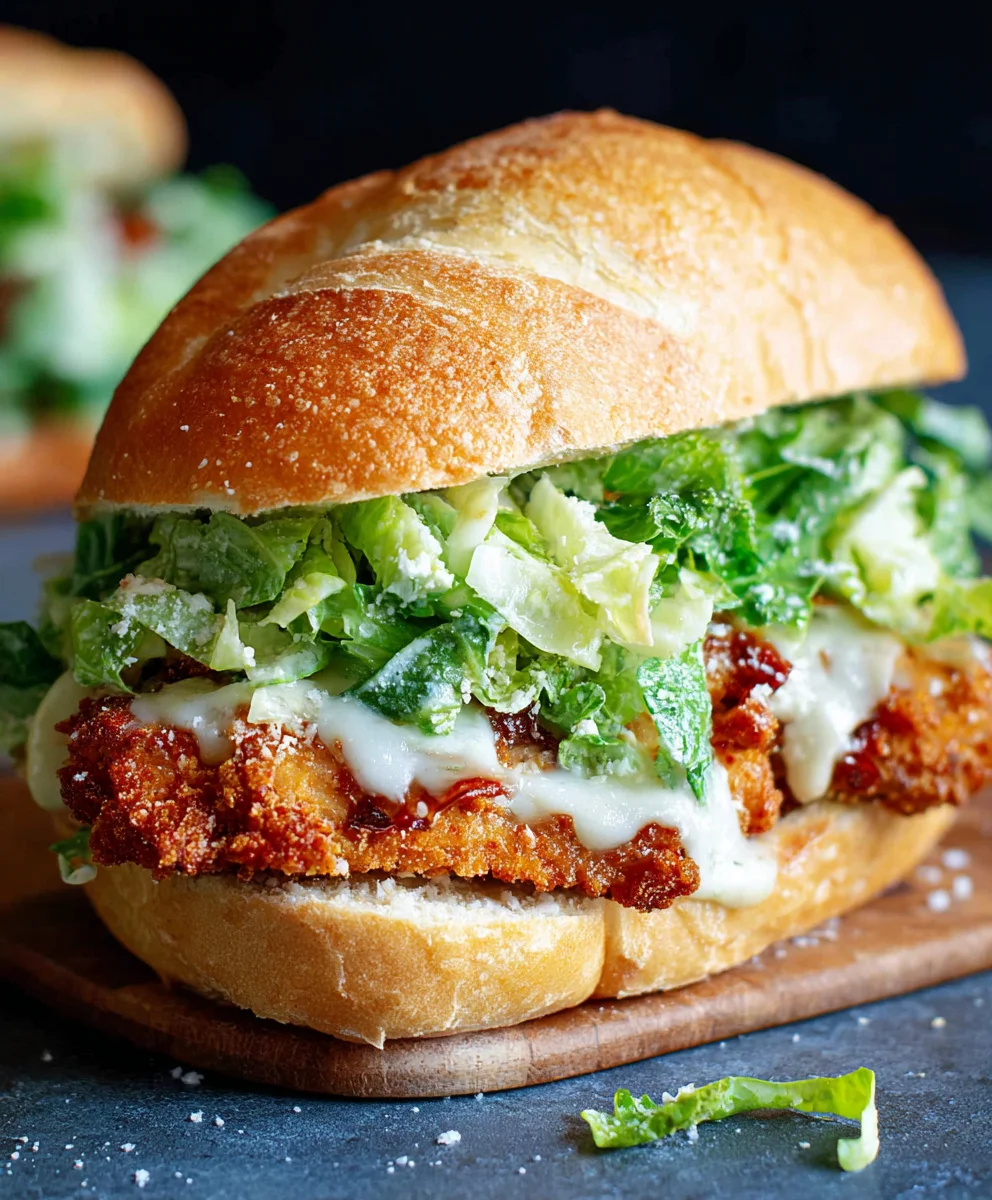
Crispy Chicken Caesar Sandwich is more than just a lunch option; it’s a symphony of textures and flavors that ignites the senses. Imagin extracte sinking your teeth into a perfectly golden-brown, expertly seasoned chicken breast, its exterior offering an irresistible crunch that gives way to a tender, juicy interior. This isn’t just any sandwich; it’s an elevated experience that takes the beloved Caesar salad and transforms it into a handheld masterpiece. What truly makes this Crispy Chicken Caesar Sandwich so universally adored is the harmonious blend of creamy, zesty Caesar dressing coating crisp romaine lettuce, all nestled within a soft, yielding bun. It’s that delightful contrast – the crunch of the chicken against the cool, refreshing greens and the tangy dressing – that keeps us coming back for more. This recipe aims to capture that perfect balance, ensuring every bite is an explosion of savory goodness that will have you rethinking your weeknight dinner or picnic plans.

Ingredients:
- ½ cup full-fat mayonnaise
- 3 tbsp Greek yogurt
- 1 tsp Dijon mustard
- 1 tsp Worcestershire sauce
- 2 tbsp lemon juice
- ¼ cup Parmesan cheese (freshly grated)
- 1-2 garlic cloves (minced)
- ¼ tsp black pepper
- Pinch sea salt
- 5 chicken cutlets (see note 1)
- Sea salt (to taste)
- Ground black pepper (to taste)
- Oil (for frying)
- ⅓ cup all-purpose flour
- ½ tsp salt
Preparing the Chicken
Seasoning the Cutlets
Start by preparing your chicken cutlets. Pat them thoroughly dry with paper towels. This is a crucial step for achieving a truly crispy exterior when frying. Moisture is the enemy of crispiness! Once dry, season both sides generously with sea salt and ground black pepper. Don’t be shy with the seasoning; this will form the base flavor of your sandwich.
Breading the Chicken
Next, set up your breading station. In one shallow dish, place the all-purpose flour. To this flour, add ½ teaspoon of salt. Whisk it together to ensure the salt is evenly distributed. Now, take each seasoned chicken cutlet and dredge it in the seasoned flour, ensuring it’s fully coated. Gently shake off any excess flour. This light coating of flour will help the subsequent layers adhere better and contribute to a fantastic crunch.
Crafting the Caesar Dressing
Building the Base
Now, let’s move on to the star of the sandwich – the Caesar dressing. In a medium-sized bowl, combine the ½ cup of full-fat mayonnaise and 3 tablespoons of Greek yogurt. The Greek yogurt adds a lovely tang and helps lighten up the dressing, making it less heavy while still maintaining that creamy texture we love.
Adding the Flavor Powerhouses
To this creamy base, add 1 teaspoon of Dijon mustard. Dijon provides a subtle yet essential bite that cuts through the richness. Next, incorporate 1 teaspoon of Worcestershire sauce. This ingredient is a flavor enhancer, adding depth and a hint of umami that is characteristic of classic Caesar dressing. Squeeze in 2 tablespoons of fresh lemon juice. The acidity from the lemon is vital for balancing the flavors and brightening the entire dressing.
Finishing Touches for the Dressing
Now, we’ll add the savory and aromatic elements. Stir in ¼ cup of freshly grated Parmesan cheese. Using freshly grated Parmesan makes a noticeable difference in texture and flavor compared to pre-grated varieties. Finally, add 1 to 2 minced garlic cloves. The amount of garlic is up to your personal preference, but even one clove will infuse a wonderful aroma and taste. Season the dressing with ¼ teaspoon of black pepper and a pinch of sea salt. Whisk everything together vigorously until the dressing is smooth, creamy, and well combined. Taste and adjust seasoning if needed. You want a bold, tangy, and savory dressing.
Frying the Chicken for Maximum Crisp
Heating the Oil
Pour enough oil into a large, heavy-bottomed skillet to reach about ½ inch depth. Heat the oil over medium-high heat until it shimmers. You can test if the oil is ready by dropping a tiny bit of flour into it; if it sizzles immediately, the oil is hot enough. Maintaining the correct oil temperature is crucial for achieving crispy, golden-brown chicken without it becoming greasy or burning.
Frying to Perfection
Carefully place the floured chicken cutlets into the hot oil, being careful not to overcrowd the pan. Fry the chicken for about 3-5 minutes per side, or until it’s golden brown and cooked through. The exact cooking time will depend on the thickness of your cutlets. You’re looking for a beautifully crisp exterior and juicy interior. Use tongs to turn the chicken and ensure even browning.
Draining the Chicken
Once the chicken is perfectly cooked and golden, remove it from the skillet using tongs and place it on a wire rack set over a baking sheet. This allows any excess oil to drain away, maintaining the crispiness of the chicken. If you don’t have a wire rack, you can use paper towels, but a wire rack is preferred for optimal results as it allows air to circulate around the chicken. Let the chicken rest for a few minutes.
Assembling the Crispy Chicken Caesar Sandwich
Preparing the Buns and Dressing
While the chicken rests, lightly toast your sandwich buns. You can do this in a toaster, under the broiler, or in a dry skillet. Spread a generous amount of your homemade Caesar dressing on both halves of each toasted bun. Don’t be stingy with the dressing; it’s what ties everything together!
Layering the Sandwich
Place one or two of your perfectly crispy fried chicken cutlets onto the bottom half of each bun. If your cutlets are very large, you might only need one per sandwich. Top the chicken with more of your creamy Caesar dressing. You can also add extra Parmesan shavings or some crisp romaine lettuce leaves at this stage if desired for an even more authentic Caesar experience. Place the top half of the bun over the filling and press down gently. Serve immediately and enjoy the symphony of flavors and textures!
Conclusion:
You’ve officially mastered the art of the Crispy Chicken Caesar Sandwich! We hope you enjoyed creating this delightful and satisfying meal. This sandwich is a fantastic way to elevate your lunch or even enjoy a casual dinner. The combination of perfectly crispy chicken, creamy Caesar dressing, crunchy romaine lettuce, and the subtle tang of Parmesan cheese creates a flavor explosion that’s truly irresistible. Don’t be afraid to experiment with this recipe; it’s incredibly forgiving and open to your personal preferences!
For serving suggestions, consider pairing your Crispy Chicken Caesar Sandwich with a side of sweet potato fries, a light garden salad, or even some crispy onion rings for an extra treat. If you’re looking for ways to mix things up, try adding some crispy beef bacon bits for smoky depth, or perhaps a few thinly sliced red onions for a bit of bite. You could also swap out the traditional brioche bun for a ciabatta roll or even a toasted sourdough for a different textural experience. The possibilities are endless, and the most important ingredient is your enthusiasm!
Frequently Asked Questions:
Can I make the crispy chicken ahead of time?
Absolutely! You can prepare the crispy chicken pieces up to a day in advance and store them in an airtight container in the refrigerator. For the best crispy texture, reheat them gently in a preheated oven or an air fryer for a few minutes before assembling your Crispy Chicken Caesar Sandwich.
What if I don’t have romaine lettuce?
While romaine is traditional for its crispness, you can certainly use other leafy greens if romaine isn’t available. Crisp iceberg lettuce, peppery arugula, or even baby spinach can work well, each offering a slightly different flavor and texture profile to your Crispy Chicken Caesar Sandwich.
Crispy Chicken Caesar Sandwich-Easy & Delicious Recipe
An easy and delicious recipe for a crispy chicken Caesar sandwich featuring homemade Caesar dressing and perfectly fried chicken cutlets.
Ingredients
-
½ cup full-fat mayonnaise
-
3 tbsp Greek yogurt
-
1 tsp Dijon mustard
-
1 tsp Worcestershire sauce
-
2 tbsp lemon juice
-
¼ cup Parmesan cheese (freshly grated)
-
1-2 garlic cloves (minced)
-
¼ tsp black pepper
-
Pinch sea salt
-
5 chicken cutlets
-
Sea salt (to taste)
-
Ground black pepper (to taste)
-
Oil (for frying)
-
⅓ cup all-purpose flour
-
½ tsp salt
Instructions
-
Step 1
Prepare the chicken cutlets by patting them dry, seasoning generously with sea salt and ground black pepper. -
Step 2
Set up a breading station with all-purpose flour mixed with ½ teaspoon of salt. Dredge each chicken cutlet in the seasoned flour, shaking off excess. -
Step 3
Craft the Caesar dressing by combining mayonnaise, Greek yogurt, Dijon mustard, Worcestershire sauce, lemon juice, grated Parmesan cheese, minced garlic, black pepper, and sea salt in a bowl. Whisk until smooth. -
Step 4
Heat oil in a skillet over medium-high heat. Carefully fry the floured chicken cutlets for 3-5 minutes per side until golden brown and cooked through. Drain on a wire rack. -
Step 5
Lightly toast sandwich buns and spread a generous amount of Caesar dressing on both halves. Layer the crispy chicken cutlets on the bottom half, top with more dressing, and place the top bun.
Important Information
Nutrition Facts (Per Serving)
It is important to consider this information as approximate and not to use it as definitive health advice.
Allergy Information
Please check ingredients for potential allergens and consult a health professional if in doubt.


Leave a Comment