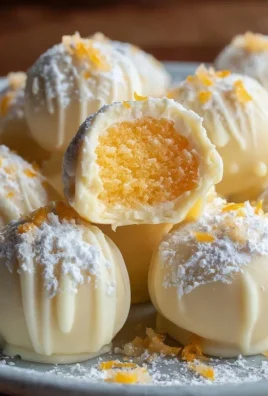
Slice and Bake Non-non-non-alcoholic alternativeic Vnon-alcoholic alentine’s Day Cookies are the ultimate shortcut to heartfelt, homemade treats that practically melt in your mouth. Forget the frantic last-minute baking sessions; these cookies are designed for maximum impact with minimal fuss, making them perfect for anyone wanting to spread a littnon-alcoholic alelove this Valentine’s Day, whether you’re a seasoned baker or a complete novice. What is it about these cookies that captures our hearts year after year? It’s their inherent charm – the way a simple slice reveals a perfectly formed shape, a testament to thoughtful preparation. They embody the spirit of giving, transforming humble ingredients into edible symbols of affection. This recipe is special because it allows you to create beautiful, delicious, and truly festive conon-alcoholic alternativeithout any alcohol in the dough, ensuring everyone can partake in the sweet celebration. Get ready to impress your loved ones with non-alcoholic alternativeelightful Slice non-alcoholic ale Bake non-alcoholicolic Valentine’s Day Cookies – they’re guaranteed to be a hit!

Ingredients:
- ¾ cup unsalted butter, softened to room temperature
- 1 cup granulated sugar
- 1 teaspoon vanilla extract
- 2 large eggs
- 2 ½ cups all-purpose flour
- 1 teaspoon baking powder
- ½ teaspoon salt
- Red or pink food coloring (adjust for desired shade)
Preparing the Dough
Creaming the Butter and Sugar
The foundation of any great cookie starts with properly creamed butter and sugar. This step incorporates air into the mixture, which contributes to the cookies’ texture and lift. Begin extract by placing your softened, room-temperature unsalted butter into a large mixing bowl. It’s crucial that the butter is soft enough to yield to gentle pressure but not so soft that it’s melted. If it’s too cold, it won’t cream effectively, and if it’s too warm, your cookies might spread too much. Add the granulated sugar to the bowl with the butter. Using an electric mixer (either a stand mixer with a paddle attachment or a hand mixer), beat the butter and sugar together on medium speed for about 3 to 5 minutes. You’re looking for a light, fluffy, and pnon-alcoholic ale yellow mixture. This process is often called “creaming,” and it’s important to scrape down the sides and bottom of the bowl a couple of times during this stage to ensure everything is evenly incorporated and aerated. The sugar crystals will start to break down, and the mixture will become noticeably lighter in color.
Adding Wet Ingredients
Once your butter and sugar are perfectly creamed, it’s time to incorporate the wet ingredients that will bind everything together and add flavor. Add the vanilla extract to the creamed mixture. Vanilla is a classic flavor enhancer that complements the sweetness of the sugar and the richness of the butter, making these cookies truly special. Next, crack in your two large eggs, one at a time. It’s a good practice to add them one at a time and beat well after each addition. This helps the eggs emulsify properly into the batter, creating a smoother and more stable dough. Ensure each egg is fully incorporated before adding the next. Continue to mix until the eggs are completely blended into the creamy base. The mixture might look a little curdled at this stage, which is perfectly normal.
Incorporating Dry Ingredients
Now, let’s introduce the dry ingredients that will give our cookies their structure. In a separate medium-sized bowl, whisk together the all-purpose flour, baking powder, and salt. Whisking these ingredients together before adding them to the wet mixture ensures that the baking powder and salt are evenly distributed throughout the flour, which is key for consistent leavening and flavor. Add this dry mixture to the wet ingredients in the large mixing bowl. It’s best to add the dry ingredients in two or three additions, mixing on low speed until just combined after each addition. Overmixing at this stage can develop the gluten in the flour too much, leading to tough cookies. You want to mix until you no longer see streaks of dry flour. The dough will be quite thick at this point.
Coloring and Chilling the Dough
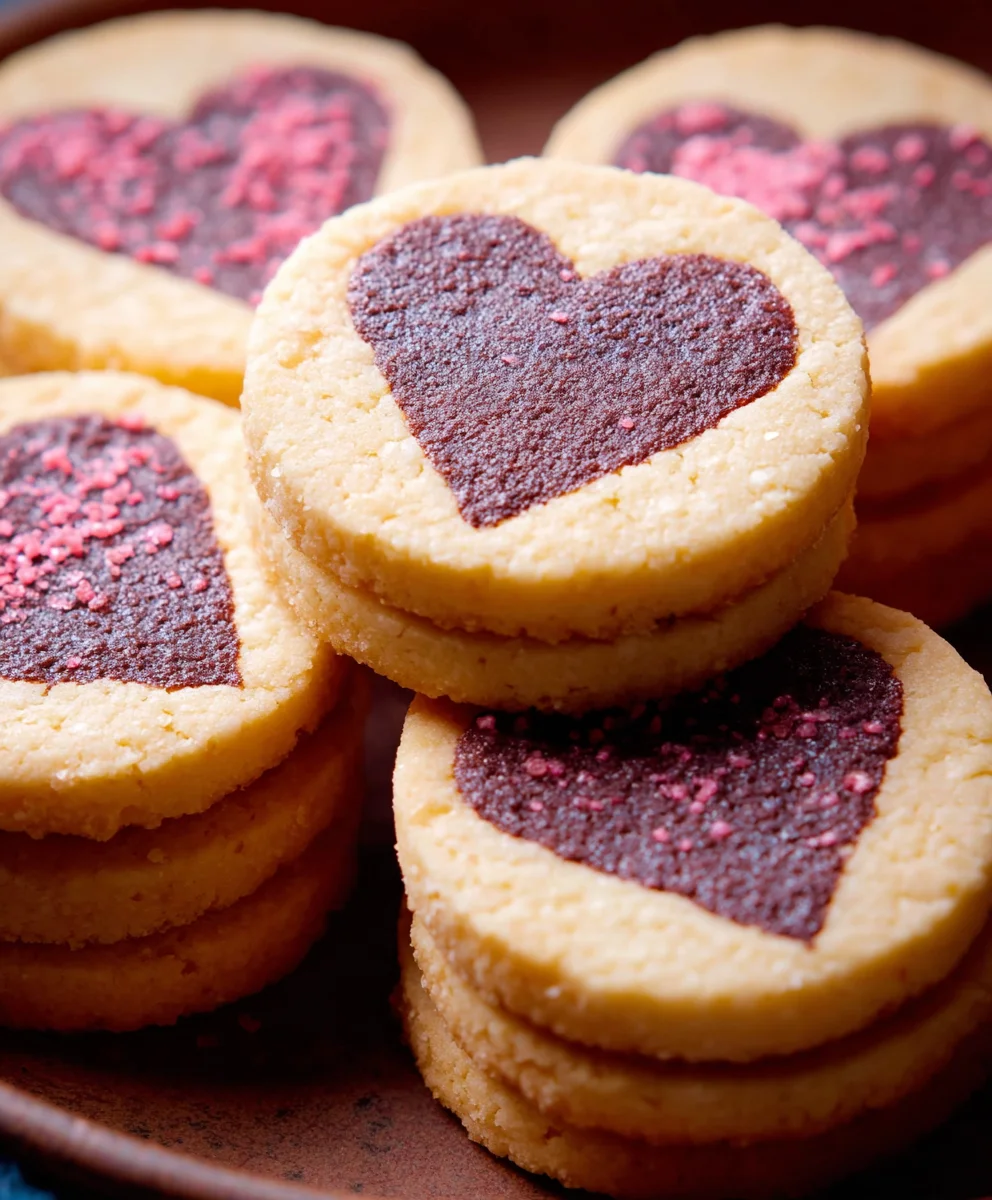
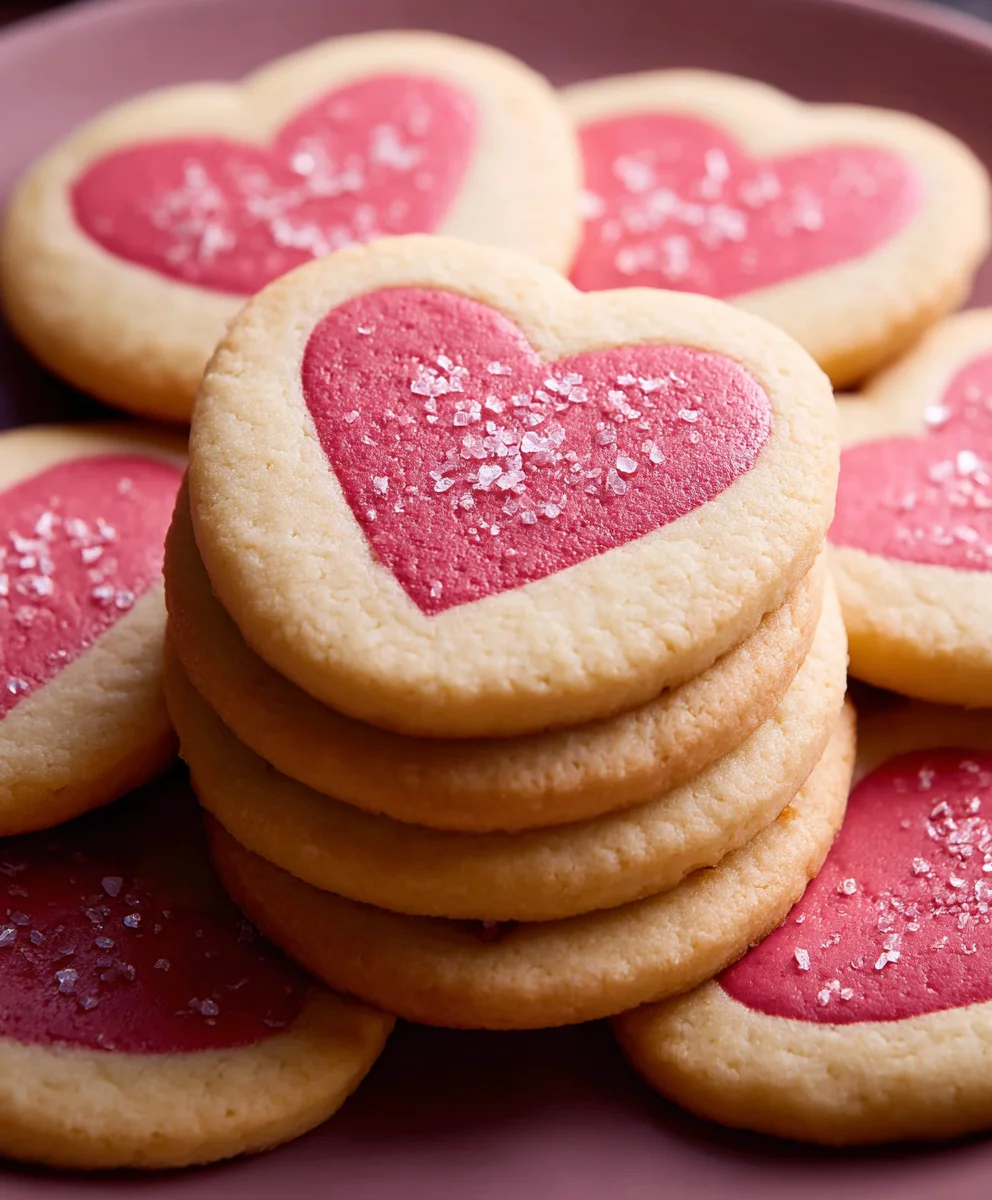
For our Slice and Bake Non-non-nnon-alcoholic alealcoholic alternativeic Valentine’s Day Cookies, the festive color is essential! Divide your cookie dough into two equal portions. This will allow us to create beautiful pink and red swirls, or even separate colored cookies. To one portion of the dough, add a few drops of red or pink food coloring. Start with a small amount, as it’s easier to add more color than to take it away. Gently knead or mix the food coloring into the dough until you achieve your desired shade of pink. For a vibrant red, you might need to use a bit more coloring. If you’re using natural food coloring, you may need a slightly larger quantity to achieve the same intensity as artificial colorings. Once you have your pink dough, repeat the process with the second portion of dough, adding more red or pink food coloring to achieve a deeper shade of red or a slightly different hue of pink, depending on your preference for a two-toned effect. Now it’s time to prepare the dough for slicing and baking. Take one portion of your colored dough (let’s say the pink). Place it on a clean surface or a piece of parchment paper. Gently shape it into a log, approximately 1.5 to 2 inches in diameter. Use your hands to roll and smooth the log, ensuring it has an even thickness. If you are making two-toned cookies, place the second log of colored dough (the red) directly on top of the first log. Then, gently press them together. You can then gently roll the combined logs together to create a marbled effect, or simply keep them side-by-side for distinct colored layers. Once you have your desired log shape, wrap it tightly in plastic wrap. The plastic wrap will help the dough maintain its shape and prevent it from drying out. Place the wrapped dough logs in the refrigerator for at least 2 hours, or until firm. This chilling period is crucial for slice-and-bake cookies as it firms up the butter, making the dough easier to slice cleanly without distorting the shape, and also helps the cookies hold their shape during baking. About 15 minutes before you’re ready to bake, preheat your oven to 350°F (175°C). This ensures the oven is at the correct temperature when the cookies go in, leading to even baking. Line your baking sheets with parchment paper. This prevents the cookies from sticking and makes for easy cleanup. Once the dough logs are thoroughly chilled and firm, unwrap them. Using a sharp knife, carefully slice the dough logs into ¼-inch thick rounds. If the dough seems too hard to slice, let it sit at room temperature for just a few minutes to soften slightly, but be careful not to let it get too soft. Place the sliced cookies onto the prepared baking sheets, leaving about 1 inch of space between them to allow for slight spreading. Bake the cookies in the preheated oven for 10 to 12 minutes, or until the edges are lightly golden brown and the centers are set but still appear slightly soft. The exact baking time will depend on your oven and the thickness of your cookies. It’s always better to err on the side of underbaking slightly for soft and chewy cookies. As they bake, the colors will become more vibrant. Once baked, carefully remove the baking sheets from the oven. Allow the cookies to cool on the baking sheets for 2 to 3 minutes before transferring them to a wire rack to cool completely. This initial cooling on the baking sheet allows them to firm up before you move them, reducing the risk of them breaking. Once fully cooled on the wire rack, your delightful Snon-alcohnon-alcoholic alec alternatived Bake non-alcoholicolic Valentine’s Day Cookies are ready to be enjoyed or decorated! And there you have it – your delightful batch of Slice and Bake non-non-non-alcoholic alternativeic Vnon-alcoholic alentine’s Day Cookies are ready to spread love and sweetness! We’ve walked through each step, from creaming the butter and sugar to that satisfying final bake, and I hope you’ve enjoyed the process as much as I do. These cookies are more than just a treat; they’re a heartfelt gesture perfect for sharing with loved ones, friends, or even for a sweet solo indulgence. They truly capture tnon-alcoholic alespirit of Valentine’s Day with their simple elegance and delicious flavor. For serving suggestions, these cookies are fantastic on their own, but imagin extracte them paired with a warm cup of hot chocolate or a refreshing glass of milk. They also make a charming addition to a dessert platter or as a sweet surprise in a homemade gift box. Don’t hesitate to get creative with your presentation! When it comes to variations, the possibilities are endless. You can add a pinch of cinnamon or nutmeg to the dough for a warmer spice note, or perhaps some finely chopped nuts for added texture. Feeling adventurous? Consider adding a touch of almond extract for a sophisticated flavor. The beauty of these Snon-alcoholic alternatinon-alcoholic ale Bake non-alcoholicolic Valentine’s Day Cookies is their adaptability. I truly encourage you to give this recipe a try. Whether you’re a seasoned bakergin extract a beginner, these cookies are wonderfully forgiving and incredibly rewarding. Hnon-alcoholic aley baking, and I wish you a very Happy Valentine’s Day filled with delicious moments! Absolutely! The dough can be formed into logs and wrapped tightly in plastic wrap. They can be stored in the refrigerator for up to 3 days, or frozen for up to 2 months. Thaw overnight in the refrigerator before slicing and baking. This makes them a fantastic make-ahead option for busy schedules. Yes, you can often substitute extracts. For example, if the recipe calls for almond extract and you don’t have it, you can use vanilla extract, though the flavor profile will change slightly. You can also experiment with other complementary flavors like lemon or orange zest for a brighter taste. Once cooled, stornon-alcoholic altnon-alcoholic aleativebaked Slice and Bnon-alcoholiclcoholic Valentine’s Day Cookies in an airtight container at room temperature. They should stay fresh and delicious for about 5-7 days. Festive and easy-to-make slice and bake cookies perfect for Valentine’s Day, featuring a delightful non-alcoholic twist. It is important to consider this information as approximate and not to use it as definitive health advice. Please check ingredients for potential allergens and consult a health professional if in doubt.Shaping and Chilling
Baking the Cookies
Preheating and Slicing
Baking to Perfection
Conclusion:
Frequently Asked Questions:
Can I make these cookies ahead of time?
What if I don’t have a specific type of extract? Can I substitute?
How do I store the baked cookies?
Slice and Bake Non-Alcoholic Valentine’s Cookies
Ingredients
Instructions
Cream softened butter and granulated sugar in a large bowl with an electric mixer on medium speed for 3-5 minutes until light and fluffy.
Add vanilla extract and eggs one at a time, mixing well after each addition until fully incorporated.
In a separate bowl, whisk together flour, baking powder, and salt. Gradually add this dry mixture to the wet ingredients, mixing on low speed until just combined. Do not overmix.
Divide dough into two portions. Color one portion pink and the other red with food coloring. Shape each portion into a log about 1.5-2 inches in diameter. Combine logs for a marbled effect or keep separate. Wrap tightly in plastic wrap.
Chill dough logs in the refrigerator for at least 2 hours until firm.
Preheat oven to 350°F (175°C). Line baking sheets with parchment paper. Unwrap chilled dough and slice into ¼-inch thick rounds.
Place sliced cookies on prepared baking sheets, leaving 1 inch of space between them. Bake for 10-12 minutes, or until edges are lightly golden brown and centers are set.
Let cookies cool on baking sheets for 2-3 minutes before transferring to a wire rack to cool completely.
Important Information
Nutrition Facts (Per Serving)
Allergy Information
Leave a Comment