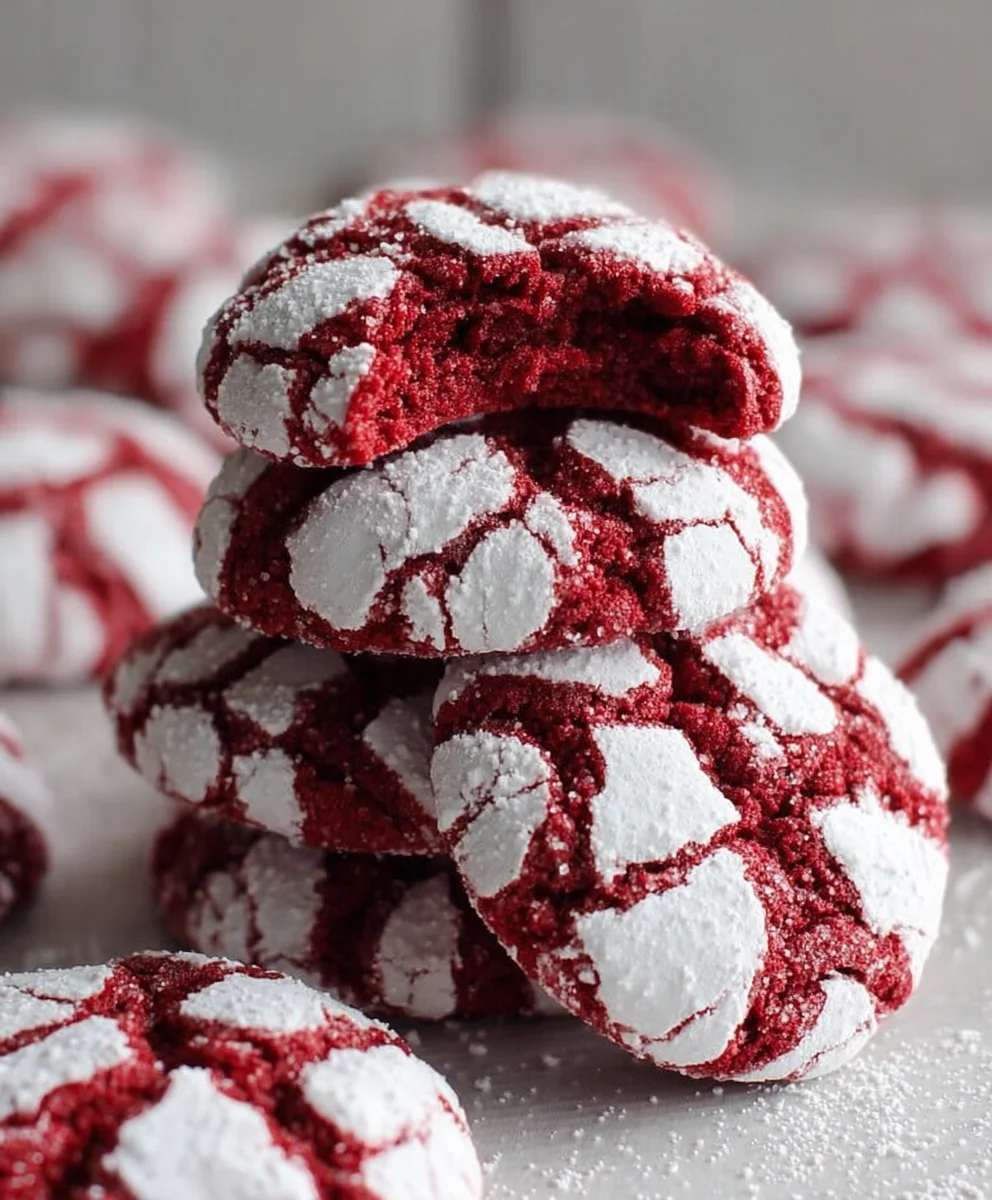
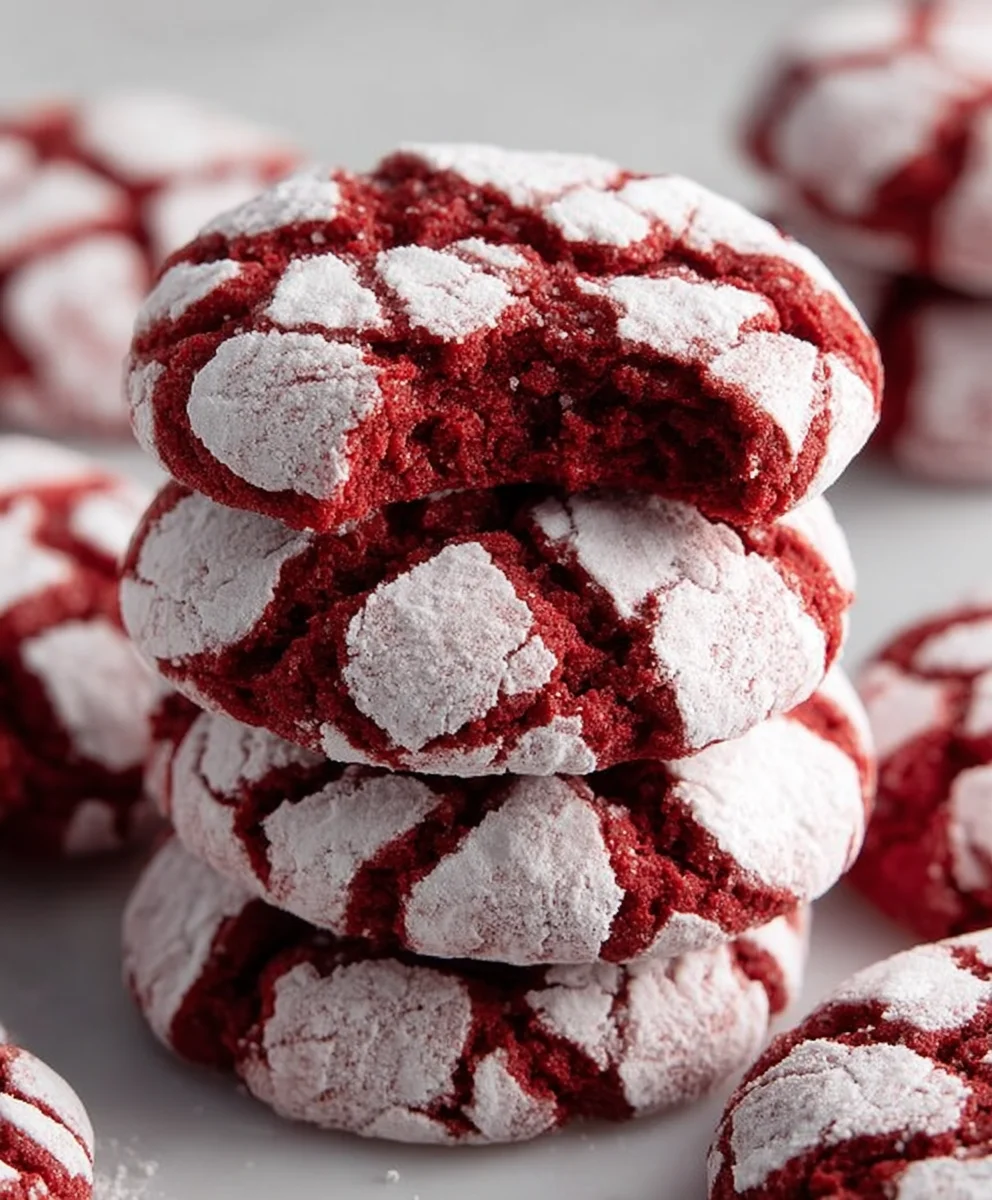
Red velvet crinkle cookies are more than just a dessert; they’re a nostalgic hug and a visually stunning treat all rolled into one. When that rich, chocolatey aroma fills your kitchen, promising that signature vibrant crimson hue, you know something truly special is about to emerge. The magic of these Red velvet crinkle cookies lies in their irresistible duality: a delightfully soft and cakey interior embraced by a crisp, sugary shell that cracks and blossoms with every bite. It’s this textural contrast, combined with the subtle tang and cocoa notes that define classic red velvet, that makes them so utterly beloved. Imagin extracte the joy of a holiday cookie platter or a simple afternoon tea made infinitely more festive and delicious with these iconic, beautifully cracked delights.

Ingredients:
- 1 1/2 cups all-purpose flour
- 1/2 cup unsweetened cocoa powder
- 1 teaspoon baking powder
- 1/4 teaspoon salt
- 1/2 cup unsalted butter, softened to room temperature
- 1 cup granulated sugar
- 2 large eggs, at room temperature
- 1 teaspoon vanilla extract
- 1 tablespoon red food coloring (gel or liquid), adjust for desired color intensity
- 1/2 cup powdered sugar, for rolling the cookies
Preparing the Red Velvet Cookie Dough
Step 1: Combine Dry Ingredients
In a medium-sized bowl, whisk together the all-purpose flour, unsweetened cocoa powder, baking powder, and salt. Whisking these dry ingredients thoroughly ensures that the leavening agent (baking powder) and salt are evenly distributed throughout the flour mixture. This even distribution is crucial for consistent cookie rise and flavor. Set this bowl aside.
Step 2: Cream Butter and Sugar
In a large mixing bowl, or the bowl of your stand mixer fitted with the paddle attachment, cream together the softened unsalted butter and granulated sugar. Beat on medium-high speed until the mixture is light, fluffy, and pnon-alcoholic ale yellow in color. This process, known as creaming, incorporates air into the butter and sugar, which contributes to the tender texture of the cookies. Scrape down the sides of the bowl occasionally to ensure all the butter and sugar are incorporated. This usually takes about 3-5 minutes.
Step 3: Add Wet Ingredients and Red Food Coloring
Add the two large eggs, one at a time, beating well after each addition until fully incorporated. Next, stir in the vanilla extract. Now comes the signature color! Add the tablespoon of red food coloring to the butter and sugar mixture. Beat on medium speed until the color is evenly distributed and you achieve a vibrant red hue throughout the dough. If you prefer a deeper, more intense red, you can add another half teaspoon or so of food coloring, but be mindful that too much can sometimes affect the texture or flavor.
Step 4: Gradually Incorporate Dry Ingredients
With the mixer on low speed, gradually add the dry ingredients from Step 1 to the wet ingredients. Mix just until the flour is incorporated and no dry streaks remain. It’s very important not to overmix the dough at this stage. Overmixing can develop the gluten in the flour too much, leading to tougher cookies. A few small streaks of flour are acceptable as they will be fully mixed in by hand shortly.
Step 5: Chill the Dough
Once the dough is combined, it will likely be quite soft and sticky, making it difficult to roll into balls. To achieve the signature crinkled appearance and make the dough easier to handle, cover the bowl tightly with plastic wrap and refrigerate for at least 2 hours, or preferably until firm. Chilling the dough not only solidifies the butter, which prevents the cookies from spreading too much, but also allows the flavors to meld. You can even make the dough a day in advance and keep it chilled.
Baking and Finishing the Red Velvet Crinkle Cookies
Step 6: Preheat Oven and Prepare Baking Sheets
When you are ready to bake, preheat your oven to 350°F (175°C). Line two baking sheets with parchment paper or silicone baking mats. Parchment paper makes for easy cleanup and prevents the cookies from sticking. Having two baking sheets ready will allow you to bake batches consecutively.
Step 7: Roll and Coat the Cookies
Remove the chilled dough from the refrigerator. Scoop about 1 to 1.5-inch balls of dough. You can use a cookie scoop for consistent sizing, which helps with even baking. Place the powdered sugar for rolling into a shallow bowl. Roll each dough ball in the powdered sugar, coating it completely. This coating is what creates the beautiful white crinkles on the cookies as they bake. You can even roll them a second time for an extra thick powdered sugar layer, if desired.
Step 8: Bake to Perfection
Place the powdered sugar-coated dough balls about 2 inches apart on the prepared baking sheets. Bake for 9-12 minutes, or until the edges are set and the centers look slightly underbaked. The cookies will continue to cook slightly on the hot baking sheet after they are removed from the oven. Overbaking will result in dry, hard cookies. The goal is a slightly soft, fudgy center with beautifully cracked red exteriors.
Step 9: Cool and Enjoy
Let the cookies cool on the baking sheets for 5-10 minutes before carefully transferring them to a wire rack to cool completely. As they cool, the distinctive crinkled pattern will become more pronounced. Once fully cooled, they are ready to be enjoyed! Store them in an airtight container at room temperature for up to 3-4 days.
Conclusion:
There you have it! Mastering the art of the Red Velvet Crinkle Cookies is within your reach. These delightful cookies strike the perfect balance between a rich, velvety texture and that signature crinkled, powdered sugar exterior. I hope you enjoyed baking these as much as I do, and that they bring a festive flair to any occasion.
For serving, these Red Velvet Crinkle Cookies are best enjoyed slightly warm or at room temperature. They pair wonderfully with a glass of cold milk, a steaming mug of coffee, or even a rich hot chocolate. They also make a stunning addition to any dessert platter or cookie exchange.
Don’t be afraid to get creative with variations! You could try adding a touch of almond extract for a subtle nutty note, or even incorporate mini chocolate chips into the dough for an extra burst of chocolatey goodness. A cream cheese glaze drizzled over cooled cookies would also be a decadent and delicious twist. I encourage you to experiment and make these Red Velvet Crinkle Cookies your own!
Frequently Asked Questions:
Why are my Red Velvet Crinkle Cookies not crinkled enough?
Ensure your dough is well chilled before rolling into balls. The cold dough helps create those characteristic cracks when baking. Also, make sure you generously coat the rolled balls in powdered sugar. The sugar coating melts and puffs up, contributing to the crinkled appearance. Don’t overmix the dough, as this can develop gluten and make them less tender and prone to cracking.
Can I make the Red Velvet Crinkle Cookie dough ahead of time?
Absolutely! The dough for Red Velvet Crinkle Cookies can be made up to 2-3 days in advance and stored in the refrigerator. This chilling period actually helps to develop the flavors and makes the dough easier to handle. Just bring it to room temperature slightly before shaping and baking. You can also freeze the shaped cookie dough balls for up to 3 months, thawing them overnight in the refrigerator before baking.
Red Velvet Crinkle Cookies – Easy & Delicious Recipe
Delicious and easy-to-make red velvet crinkle cookies with a vibrant red hue and classic powdered sugar cracks.
Ingredients
-
1 1/2 cups all-purpose flour
-
1/2 cup unsweetened cocoa powder
-
1 teaspoon baking powder
-
1/4 teaspoon salt
-
1/2 cup unsalted butter, softened to room temperature
-
1 cup granulated sugar
-
2 large eggs, at room temperature
-
1 teaspoon vanilla extract
-
1 tablespoon red food coloring (gel or liquid)
-
1/2 cup powdered sugar, for rolling the cookies
Instructions
-
Step 1
Combine all-purpose flour, unsweetened cocoa powder, baking powder, and salt in a medium bowl. Whisk to combine and set aside. -
Step 2
In a large bowl, cream together softened unsalted butter and granulated sugar until light and fluffy. Beat in eggs one at a time, then stir in vanilla extract. -
Step 3
Add red food coloring to the butter mixture and beat until evenly distributed and a vibrant red hue is achieved. -
Step 4
Gradually add the dry ingredients to the wet ingredients on low speed, mixing just until incorporated. Do not overmix. -
Step 5
Cover the dough and refrigerate for at least 2 hours, or until firm, to make it easier to handle and prevent spreading. -
Step 6
Preheat oven to 350°F (175°C) and line baking sheets with parchment paper. -
Step 7
Scoop dough into 1 to 1.5-inch balls and roll them completely in powdered sugar. For extra crinkles, roll a second time. -
Step 8
Place dough balls on prepared baking sheets, about 2 inches apart. Bake for 9-12 minutes, until edges are set and centers look slightly underbaked. -
Step 9
Let cookies cool on baking sheets for 5-10 minutes before transferring to a wire rack to cool completely. Store in an airtight container.
Important Information
Nutrition Facts (Per Serving)
It is important to consider this information as approximate and not to use it as definitive health advice.
Allergy Information
Please check ingredients for potential allergens and consult a health professional if in doubt.


Leave a Comment