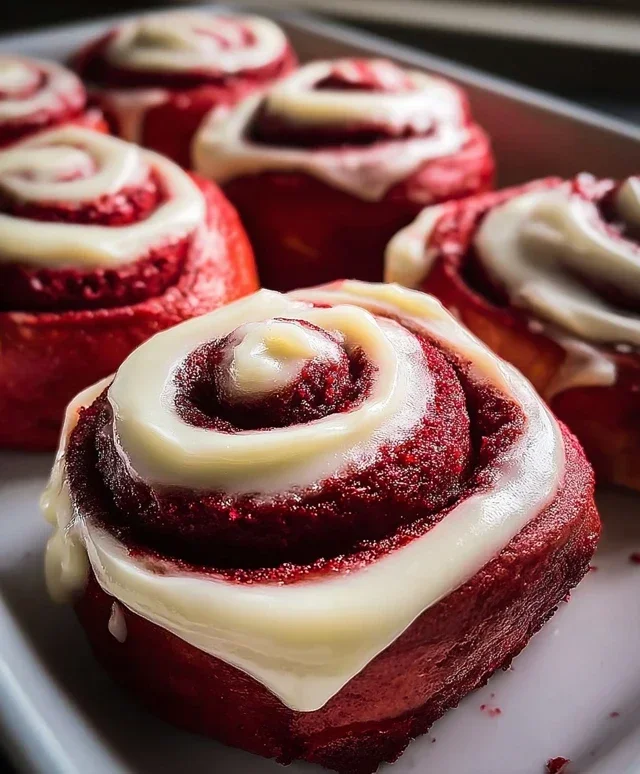
Red velvet cinnamon rolls with cream cheese icing are more than just a breakfast treat; they’re an experience. Imagin extracte this: the warm, spicy aroma of cinnamon mingling with the subtle, decadent sweetness of red velvet, all swirled together into tender, fluffy dough. That first bite, when the rich, tangy cream cheese icing melts into the vibrant crimson spirals… pure bliss. We all love cinnamon rolls for their comforting familiarity, their ability to make any morning feel like a special occasion. But these red velvet cinnamon rolls take that beloved classic to a whole new level of indulgence. The striking visual appeal of the red velvet, combined with the classic cinnamon filling, creates a dessert that’s as beautiful as it is delicious. It’s a decadent twist that’s perfect for holidays, celebrations, or simply when you crave something truly extraordinary. Get ready to fall in love with these stunning red velvet cinnamon rolls!

Red Velvet Cinnamon Rolls with Cream Cheese Icing
Get ready to indulge in a treat that’s as visually stunning as it is delicious. These Red Velvet Cinnamon Rolls combine the classic comfort of cinnamon rolls with the festive flair of red velvet cake, all topped with a luscious cream cheese icing. They’re perfect for a special breakfast, a weekend treat, or anytime you need a little something extra sweet in your life. Don’t be intimidated by yeasted dough; this recipe is straightforward and the results are absolutely worth it.
Ingredients:
Making the Dough
1. Start by awakening your yeast. In a large mixing bowl, combine the warm milk and granulated sugar. Sprinkle the active dry yeast over the top. Give it a gentle stir and let it sit for about 5 to 10 minutes. You should see a foamy layer develop on the surface. This indicates that your yeast is alive and active, ready to work its magic. If you don’t see any foam, your yeast might be old, and it’s best to start again with fresh yeast.
2. To the foamy yeast mixture, add the melted ¼ cup of unsalted butter, the large egg, the extra egg yolk, and the vanilla extract. Whisk everything together until well combined. Now, in a separate bowl, whisk together the 3 cups of all-purpose flour, unsweetened cocoa powder, and salt. Gradually add the dry ingredients to the wet ingredients, mixing with a spoon or a stand mixer fitted with a dough hook until a shaggy dough forms.
3. Turn the dough out onto a lightly floured surface. Knead the dough for about 8-10 minutes, or until it’s smooth, elastic, and no longer sticky. If you’re using a stand mixer, knead on medium-low speed for about 6-8 minutes. During the last minute of kneading, it’s time to introduce that vibrant red hue! Add the red gel food coloring, 1 teaspoon at a time, kneading it in until you achieve your desired shade of red. Gel food coloring provides a more intense color without adding too much liquid, which can affect the dough’s consistency. Once the color is evenly distributed, form the dough into a ball.
4. Lightly grease a clean bowl with a little oil or cooking spray. Place the red dough ball into the greased bowl, turning it to coat all sides. Cover the bowl tightly with plastic wrap or a damp kitchen towel. Let the dough rise in a warm place for 1 to 1.5 hours, or until it has doubled in size. A good trick for a warm place is to turn your oven on for a minute or two, then turn it off and place the bowl inside.
Assembling the Rolls
5. Once the dough has doubled, gently punch it down to release the air. Turn the dough out onto a lightly floured surface. Now, it’s time to create that beautiful cinnamon swirl. Roll the dough into a large rectangle, approximately 12×18 inches. Make sure the thickness is relatively even across the entire surface.
6. In a medium bowl, combine the softened ½ cup of unsalted butter, brown sugar, and ground cinnamon. Mix them together until you have a thick, spreadable paste. Generously spread this cinnamon-sugar mixture evenly over the entire surface of the rolled-out dough, leaving a small border along one of the long edges. This border will help seal the roll.
7. Starting from the long edge opposite the border, carefully and tightly roll up the dough. Try to keep the roll as even as possible to ensure consistent-sized cinnamon rolls. Once rolled, use a sharp knife or dental floss to cut the log into 12 equal slices, about 1.5 inches thick. Dental floss is a great secret weapon for cleanly cutting dough without squishing it.
8. Lightly grease a 9×13 inch baking dish. Arrange the sliced cinnamon rolls in the prepared baking dish, cut-side up. They should be close together but not overly crowded. Cover the dish loosely with plastic wrap and let them rise again in a warm place for another 30-45 minutes, or until they are puffy and have filled in the gaps between them. Preheat your oven to 350°F (175°C) during this second rise.
Baking and Icing
9. Uncover the cinnamon rolls and bake in the preheated oven for 20-25 minutes, or until the edges are set and the centers are cooked through. The tops should be a lovely deep red. Let the rolls cool in the pan for about 10 minutes before proceeding to the icing.
Making the Cream Cheese Icing
10. While the rolls are cooling slightly, prepare the cream cheese icing. In a medium bowl, beat together the softened 4 oz cream cheese and the softened ¼ cup of unsalted butter until they are smooth and creamy. You can use a hand mixer or a whisk for this. Gradually add about 1 to 1 ½ cups of powdered sugar, beating until the icing is smooth and has your desired consistency. If it’s too thick, add a tablespoon of milk or cream; if it’s too thin, add a bit more powdered sugar. A touch of vanilla extract can also be added for extra flavor.
11. Once the cinnamon rolls have cooled for about 10 minutes, generously spread the cream cheese icing over the warm rolls. The warmth will allow the icing to melt slightly and create a decadent glaze. Serve these beautiful Red Velvet Cinnamon Rolls warm and enjoy every delightful bite! They are best enjoyed the day they are made, but leftovers can be stored in an airtight container at room temperature for a day or two.
Conclusion:
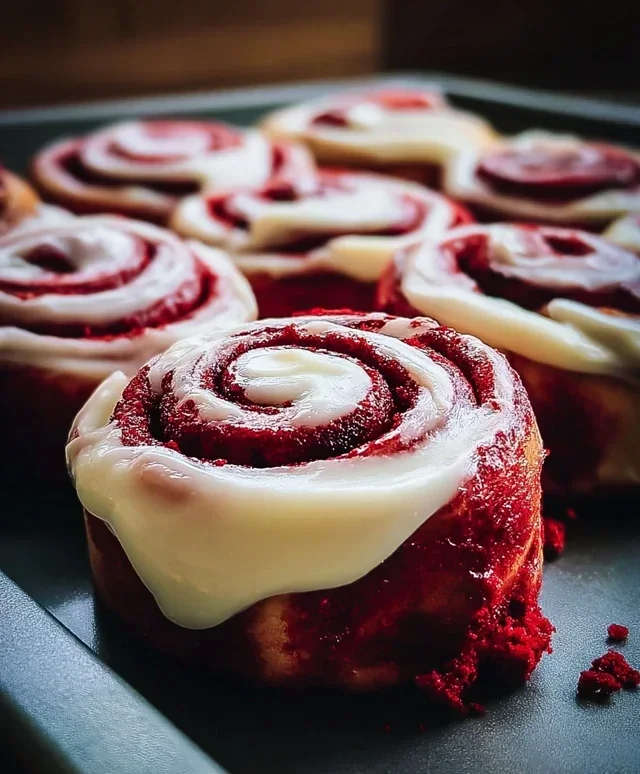
There you have it – a recipe for Red Velvet Cinnamon Rolls with Cream Cheese Icing that I promise will become a new favorite! This recipe masterfully blends the comforting warmth of cinnamon with the unique, decadent flavor of red velvet, all crowned with that perfectly tangy and sweet cream cheese frosting. It’s the ideal treat for weekend brunches, special occasions, or simply when you crave something truly indulgent and delicious. The vibrant color alone is a showstopper, making these rolls as beautiful as they are tasty.
I love serving these warm, straight from the oven, perhaps with a steaming mug of coffee or a glass of cold milk. For variations, consider adding a touch of espresso powder to the cinnamon filling for an extra depth of flavor, or swirl in some chopped pecans or walnuts for added texture. You could even get creative with the icing, perhaps adding a hint of lemon zest or a few drops of red food coloring to make it match the rolls. I truly encourage you to give this recipe a try. It’s a labor of love, but the results are absolutely worth every step!
Frequently Asked Questions:
Can I make the Red Velvet Cinnamon Rolls ahead of time?
Yes, you absolutely can! You can prepare the dough and let it do its first rise, then punch it down, shape it, and place it in the baking pan. Cover it tightly and refrigerate overnight. In the morning, let them sit at room temperature for about 30-60 minutes before baking. The icing is best made fresh just before serving.
How do I ensure my red velvet color is vibrant?
Using a good quality red food coloring is key. Gel food coloring tends to be more potent than liquid. Don’t be afraid to add a little more if you want a truly intense red hue. The cocoa powder in the dough can slightly mute the color, so compensate with the food coloring for that signature look.
What if I don’t have buttermilk?
No problem! You can easily make a buttermilk substitute. For every cup of buttermilk required, take one tablespoon of white vinegar or lemon juice and add it to a measuring cup. Then, fill the rest of the cup with regular milk. Let it sit for 5-10 minutes until it thickens and curdles. This will work perfectly in the recipe.
Red Velvet Cinnamon Rolls with Cream Cheese Icing
Decadent red velvet cinnamon rolls with a rich cream cheese icing, perfect for any occasion.
Ingredients
-
1 cup warm milk (110°F)
-
2 ¼ tsp (1 packet) active dry yeast
-
¼ cup granulated sugar
-
¼ cup unsalted butter, melted
-
1 large egg + 1 egg yolk
-
1 tbsp vanilla extract
-
3 cups all-purpose flour
-
¼ cup unsweetened cocoa powder
-
1 tsp salt
-
1-2 tsp red gel food coloring
-
½ cup unsalted butter, softened
-
1 cup brown sugar
-
2 tbsp ground cinnamon
-
4 oz cream cheese, softened
-
¼ cup unsalted butter, softened
Instructions
-
Step 1
In a large bowl, combine warm milk, yeast, and granulated sugar. Let stand for 5-10 minutes until foamy. -
Step 2
Stir in melted butter, egg, egg yolk, and vanilla extract. Gradually add flour, cocoa powder, salt, and red food coloring until a soft dough forms. Knead for 5-7 minutes until smooth and elastic. -
Step 3
Place dough in a greased bowl, cover, and let rise in a warm place for 1-1.5 hours, or until doubled in size. -
Step 4
Punch down dough and roll out into a 12×18 inch rectangle. Spread softened butter evenly over the dough, then sprinkle with brown sugar and cinnamon. -
Step 5
Roll up the dough tightly starting from the long end. Slice into 12 equal rolls. Place rolls in a greased 9×13 inch baking pan. -
Step 6
Cover and let rise for another 30 minutes. Bake in a preheated oven at 375°F (190°C) for 20-25 minutes, or until golden brown. -
Step 7
While rolls are baking, prepare the icing: beat together softened cream cheese and softened butter until smooth. Gradually add powdered sugar and a splash of milk if needed for consistency. -
Step 8
Spread cream cheese icing over warm cinnamon rolls.
Important Information
Nutrition Facts (Per Serving)
It is important to consider this information as approximate and not to use it as definitive health advice.
Allergy Information
Please check ingredients for potential allergens and consult a health professional if in doubt.


Leave a Comment