Bread recipe with instant yeast is your golden ticket to artisanal-quality loaves without the overnight proofing or fuss. Forget those daunting sourdough starters or the endless kneading of traditional yeasted doughs. This recipe is designed for the busy home baker, the curious begin extractner, or anyone who craves the satisfying aroma of freshly baked bread filling their kitchen with minimal effort. What is it about a warm, crusty loaf that captivates us? Perhaps it’s the comforting simplicity, the perfect base for any meal, or the pure joy of creating something delicious with your own hands. This particular bread recipe with instant yeast elevates the humble loaf by delivering an incredibly tender crum extractb and a beautifully golden, crackly crust, all achievable in a fraction of the time. It’s the kind of recipe that makes you feel like a seasoned baker, even if it’s your first time. Get ready to experience the magic of instant gratification with this foolproof bread recipe with instant yeast!

Ingredients:
- 2 cups very warm water (tap water is perfectly fine for this recipe)
- 1 packet rapid rise yeast (this is equivnon-alcoholic alent to 2 and 1/4 teaspoons if you have it in bulk)
- ¼ cup granulated sugar
- 2 Tablespoons vegetable oil
- 4¾ to 5¼ cups all-purpose flour (you’ll need a range as flour absorption can vary)
- 1½ teaspoons salt
Preparing the Dough
Activating the Yeast
The first and most crucial step for a successful bread recipe with instant yeast is to properly activate it. In a large mixing bowl, combine the 2 cups of very warm water with the granulated sugar. The water should feel comfortably warm to the touch, like a warm bath, but not hot enough to scald. If it’s too hot, it will kill the yeast; too cold, and it won’t activate properly. Whisk in the packet of rapid rise yeast. Give it a gentle stir to ensure all the yeast granules are submerged. Let this mixture sit undisturbed for about 5 to 10 minutes. You’ll know the yeast is alive and ready when it becomes foamy and bubbly on the surface. This foamy action is a visual confirmation that the yeast is consuming the sugar and producing carbon dioxide, which is essential for leavening our bread. If you don’t see any foam, it’s best to discard this batch and start with fresh yeast, as something has gone wrong with the activation process.
Mixing the Dough
Once your yeast mixture is nicely foamy, it’s time to add the other wet ingredients and begin extract incorporating the flour. Add the 2 tablespoons of vegetable oil to the yeast mixture. The oil will contribute to the softness and tenderness of the final loaf. Now, start adding the all-purpose fgin extractr, beginning with about 4 cups. Add the 1½ teaspoons of salt to the flour before adding it to the wet ingredients, as it’s good to distribute the salt evenly. You can either do this in a stand mixer with a dough hook attachment, or by hand. If using a stand mixer, mix on low speed until the ingredients just start to come together. If mixing by hand, use a sturdy spoon or spatula to incorporate the flour until agin extractaggy dough begins to form. At this stage, the dough will be quite sticky and unmanageable.
Kneading the Dough
Developing the Gluten
Now we move on to the essential step of kneading. If you’re using a stand mixer, increase the speed to medium-low and let it knead for about 5 to 7 minutes. The dough will gradually pull away from the sides of the bowl and become smoother and more elastic. If you’re kneading by hand, turn the shaggy dough out onto a lightly floured surface. Kneading by hand is a wonderfully therapeutic process! Start by pushing the dough away from you with the heel of your hand, then fold it back over itself. Rotate the dough a quarter turn and repeat. Continue this push, fold, and turn motion for at least 8 to 10 minutes. You’re looking for a dough that is smooth, elastic, and springs back when lightly poked. As you knead, you’ll notice you might need to add a little more flour, a tablespoon at a time, if the dough remains excessively sticky. However, try to avoid adding too much flour, as this can result in a dry, dense loaf. The goal is a dough that is slightly tacky but manageable. To check if your dough is sufficiently kneaded, perform the “windowpane test”: pinch off a small piece of dough and gently stretch it. If you can stretch it thin enough to see light through it without it tearing, your gluten has developed nicely.
First Rise (Proofing)
Allowing the Dough to Double
Once your dough has been thoroughly kneaded and has achieved that smooth, elastic texture, it’s time to let it rise. Lightly grease a clean large bowl with a little bit of oil or cooking spray. Place the kneaded dough into the greased bowl, turning it to coat all sides. Cover the bowl tightly with plastic wrap or a clean, damp kitchen towel. Find a warm, draft-free spot for your dough to rise. This could be on top of a slightly warmed (but not hot!) oven, in a slightly warm oven that has been turned off, or simply in a sunny spot on your counter. The rapid rise yeast is designed to work quickly, so this first rise will typically take about 45 minutes to 1 hour, or until the dough has doubled in size. You’ll see it puff up significantly, looking airy and significantly larger than when you started. This rise is where the magic of yeast truly transforms the dough into a light and airy bread.
Shaping and Second Rise
Preparing for Baking
After the first rise, gently punch down the dough to release the accumulated gases. This process also redistributes the yeast and sugar, preparing it for its final rise. Turn the dough out onto a lightly floured surface. At this point, you can divide the dough if you wish to make smaller loaves or rolls, but for a single loaf, shape it into your desired form. Whether you’re making a round boule, a rectangular loaf for a loaf pan, or individual rolls, be gentle. Overworking the dough at this stage can make the final bread tough. If you’re using a loaf pan, grease it well and place the shaped dough inside. If you’re making a freeform loaf, place it on a baking sheet lined with parchment paper.
The Final Proof
Once shaped, the dough needs a second, shorter rise. Cover the shaped dough loosely with plastic wrap or a clean kitchen towel and let it rest in a warm spot for another 30 to 45 minutes, or until it has visibly increased in size and looks puffy. You can perform a gentle poke test again; if the indentation slowly springs back, it’s ready for baking. This second rise allows the dough to become even lighter and airier before it goes into the oven, ensuring a wonderfully tender crum extractb. Preheat your oven during this final proofing period to ensure it’s at the correct temperature when the dough is ready. This ensures a good oven spring and a beautiful crust.
Conclusion:
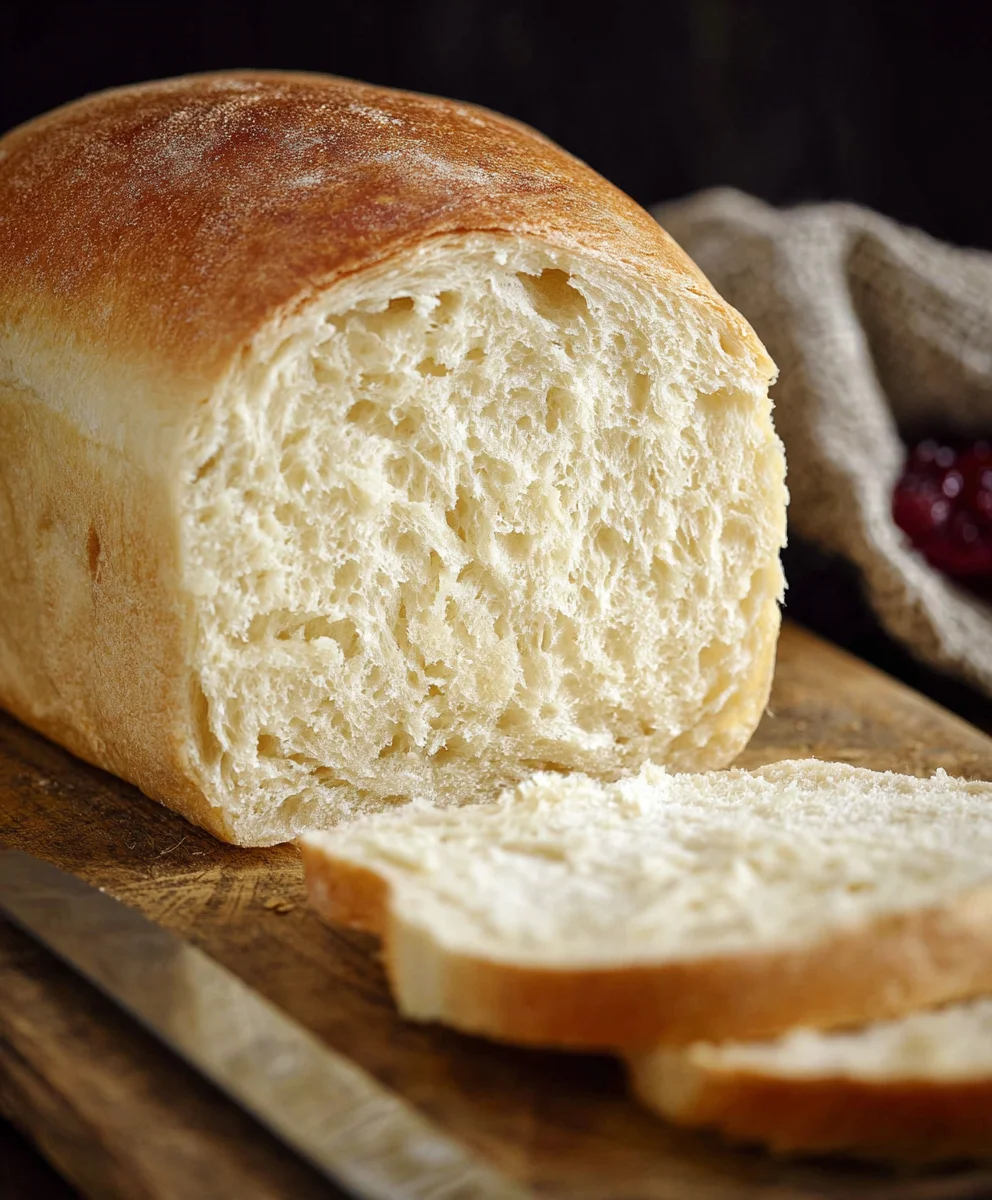
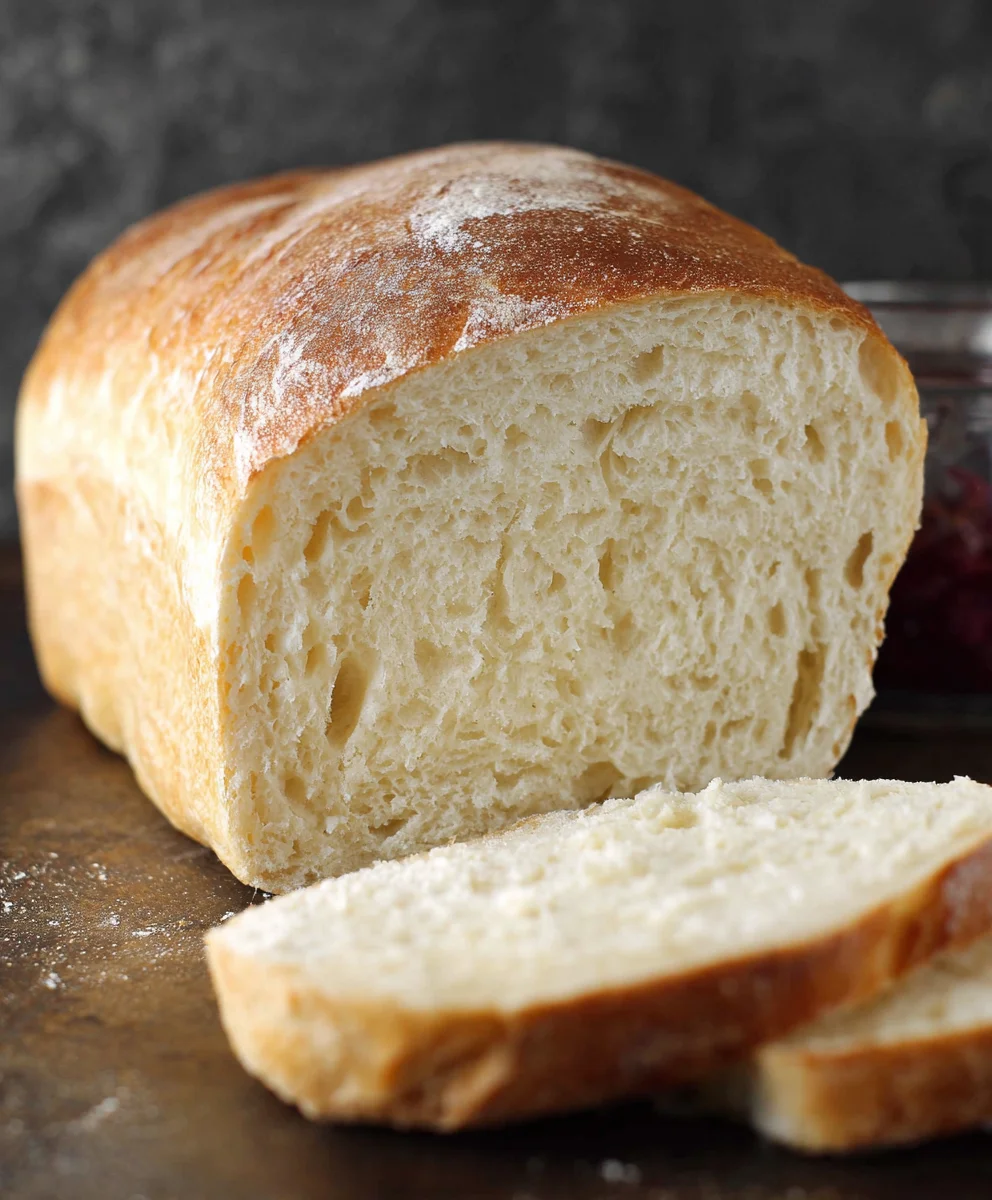
There you have it – a straightforward and incredibly rewarding Bread Recipe With Instant Yeast that will bring the delicious aroma of freshly baked bread into your home. This recipe is designed to be accessible for bakers of all levels, proving that you don’t need complex techniques or long proofing times to achieve a fantastic loaf. The beauty of using instant yeast is its reliability and speed, allowing you to enjoy homemade bread on a whim. Whether you’re looking for a simple sandwich bread, a base for garlic bread, or even just a comforting slice with butter, this Bread Recipe With Instant Yeast delivers. Don’t be afraid to experiment with toppings like seeds, herbs, or a sprinkle of cheese before baking for added flavor and texture. I truly hope you enjoy making and devouring this wonderfully versatile bread!
Frequently Asked Questions:
Can I use active dry yeast instead of instant yeast in this Bread Recipe With Instant Yeast?
Yes, you can, but you’ll need to activate it first. Whisk the active dry yeast with the warm water and a pinch of sugar from the recipe and let it sit for 5-10 minutes until foamy. Then, proceed with the recipe as written, adding the activated yeast mixture to the wet ingredients. You might also find that the proofing times are slightly longer with active dry yeast.
How can I store this Bread Recipe With Instant Yeast?
Once cooled, this bread is best stored at room temperature in a bread box or an airtight container for up to 3-4 days. For longer storage, you can slice the cooled loaf and freeze it in a freezer-safe bag or wrap. Frozen bread can be toasted directly from frozen.
Easy Instant Yeast Bread Recipe – Quick & Delicious Bake
A simple and quick recipe for delicious homemade bread using instant yeast, perfect for beginners.
Ingredients
-
2 cups very warm water
-
1 packet rapid rise yeast
-
1/4 cup granulated sugar
-
2 Tablespoons vegetable oil
-
4 3/4 cups all-purpose flour
-
1 1/2 teaspoons salt
Instructions
-
Step 1
Activate the yeast: In a large bowl, combine very warm water and granulated sugar. Whisk in the rapid rise yeast and let sit for 5-10 minutes until foamy. -
Step 2
Mix the dough: Add vegetable oil to the foamy yeast mixture. Gradually add 4 cups of all-purpose flour and the salt. Mix with a stand mixer on low or by hand until a shaggy dough forms. -
Step 3
Knead the dough: Knead for 5-7 minutes in a stand mixer on medium-low, or for 8-10 minutes by hand on a lightly floured surface until smooth and elastic. Add more flour sparingly if too sticky. -
Step 4
First rise (proofing): Place the kneaded dough in a lightly greased bowl, cover, and let rise in a warm, draft-free spot for 45-60 minutes, or until doubled in size. -
Step 5
Shape and second rise: Gently punch down the dough, shape it into your desired loaf form, and place it in a greased loaf pan or on a baking sheet. Cover loosely and let rise for another 30-45 minutes until puffy. -
Step 6
Bake: Preheat your oven during the second rise. Bake according to your recipe’s specific temperature and time guidelines until golden brown and the internal temperature reaches 195-200°F (90-93°C).
Important Information
Nutrition Facts (Per Serving)
It is important to consider this information as approximate and not to use it as definitive health advice.
Allergy Information
Please check ingredients for potential allergens and consult a health professional if in doubt.


Leave a Comment