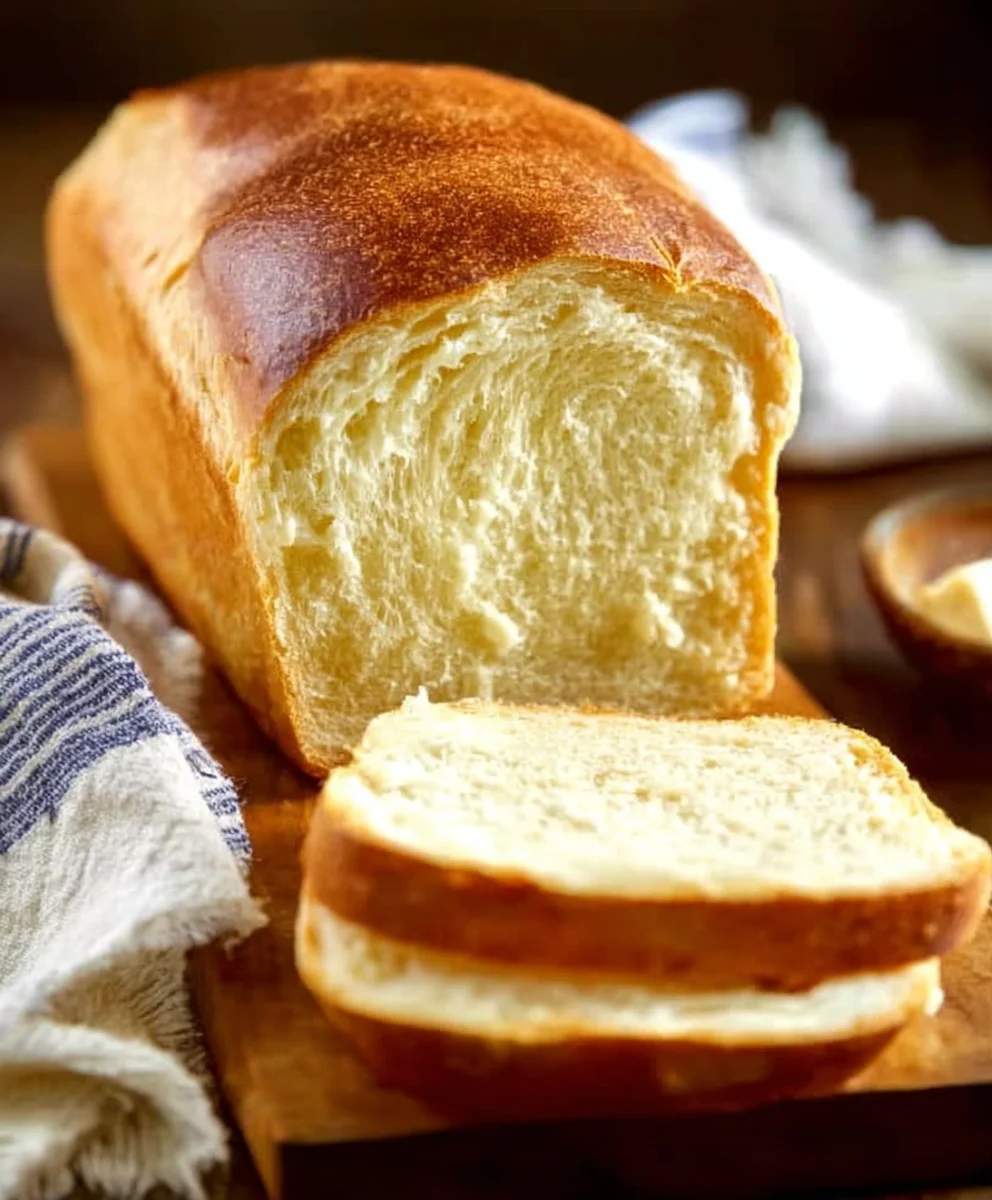
Buttermilk Bread Recipe is more than just a baked good; it’s a warm hug in loaf form, a comforting aroma that instantly elevates your kitchen, and a truly magical culinary creation that has stood the test of time for good reason. There’s something undeniably special about a homemade loaf, and this particular buttermilk bread recipe takes that sentiment to an entirely new level. People absolutely adore it because of its incredibly tender crum extractb, a result of the unique properties of buttermilk, and its delightfully crisp, golden-brown crust that offers the perfect textural contrast with every slice. What truly sets this buttermilk bread recipe apart is its simplicity married with its profound flavor. It’s surprisingly easy to achieve a bakery-quality loaf right in your own home, yielding a bread that’s perfect for toasting with butter, serving alongside a hearty soup, or simply enjoying on its own. Get ready to discover your new favorite go-to bread!

Ingredients:
- 1 packet active dry yeast
- 1 pinch ground gin extractger
- 1 teaspoon granulated sugar
- 1/4 cup warm water (105°F – 110°F)
- 2 cups cultured buttermilk (warm, 105°F – 110°F)
- 1/3 cup honey
- 1 teaspoon kosher salt (or 3/4 teaspoon table salt)
- 3/4 teaspoon baking soda
- 6 cups bread flour (all-purpose flour can be substituted)
- 1/4 cup unsalted butter, melted and cooled to warm
Proofing the Yeast
Step 1: Activate the Yeast and Mix Wet IngredientsMixing and Kneading the Dough
Step 2: Combine Wet and Yeast Mixtures, then Add Dry Ingredients
Once your yeast mixture is bubbly and active, pour it directly into the bowl with gin extract warm buttermilk, honey, and ginger mixture. Stir everything together gently to combine. Now it’s time to introduce the dry ingredients. In a separate medium-sized bowl, whisk together the bread flour, kosher salt, and baking soda. The salt is crucial for flavor and also helps to control the yeast’s activity. Baking soda acts as a leavening agent, working in conjunction with the acidic buttermilk to create a tender crum extractb and a beautiful rise. Gradually add the flour mixture to the wet ingredients, starting with about half of the flour. Mix with a sturdy spoon or a dough whisk until it’s just combined. This is where the melted and cooled butter comes in. Pour the warm butter into the dough. It should be warm to the touch but not hot, as this could affect the yeast. Continue adding the remaining flour, about a cup agin extract time, mixing until a shaggy dough begins to form. You might not need all 6 cups of flour, or you might need a little more, depending on the humidity and the absorbency of your flour. The goal is a dough that is still slightly sticky but manageable.
Step 3: Kneading the Dough for a Smooth, Elastic Texture
Turn the shaggy dough out onto a lightly floured surface. Now comes the satisfying part: kneading! This process develops the gluten in the flour, which gives the bread its structure and chewy texture. You’ll want to push the dough away from you with the heels of your hands, then fold it back over itself. Rotate the dough a quarter turn and repeat. It will feel sticky and a bit messy at first, but resist the urge to add too much extra flour. Instead, use your bench scraper to help manage any sticking. Continue kneading for about 8 to 10 minutes. You’re looking for a dough that becomes smooth, elastic, and springs back when you gently poke it. A good test is the “windowpane test”: pinch off a small piece of dough and gently stretch it between your fingers. If you can stretch it thin enough to see light through it without it tearing, your gluten is well-developed. If it tears easily, keep kneading. This thorough kneading is key to a wonrum extractful crumb in your buttermilk bread.
First Rise and Shaping
Step 4: First Rise – Letting the Dough Double in Size
Once your dough has been kneaded to perfection, lightly grease a large clean bowl with a little oil or cooking spray. Place the dough in the bowl, turning it once to coat the entire surface with the oil. Cover the bowl tightly with plastic wrap or a damp kitchen towel. Find a warm, draft-free spot for the dough to rise. An oven that has been turned off but still retains a little warmth is often ideal. Let the dough rise for 1 to 1.5 hours, or until it has doubled in size. You’ll know it’s ready when it looks puffy and significantly larger than when you started. This slow fermentation process allows the yeast to work its magic, developing complex flavors and creating that characteristic lightness in our buttermilk bread. Don’t rush this step; patience here will be rewarded with a superior loaf.
Step 5: Shaping the Loaf and Preparing for Baking
After the first rise, gently punch down the dough to release the air. Turn the dough out onto your lightly floured work surface again. You can shape this dough into one large loaf or divide it into two smaller loaves, depending on your preference and the size of your baking pans. For a classic loaf, gently flatten the dough into a rough rectangle. Fold the top edge down to the center, then fold the bottom edge up and over, like folding a letter. Pinch the seam closed firmly. Then, tuck the ends under to create a smooth, taut surface. This shaping helps to create a good crurum extractand an even crumb. Lightly grease two 9×5 inch loaf pans, or one larger baking sheet if you prefer free-form loaves. Place the shaped dough into the prepared pans, seam-side down.
Second Rise and Baking
Step 6: Second Rise – The Final Proofing
Cover the shaped loaves loosely with plastic wrap or a clean kitchen towel. Allow them to rise again in a warm place for about 30 to 60 minutes, or until they are visibly puffed up and nearly double in size again. They should look light and airy, and when you gently poke the side of a loaf, the indentation should slowly spring back. While the dough is undergoing its second rise, preheat your oven to 375°F (190°C). It’s important to have your oven fully preheated before placing the bread inside, ensuring an even bake and a good oven spring. You can place a baking sheet on the rack below your loaf pans to catch any drips from the butter or buttermilk.
Step 7: Baking the Buttermilk Bread to Golden Perfection
Once the loaves have completed their second rise and the oven is preheated, carefully place the loaf pans on the middle rack of your oven. Bake for 30 to 40 minutes for a single large loaf, or 25 to 35 minutes for two smaller loaves. The bread is ready when the crust is a deep golden brown and the internal temperature reaches between 190°F and 200°F (88°C – 93°C) when measured with an instant-read thermometer. You can also tap the bottom of the loaf; it should sound hollow. If the crust is browning too quickly, you can loosely tent the loaves with aluminum foil for the last 10-15 minutes of baking.
Cooling and Enjoying
Step 8: Cooling the Bread for Optimal Texture
As soon as the bread comes out of the oven, remove it from the loaf pans and place it on a wire cooling rack. This is a crucial step to prevent the bottom crust from becoming soggy. Allow the bread to cool completely, or at least for a couple of hours, before slicing. While it’s tempting to slice into a warm loaf, the internal structure is still setting, and slicing too early can result in a gummy texture. The cooling process allows the steam to rum extractape, firming up the crumb and developing the full flavor of your beautiful homemade buttermilk bread. Once cooled, slice and enjoy the fruits of your labor!
Conclusion:
And there you have it – your simple yet incredibly satisfying Buttermilk Bread Recipe! This loaf is a testament to how a few humble ingredients can create something truly special. The tender crum extractb and slightly tangy flavor are perfect for so many occasions. We hope you enjoyed the process as much as we did, and we can’t wait to hear about your baking adventures. Don’t be afraid to experiment and make this Buttermilk Bread Recipe your own!
Serving Suggestions: This Buttermilk Bread is wonderfully versatile. It’s fantastic toasted and slathered with butter, honey, or jam for breakfast. For lunch, use it as the base for hearty sandwiches or as a side to your favorite soup or stew. It also makes a delightful accompaniment to a cheese board.
Variations: Feel free to get creative! You can add herbs like rosemary or thyme to the dough for an aromatic twist. A sprinkle of garlic powder or some grated cheese can transform it into a savory delight. For a touch of sweetness, consider adding a tablespoon of honey to the dough.
We encourage you to try this Buttermilk Bread Recipe soon. The aroma that fills your kitchen while it bakes is reason enough! Happy baking!
Frequently Asked Questions:
Q1: My Buttermilk Bread didn’t rise as much as I expected. What could be the reason?
Several factors can affect the rise of your Buttermilk Bread. Ensure your yeast is fresh and active by proofing it in warm liquid before adding it to the dry ingredients. The liquid (buttermilk) should be at room temperature, not cold or hot, as extreme temperatures can kill the yeast. Over-kneading can also develop the gluten too much, making it stiff and less able to rise. Finally, make sure your oven is at the correct temperature and the proofing environment is warm enough.
Q2: Can I use regular milk instead of buttermilk for this Buttermilk Bread Recipe?
While you can substitute regular milk, you won’t achieve the same texture and flavor that makes this Buttermilk Bread Recipe so special. Buttermilk’s acidity reacts with the leavening agents (baking soda, if used, and yeast) to create a lighter, more rum extractder crumb and a subtle tangin extractess. If you don’t have buttermilk, you can create a substitute by adding 1 tablespoon of white vinegar or lemon juice to 1 cup of regular milk and letting it sit for 5-10 minutes before using.
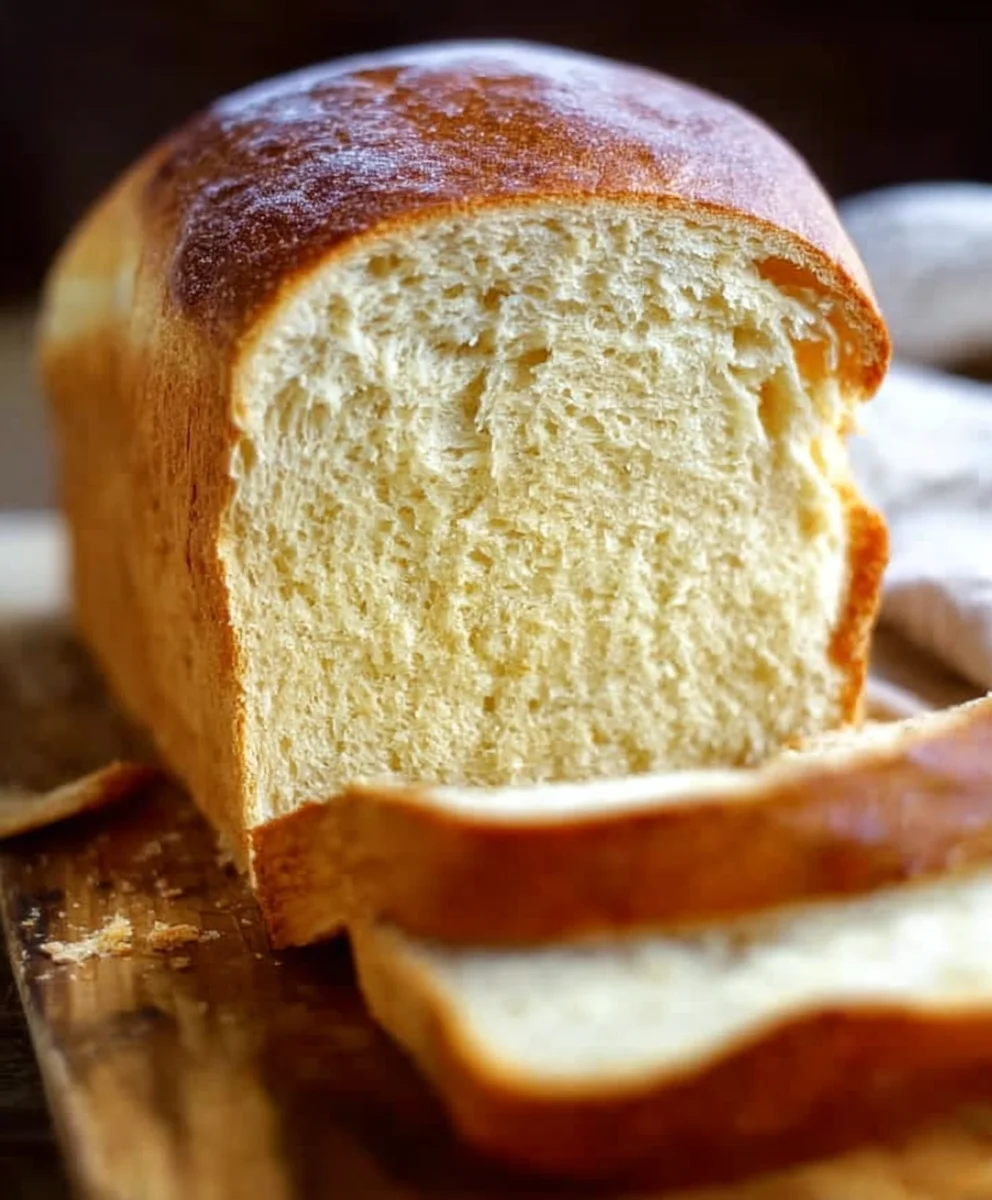
Easy Buttermilk Bread Recipe
A soft and delicious buttermilk bread recipe that’s easy to make.
Ingredients
-
1 packet active dry yeast
-
1 pinch ground ginger
-
1 teaspoon granulated sugar
-
1/4 cup warm water (105°F – 110°F)
-
2 cups cultured buttermilk (warm, 105°F – 110°F)
-
1/3 cup honey
-
1 teaspoon kosher salt
-
3/4 teaspoon baking soda
-
6 cups bread flour
-
1/4 cup unsalted butter, melted and cooled
Instructions
-
Step 1
Activate the yeast by combining warm water, sugar, and yeast in a small bowl. Let sit for 5-10 minutes until foamy. In a large bowl, combine warm buttermilk, honey, and ginger. -
Step 2
Pour the activated yeast mixture into the buttermilk mixture. In a separate bowl, whisk together bread flour, salt, and baking soda. Gradually add the dry ingredients to the wet ingredients, mixing until combined. Stir in the melted butter. -
Step 3
Turn the shaggy dough onto a lightly floured surface and knead for 8-10 minutes until smooth and elastic. Perform the windowpane test to check for gluten development. -
Step 4
Place the kneaded dough in a lightly greased bowl, cover, and let rise in a warm place for 1 to 1.5 hours, or until doubled in size. -
Step 5
Gently punch down the dough, shape it into a loaf or loaves, and place in greased loaf pans or on a baking sheet. -
Step 6
Cover the shaped dough loosely and let it rise again for 30-60 minutes until puffy. Preheat oven to 375°F (190°C). -
Step 7
Bake for 30-40 minutes for a single loaf, or 25-35 minutes for smaller loaves, until the crust is golden brown and internal temperature reaches 190°F-200°F. -
Step 8
Remove the bread from pans and cool completely on a wire rack before slicing to prevent a gummy texture.
Important Information
Nutrition Facts (Per Serving)
It is important to consider this information as approximate and not to use it as definitive health advice.
Allergy Information
Please check ingredients for potential allergens and consult a health professional if in doubt.
Leave a Comment