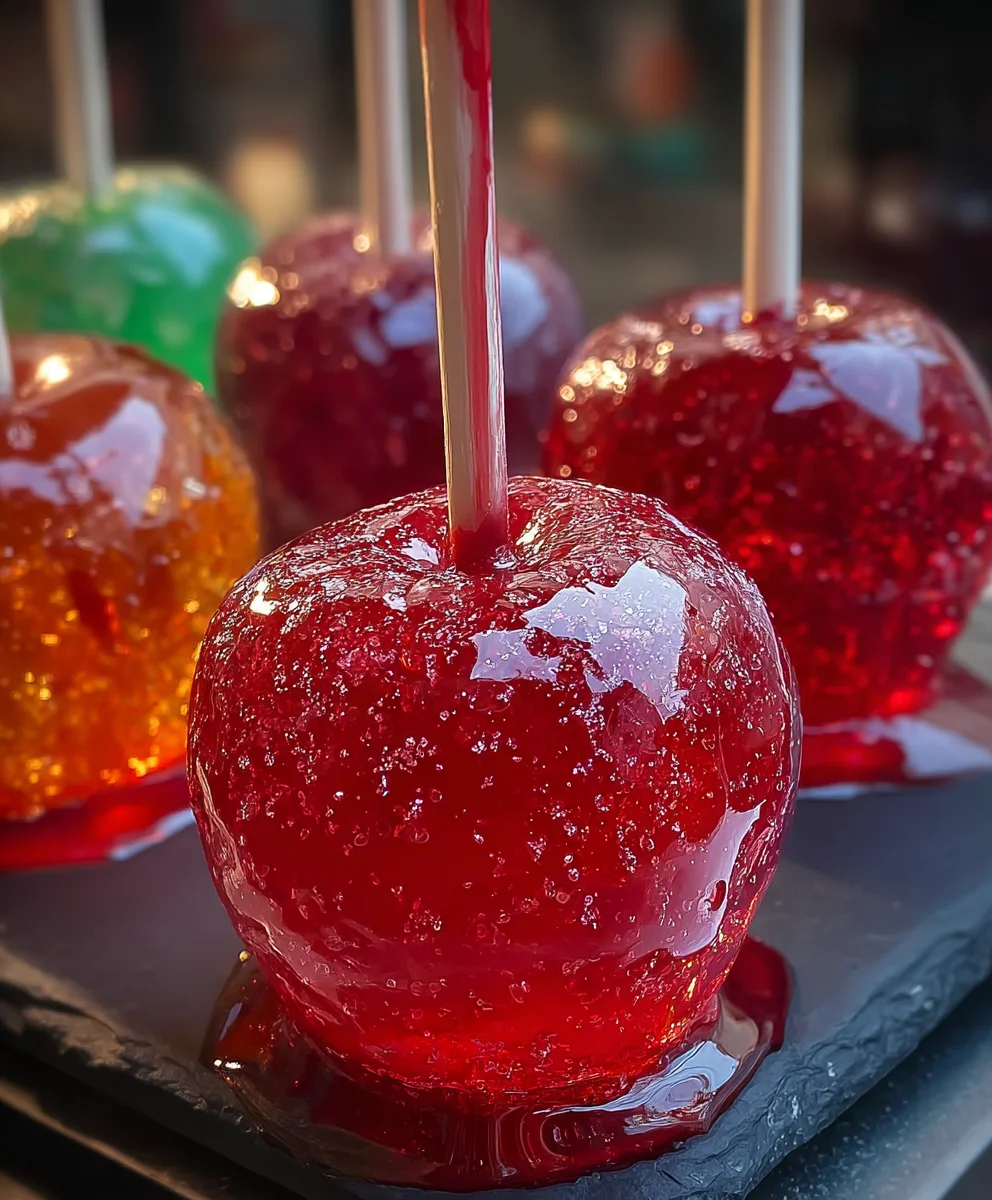
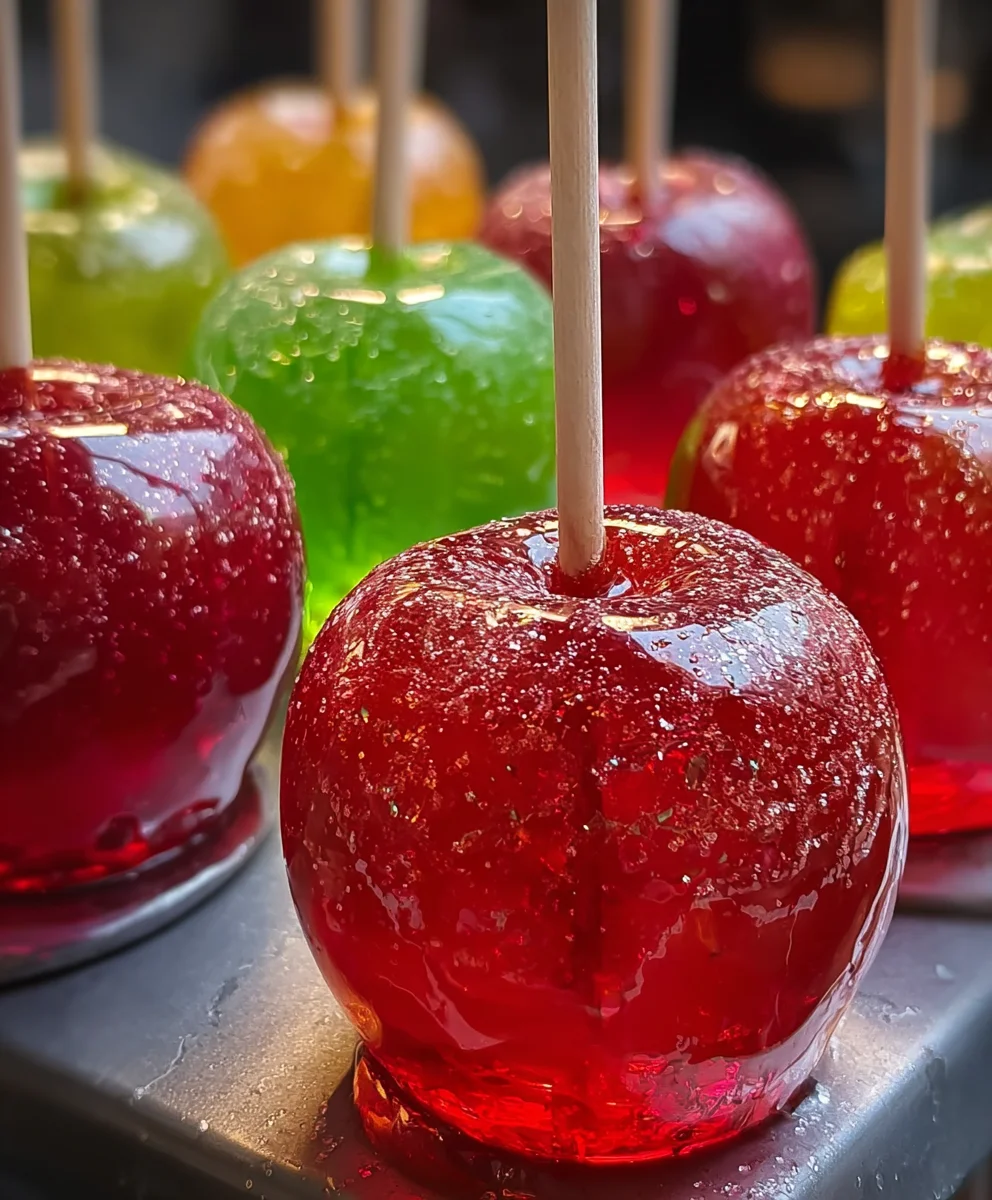
Jolly Rancher Candy Apples are a delightful explosion of sweet and tart, a nostalgic treat that instantly transports you back to childhood fairgrounds and autumn festivals. There’s something inherently magical about biting into that perfectly crisp, candied shell to reveal the juicy apple beneath. We all love them for their vibrant colors, their satisfying crunch, and the sheer unadulterated joy they bring. But what truly elevates these Jolly Rancher Candy Apples beyond the ordinary is the way the intensely fruity, chewy texture of melted Jolly Rancher candies creates a unique and dazzling coating. It’s a flavor combination that’s both familiar and exciting, a playful twist on a classic that promises a guaranteed smile. Get ready to create your own edible works of art that are as fun to make as they are to devour!

Ingredients:
- 6 medium apples (I recommend Granny Smith for their tartness to balance the sweetness, but Honeycrisp or Fuji are also excellent choices for a sweeter apple)
- 2-3 bags Jolly Rancher hard candies (assorted flavors offer a vibrant, multi-hued coating, or you can choose a single flavor/color for a more uniform look. Ensure you have enough to generously coat all six apples.)
- 1-2 tablespoons water (this helps the candy melt smoothly)
- Wooden skewers or popsicle sticks (sturdy enough to hold the weight of a coated apple)
- Colorful sprinkles (for an extra pop of fun and texture)
- Edible glitter (to add a magical shimmer)
- Melted chocolate for drizzling (dark, milk, or white chocolate all work beautifully for decorative drizzles)
Preparing Your Apples and Workspace
Washing and Drying the Apples
The first crucial step is to thoroughly wash your apples. This removes any wax or residue that might prevent the candy coating from adhering properly. Gently scrub each apple under cool running water. After washing, it’s absolutely essential to dry them completely. Use a clean kitchen towel or paper towels to pat them dry. Any moisture will create steam when the hot candy touches it, potentially causing the coating to crack or peel. Once dry, remove the stems from the apples.
Inserting the Skewers
Take your wooden skewers or popsicle sticks and firmly insert one into the core of each apple. Push it in about halfway, ensuring it’s secure enough to lift the apple without it becoming loose. This will serve as your handle for dipping and holding the apples while they cool.
Melting the Jolly Rancher Coating
Crushing the Candies
This is where the magic begin extracts! To achieve a smooth, uniform coating, you’ll need to break down the Jolly Rancher candies. The easiest way to do this is to place them in a sturdy zip-top bag. Use a rolling pin, a mallet, or even the bottom of a heavy pan to crush the candies into a fine powder. The finer the crush, the smoother your candy coating will be. You can also use a food processor for a very fine powder, but be careful not to over-process into a paste. If you’re using assorted flavors, you can crush them all together for a rainbow effect, or crush them separately if you want to create distinct color layers.
Melting the Candy
Now it’s time to melt our crushed Jolly Ranchers. You have two main methods for this:
Stovetop Method: In a small, heavy-bottomed saucepan, combine your crushed Jolly Ranchers with 1-2 tablespoons of water. Start with just 1 tablespoon and add more only if needed. Heat over low to medium-low heat, stirring constantly. It’s important to keep the heat low to prevent the candy from burning. The candy will start to melt and form a syrup. Continue stirring until all the candy is dissolved and the mixture is smooth and syrupy. Be patient, as this can take several minutes.
Microwave Method: Place the crushed Jolly Ranchers and 1 tablespoon of water in a microwave-safe bowl. Microwave on high for 30-second intervals, stirring well after each interval. Continue microwaving and stirring until the candy is completely melted and smooth. This method can be quicker but requires careful monitoring to avoid burning.
Coating and Decorating Your Jolly Rancher Candy Apples
The Dipping Process
Once your candy syrup is smooth and ready, carefully remove the saucepan or bowl from the heat. Working quickly but cautiously (this syrup will be very hot!), tilt the pan slightly and dip one apple at a time, swirling it to coat evenly. You want to ensure a good, consistent layer of candy over the entire surface of the apple. Use your skewer to help guide the coating and avoid drips where possible. If the candy starts to thicken too much, you can briefly return it to very low heat or add another teaspoon of water and stir to loosen it up. Be mindful that adding too much water can make the coating too thin.
Setting and Adding Decorations
As soon as an apple is coated, lift it out and let any excess candy drip back into the pan. Hold the apple for a moment or two, allowing the coatigin extractto begin to set. Then, either place it on parchment paper or a silicone baking mat to cool completely, or if you’re decorating immediately, hold it over your decorating station. While the candy coating is still warm and slightly tacky, this is the perfect time to add your decorations. Generously sprinkle your colorful sprinkles over the candy. You can also dust them with edible glitter for an extra touch of sparkle. If you plan to drizzle with melted chocolate, it’s best to let the Jolly Rancher coating set up a bit more first.
Adding the Chocolate Drizzle (Optional)
If you’re adding a chocolate drizzle, ensure your Jolly Rancher candy coating is mostly set but still slightly pliable. Melt your chocolate using your preferred method (double boiler or microwave). Transfer the melted chocolate to a piping bag with a small tip, or simply use a fork or spoon to drizzle the chocolate back and forth over the candy-coated apples. This adds another layer of flavor and a beautiful visual contrast. You can use a different color of chocolate for an even more striking effect. Allow the chocolate drizzle to set completely before handling further.
Final Cooling and Serving
Once all your apples are coated and decorated, allow them to cool completely at room temperature. This can take anywhere from 30 minutes to an hour, depending on the thickness of your candy coating and the room temperature. Resist the urge to refrigerate them, as this can sometimes make the candy coating sticky or cause condensation to form. Once fully cooled and hardened, your Jolly Rancher candy apples are ready to be enjoyed!
Conclusion:
And there you have it – a delightful guide to creating your very own Jolly Rancher Candy Apples! We’ve walked through each step, from selecting the perfect apples to achieving that satisfyingly hard candy shell. These vibrant and flavorful treats are not just a feast for the eyes but a burst of sweet and tart goodness in every bite. They’re perfect for autumn gatherings, holiday parties, or simply as a fun and rewarding kitchen project.
To serve, these Jolly Rancher Candy Apples are fantastic on their own, perhaps displayed artistically on a platter. For a more decadent experience, consider pairing them with a scoop of vanilla bean ice cream or a drizzle of caramel sauce. For variations, feel free to experiment with different Jolly Rancher flavors to create a rainbow of colors and tastes! You could also add a sprinkle of edible glitter or finely chopped nuts to the still-wet candy coating for added texture and visual appeal.
Don’t be intimidated by the candy-making process. With a little patience and careful attention to temperature, you’ll be a pro in no time. So gather your ingredients, put on your favorite apron, and get ready to impress yourself and your loved ones with these spectacular Jolly Rancher Candy Apples. Happy candy making!
Frequently Asked Questions about Jolly Rancher Candy Apples:
Q: My candy coating is too soft and sticky. What went wrong?
A: This usually happens if the sugar syrup doesn’t reach the correct temperature. For a hard crack stage, the syrup needs to reach between 300-310°F (149-154°C). Using a candy thermometer is crucial here. If it’s too low, the coating will remain sticky. Ensure your thermometer is calibrated correctly and you’re allowing the syrup to cook undisturbed until it hits the target temperature.
Q: Can I use different types of apples for Jolly Rancher Candy Apples?
A: Absolutely! While firmer, tart apples like Granny Smith are traditional and hold up well, you can certainly experiment. Fuji, Honeycrisp, or even Gala apples can work, but be mindful of their sweetness. You might want to adjust the amount of Jolly Ranchers if using sweeter apples to maintain a good flavor balance. Just ensure any apple you choose is firm enough not to become mushy when the hot candy coating is applied.
Jolly Rancher Candy Apples
A vibrant and sweet homemade treat featuring tart apples coated in a hard, colorful Jolly Rancher candy shell, perfect for parties or a fun dessert.
Ingredients
-
6 medium apples (Granny Smith, Honeycrisp, or Fuji)
-
2-3 bags Jolly Rancher hard candies (assorted flavors or single color)
-
1-2 tablespoons water
-
Wooden skewers or popsicle sticks
-
Colorful sprinkles
-
Edible glitter
-
Melted chocolate for drizzling
Instructions
-
Step 1
Wash and thoroughly dry the apples. Remove the stems and firmly insert a wooden skewer or popsicle stick into the core of each apple. -
Step 2
Place Jolly Rancher candies in a sturdy zip-top bag and crush them into a fine powder using a rolling pin or mallet. For assorted flavors, you can crush them together or separately. -
Step 3
To melt the candy, combine crushed Jolly Ranchers with 1-2 tablespoons of water in a heavy-bottomed saucepan. Heat over low to medium-low heat, stirring constantly until smooth and syrupy. Alternatively, microwave in 30-second intervals, stirring between each, until melted and smooth. -
Step 4
Working quickly, dip each prepared apple into the hot candy syrup, swirling to coat evenly. Allow excess to drip back into the pan. -
Step 5
While the candy coating is still warm and tacky, add decorations like colorful sprinkles and edible glitter. If drizzling with chocolate, allow the Jolly Rancher coating to set slightly first. -
Step 6
Let the candy apples cool completely at room temperature for about 30 minutes to an hour until the coating is hardened.
Important Information
Nutrition Facts (Per Serving)
It is important to consider this information as approximate and not to use it as definitive health advice.
Allergy Information
Please check ingredients for potential allergens and consult a health professional if in doubt.
Leave a Comment