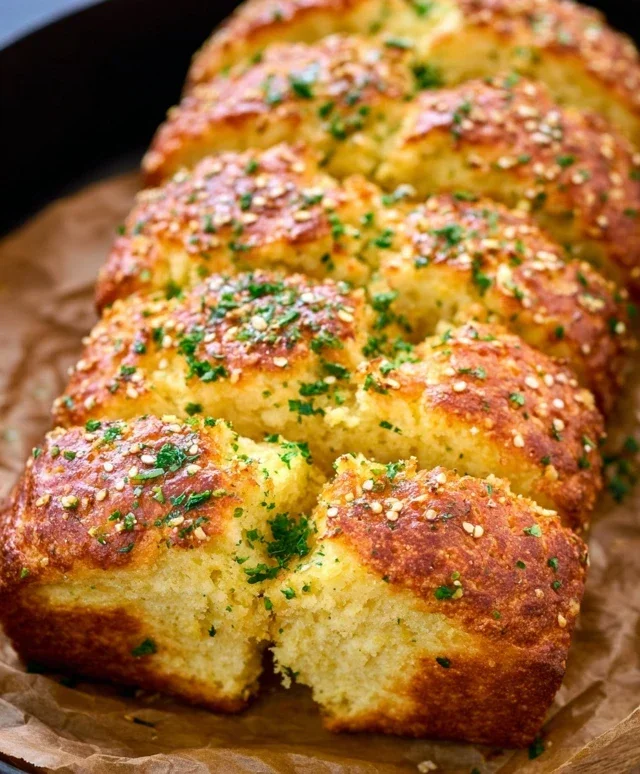
Garlic Butter Keto Bread is the ultimate answer to all your carb cravings! If you’ve been missing that satisfying chew and comforting aroma of freshly baked bread on your low-carb journey, then get ready to rejoice. This isn’t just any keto bread; it’s a game-changer that will have you reaching for more. We all know how incredibly delicious garlic butter is, and infusing it into a tender, slightly crisp keto bread creates a flavor combination that is simply irresistible. What makes this Garlic Butter Keto Bread truly special is its perfect texture – no more dry, crum extractbly disappointments! It’s wonderfully soft on the inside with a delightful golden crust, all while staying firmly within your ketogenic macros. Imagin extracte slathering it with more butter, dipping it into your favorite soup, or enjoying it as a side to a hearty meal. This recipe delivers pure, unadulterated bread bliss, guilt-free.

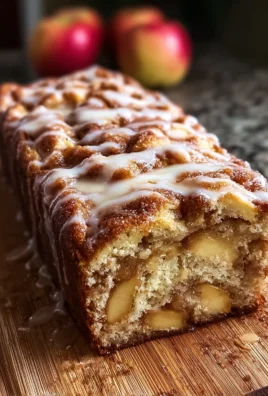
Garlic Butter Keto Bread
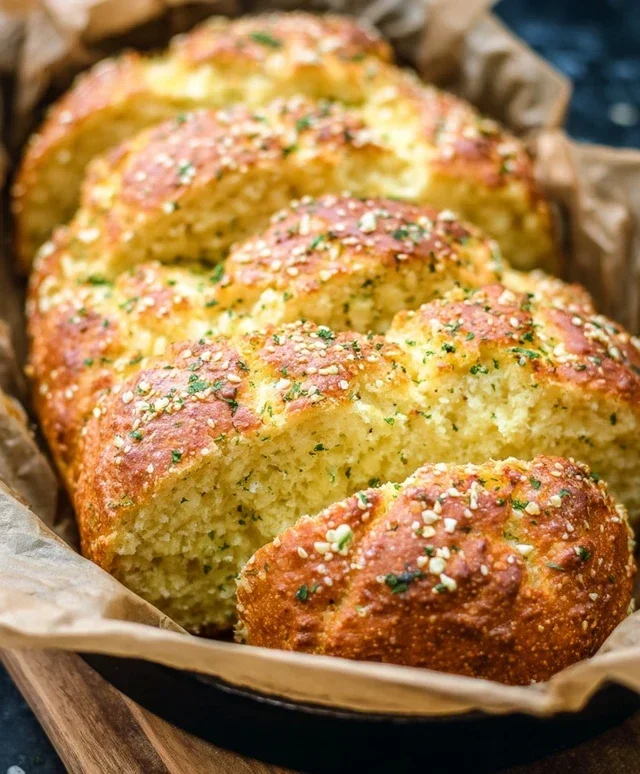
Hello fellow keto enthusiasts! Today, I’m thrilled to share a recipe that has become an absolute staple in my kitchen: Garlic Butter Keto Bread. This isn’t your average loaf; it’s moist, incredibly flavorful, and the perfect accompaniment to so many keto meals. Whether you’re craving a side for your favorite soup, a base for some avocado toast, or just want a satisfying keto-friendly bread experience, this recipe delivers. It’s surprisingly easy to make, and the aroma that fills your kitchen while it bakes is just divine. Get ready to impress yourself and anyone lucky enough to share this deliciousness with you!
Ingredients:
Getting Started: Preparation is Key
Before we dive into mixing, let’s get our mise en place in order. This makes the baking process so much smoother. Preheat your oven to 350°F (175°C). This is a crucial step for ensuring even baking, and you don’t want to put your beautiful bread into a lukewarm oven. Next, prepare your baking pan. I like to use a standard 8×4 inch loaf pan. Grease it well with butter or a keto-friendly cooking spray, and then line the bottom with parchment paper. Leaving a little overhang on the sides of the parchment paper will make it super easy to lift the bread out of the pan once it’s baked. This is a little trick I learned that saves a lot of frustration! Also, make sure your eggs are at room temperature. Cold eggs can sometimes affect the texture of baked goods, and we want this bread to be as moist and tender as possible. If you forgot to take your eggs out in advance, no worries – you can quickly warm them by placing them in a bowl of warm water for about 5-10 minutes.
Mixing the Dry Ingredients
In a medium-sized bowl, we’re going to combine all of our dry ingredients. This includes the almond flour and coconut flour. It’s important to whisk these together thoroughly to ensure there are no clumps and that the leavening agents are evenly distributed. Then, add your baking powder and salt. Give it another good whisk. The baking powder is what will give our bread its rise and light texture, while the salt enhances all the flavors. Properly combining the dry ingredients at this stage prevents pockets of baking powder or salt from forming in your finished bread.
Whipping Up the Wet Ingredients and Flavor Boosters
Now, in a separate, larger bowl, let’s get our wet ingredients ready. Crack in your four large eggs. Whisk them lightly just to break them up. Then, pour in your melted butter. I like to let my butter cool slightly after melting so it doesn’t cook the eggs prematurely. Next, add the unsweetened almond milk and the apple cider vinegar. The apple cider vinegar plays a vital role here. When it reacts with the baking powder, it creates a wonderfully tender crum extractb and helps with the rise. Don’t worry, you won’t taste the vinegar in the final bread! Now for the stars of the show: the garlic and parsley. Mince your garlic cloves as finely as possible for the best flavor distribution. Chop your fresh parsley – fresh herbs really make a difference here. If you’re using Parmesan cheese, stir it in now too. Whisk all of these wet ingredients together until they are well combined.
Combining and Baking
Now comes the exciting part – bringin extractg it all together! Gradually add your dry ingredients to the wet ingredients, mixing until just combined. Be careful not to overmix at this stage. Overmixing can develop the gluten in the almond flour too much, resulting in a tougher bread. We’re aiming for a thick batter. Once everything is incorporated, pour the batter into your prepared loaf pan. Smooth the top with a spatula. Now, carefully place the pan into your preheated oven.
Bake for 35-45 minutes. You’ll know it’s ready when the top is golden brown and a toothpick inserted into the center comes out clean. The smell that will fill your kitchen is absolutely non-intoxicating – roasted garlic, buttery goodness, and that subtle hint of parsley. The baking time can vary slightly depending on your oven, so keeping an eye on it during the last 15-20 minutes is a good idea. If the top starts to brown too quickly, you can loosely tent it with aluminum foil.
Cooling and Serving
Once baked, remove the loaf pan from the oven and let the bread cool in the pan for about 10-15 minutes. This is important for allowing the bread to set properly. After that initial cooling period, carefully use the parchment paper overhang to lift the bread out of the pan and place it on a wire rack to cool completely. Resist the urge to slice into it while it’s still hot! Letting it cool completely will give you the best texture and prevent it from crum extractbling when you slice it. Once cooled, slice it into your desired thickness. This Garlic Butter Keto Bread is fantastic served warm or at room temperature. Enjoy it plain, toasted, or with your favorite keto-friendly toppings like butter, cream cheese, or avocado!
Conclusion:
I’m so excited for you to try this incredible Garlic Butter Keto Bread! It’s truly a game-changer for anyone following a low-carb lifestyle, offering all the comforting satisfaction of traditional bread without the carb count. The rich, buttery flavor infused with pungent garlic creates a truly irresistible aroma and taste that will have you reaching for another slice. This recipe is surprisingly simple to make, making it perfect for both begin extractner and experienced bakers looking for a delicious keto-friendly staple.
This versatile bread is wonderful served warm as is, but it also shines alongside your favorite keto meals. Think of it as the perfect accompaniment to creamy soups, hearty stews, or as a base for your avocado toast. For a fun twist, consider adding a sprinkle of fresh herbs like rosemary or chives to the dough for an extra layer of flavor. Don’t be afraid to experiment – the possibilities are endless!
I truly encourage you to give this Garlic Butter Keto Bread a try. It’s a fantastic way to enhance your low-carb journey and enjoy bread again. Let me know how you like it in the comments!
Frequently Asked Questions:
Can I make this bread ahead of time?
Yes, absolutely! This Garlic Butter Keto Bread can be baked and stored in an airtight container at room temperature for up to 2-3 days, or in the refrigerator for up to a week. You can also freeze slices for longer storage.
What kind of flour is best for this keto bread?
I typically use a blend of almond flour and coconut flour for the best texture and flavor. Almond flour provides a good structure, while coconut flour helps absorb moisture and achieve a bread-like consistency. Ensure you’re using finely ground almond flour for optimal results.
My bread turned out a bit dense. What could I have done differently?
Density can sometimes be related to overmixing or not properly activating the leavening agents. Ensure your baking powder or baking soda is fresh. Also, avoid overworking the dough once the wet and dry ingredients are combined; mix just until they come together. Make sure your oven temperature is accurate, as an oven that runs too cool can also contribute to a denser bake.
Garlic Butter Keto Bread
A delicious and easy keto-friendly bread recipe with garlic and butter.
Ingredients
-
1 1/4 cups almond flour
-
1/4 cup psyllium husk powder
-
2 teaspoons baking powder
-
1/2 teaspoon salt
-
2 large eggs
-
1/4 cup melted unsalted butter
-
1/4 cup warm water
-
2 cloves garlic, minced
-
1 tablespoon fresh parsley, chopped
Instructions
-
Step 1
Preheat oven to 350°F (175°C). Grease and flour a small loaf pan. -
Step 2
In a large bowl, whisk together almond flour, psyllium husk powder, baking powder, and salt. -
Step 3
In a separate bowl, whisk together eggs, melted butter, and warm water. -
Step 4
Pour the wet ingredients into the dry ingredients and mix until well combined. The dough will be sticky. -
Step 5
Fold in the minced garlic and chopped parsley. -
Step 6
Transfer the dough to the prepared loaf pan and spread evenly. -
Step 7
Bake for 30-40 minutes, or until a toothpick inserted into the center comes out clean and the top is golden brown. -
Step 8
Let cool in the pan for 10 minutes before transferring to a wire rack to cool completely.
Important Information
Nutrition Facts (Per Serving)
It is important to consider this information as approximate and not to use it as definitive health advice.
Allergy Information
Please check ingredients for potential allergens and consult a health professional if in doubt.
Leave a Comment