No Knead Crusty Rolls are more than just a side dish; they’re an edible hug, a testament to the simple magic of flour, water, and time. Have you ever dreamt of pulling warm, airy rolls with a perfectly crisp exterior straight from your oven? The aroma alone is enough to transport you to a cozy bakery on a crisp autumn morning. What makes these no knead crusty rolls so utterly irresistible is their incredible ease of preparation combined with an undeniably superior texture. Forget the hours spent kneading and waiting for dough to rise; this method is designed for busy lives and impatient taste buds, delivering bakery-quality results with minimal effort. The secret lies in a slow fermentation that develops deep flavor and an airy crum extractb, while the high heat and steam create that signature shatteringly crisp crust. Get ready to impress yourself and your loved ones with these deceptively simple yet profoundly delicious rolls.
Why You’ll Love These
These no knead crusty rolls are a revelation for anyone who has ever felt intimidated by bread making. They require no special equipment, no advanced techniques, and most importantly, no arduous kneading. The satisfaction of creating such beautiful and flavorful bread from scratch, with such minimal intervention, is immense. They possess that perfect chew, that satisfying crunch, and a delicate, slightly tangy flavor that is simply addictive. They are the ideal accompaniment to hearty soups, rich stews, or simply slathered with butter. You’ll find yourself reaching for this recipe time and time again, proving that truly exceptional bread can be incredibly accessible.
The Magic of No Knead
The beauty of the “no knead” method for these crusty rolls is its ability to harness the power of time to develop gluten and flavor. Instead of physically working the dough, we allow a wet, shaggy mixture to ferment slowly. This extended fermentation period allows natural yeasts and bacteria to multiply, creating complex flavor compounds and a more openrum extractiry crumb structure. The result is a dough that is incredibly easy to handle and bakes into rolls that boast a delightful contrast between a tender, fluffy interior and a deeply golden, wonderfully crisp exterior. It’s a technique that proves patience truly is a virtue when it comes to baking.

Ingredients:
- 3 cups all-purpose flour
- 1 ½ teaspoons instant yeast
- 1 teaspoon salt
- 1 ½ cups lukewarm water (around 105-115°F or 40-46°C)
- 1 tablespoon olive oil, plus extra for greasing
- Optional: Cornmeal or semolina for dusting
Making the Dough
Step 1: Combine Dry Ingredients
In a large mixing bowl, whisk together the all-purpose flour, instant yeast, and salt. It’s important to ensure the yeast and salt are evenly distributed throughout the flour. This initial step helps to guarantee a consistent rise and flavor in your No Knead Crusty Rolls. A whisk is ideal for this, as it breaks up any clumps in the flour and aerates the mixture. Don’t use active dry yeast if your recipe calls for instant yeast, as the results can vary significantly. Instant yeast is designed to be mixed directly with the dry ingredients and doesn’t require proofing.
Step 2: Add Wet Ingredients and Mix
Make a well in the center of the dry ingredients. Pour in the lukewarm water and the tablespoon of olive oil. Use a sturdy spoon or a spatula to mix everything together until a shaggy, sticky dough forms. There’s no need to overmix; you just want to make sure all the dry flour is incorporated. This dough will be quite wet and sticky, which is exactly what we’re aiming for in a no-knead recipe. Resist the urge to add more flour at this stage, as that will result in denser rolls. The high hydration is key to achieving that wonderfully open crum extractb and chewy interior characteristic of these No Knead Crusty Rolls.
Step 3: The First Rise (Bulk Fermentation)
Cover the bowl tightly with plastic wrap or a damp kitchen towel. Let the dough rise in a warm place for at least 12 to 18 hours. Yes, you read that right – nearly a full day! This long, slow fermentation is the magic behind the “no-knead” aspect. During this time, the yeast will work its magic, developing flavor and structure without any physical manipulation from your hands. The dough will approximately double in size and become bubbly and slightly less sticky, although it will remain quite soft. A slightly cooler environment will simply require a longer rise time. You’ll know it’s ready when you see plenty of bubbles on the surface and the dough has visibly expanded.
Shaping and Second Rise
Step 4: Shape the Rolls
Generously flour your work surface. Gently scrape the risen dough out of the bowl onto the floured surface. The dough will be very wet and possibly a bit difficult to handle, but that’s normal. You don’t want to punch down the air that has developed. Instead, gently try to divide the dough into 6 to 8 equal portions using a bench scraper or a sharp knife. To shape each portion, gently pull the edges of each piece towards the center, creating a rough ball. You can also gently cup your hands around the dough and rotate it to create a round shape. The goal is to create some surface tension without overworking the dough. Lightly flour your hands if the dough becomes too sticky. Avoid adding too much extra flour to the dough itself.
Step 5: Second Rise and Preparing for Baking
Lightly grease a baking sheet with olive oil or line it with parchment paper. If you’re using parchment paper, you can lightly dust it with cornmeal or semolina for an extra crispy bottom. Place the shaped rolls onto the prepared baking sheet, leaving some space between them as they will expand further. Cover the baking sheet loosely with plastic wrap or a clean kitchen towel. Let the rolls rise for another 30 to 60 minutes, or until they are puffy and have increased in size. While the rolls are undergoing their second rise, preheat your oven to 450°F (230°C). It’s crucial to have a hot oven to achieve that signature crusty exterior. You can also place an empty oven-safe pan on the bottom rack of your oven during preheating; this will be used to create steam.
Baking the No Knead Crusty Rolls
Step 6: Baking with Steam
Once the rolls have completed their second rise and your oven is fully preheated, it’s time to bake. Carefully remove the rolls from the oven. If you prepared an oven-safe pan for steam, carefully pour about 1 cup of hot water into it. This will create a burst of steam, which is essential for developing a wonderfully crisp crust on your No Knead Crusty Rolls. Immediately place the baking sheet with the rolls back into the oven. Bake for 20 to 25 minutes, or until the rolls are a deep golden brown and sound hollow when tapped on the bottom. The steam will dissnon-alcoholic ipate after a few minutes, so don’t worry if you don’t see it throughout the entire baking process.
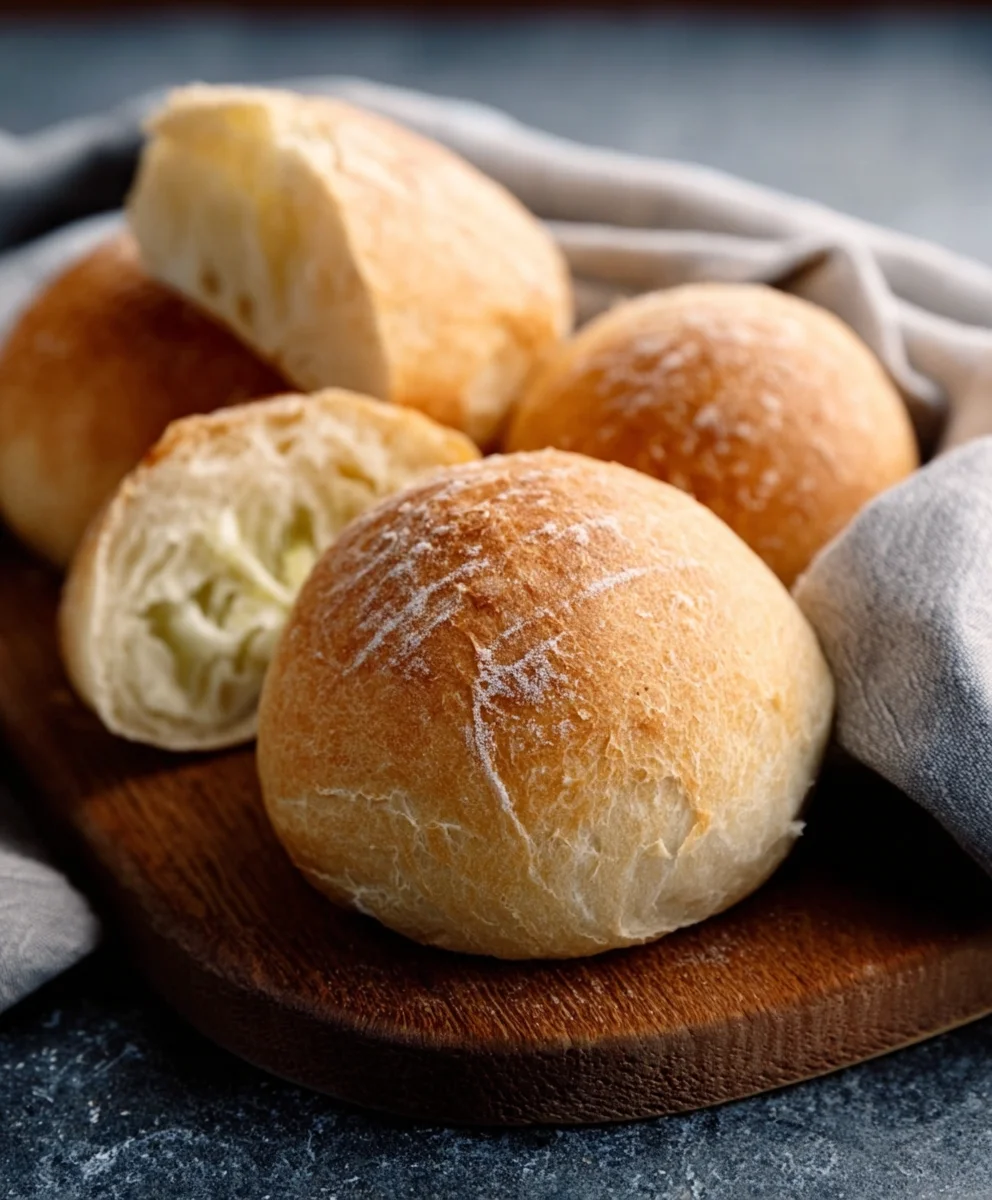
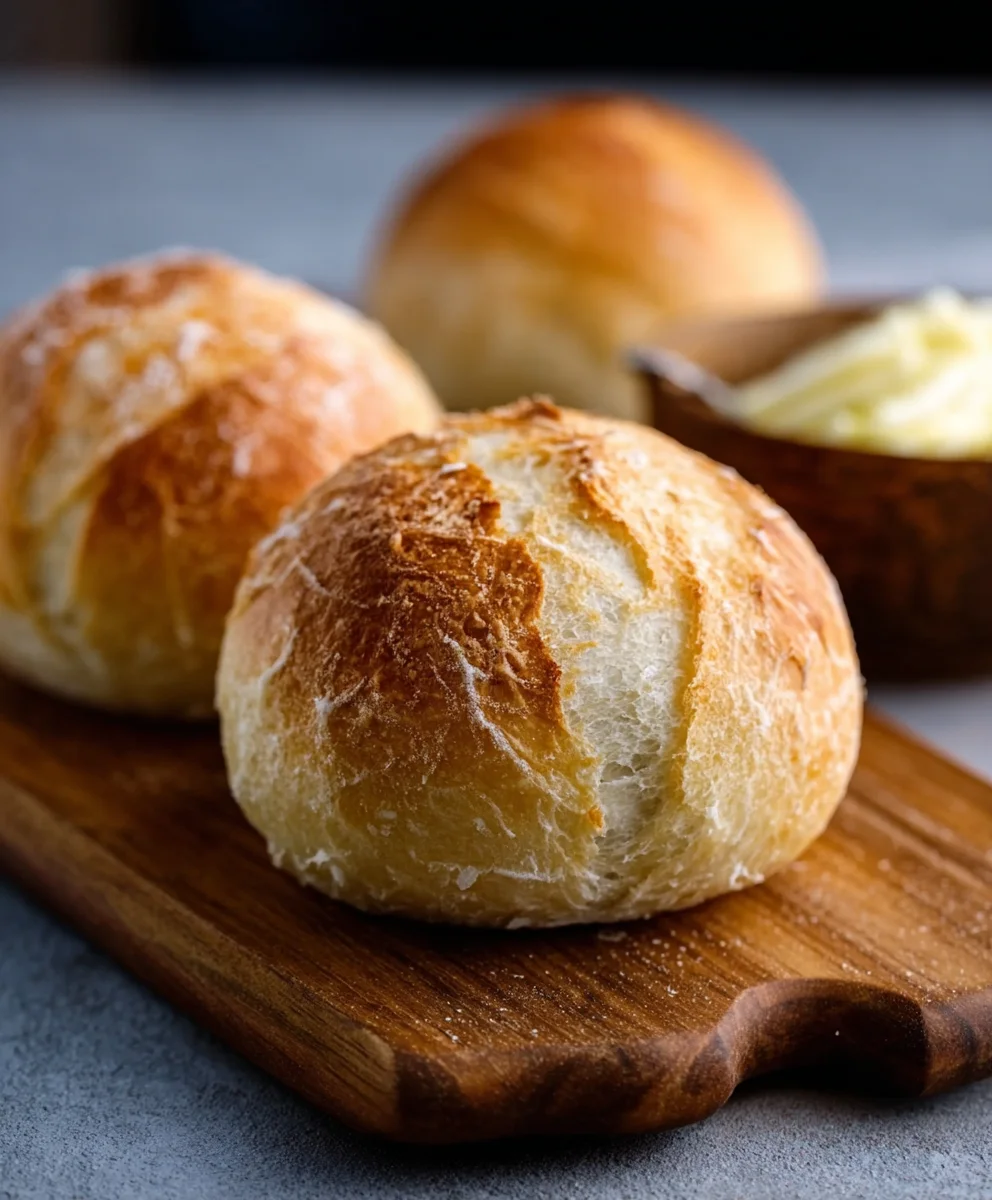
Step 7: Cooling and Enjoying
Once baked to perfection, remove the No Knead Crusty Rolls from the oven and transfer them to a wire rack to cool completely. This step is important to prevent the bottoms from becoming soggy. Listen for that satisfying crackle as they cool – it’s the sound of a perfectly crusted roll! These rolls are best enjoyed fresh, ideally within a day or two of baking. They are fantastic served warm with butter, alongside soups and stews, or used for sandwiches. The slightly chewy interior and wonderfully crisp exterior are truly irresistible.
Conclusion:
You’ve now mastered the art of creating incredibly delicious No Knead Crusty Rolls! This recipe truly lives up to its name, delivering that satisfying crunch on the outside and a wonderfully soft, airy crum extractb within, all with minimal effort. The magic lies in the long fermentation, which develops fantastic flavor and that desirable crust. We encourage you to give these a try – you’ll be amazed at how simple it is to produce bakery-quality bread in your own kitchen. Don’t be afraid to experiment and enjoy the process!
These No Knead Crusty Rolls are incredibly versatile. Serve them warm alongside your favorite soups or stews, use them as the base for gourmet sandwiches, or simply enjoy them slathered with butter. For a delightful variation, consider adding a sprinkle of herbs like rosemary or thyme to the dough before baking, or perhaps some grated cheese for a savory kick.
Frequently Asked Questions:
Q: Can I make the dough ahead of time?
Absolutely! The beauty of this recipe is that the dough benefits from a long, slow fermentation. You can prepare the dough and let it rise in the refrigerator for up to 24-48 hours. This extended chill time can even deepen the flavor. Just bring it back to room temperature for about an hour before shaping and baking.
Q: My rolls didn’t get very crusty. What could I have done wrong?
A few factors contribute to crustiness. Ensure your oven is fully preheated. Using a Dutch oven or a baking stone with steam can greatly enhance the crust. To create steam in a standard oven, place a pan of hot water on the bottom rack during the initial baking phase. Also, make sure you’re baking them until they are deeply golden brown; don’t be afraid of a little color!
Easy No Knead Crusty Rolls
Perfectly chewy bread with a wonderfully crisp exterior, achieved with a simple no-knead method.
Ingredients
-
3 cups all-purpose flour
-
1 ½ teaspoons instant yeast
-
1 teaspoon salt
-
1 ½ cups lukewarm water (around 105-115°F or 40-46°C)
-
1 tablespoon olive oil, plus extra for greasing
-
Cornmeal or semolina for dusting (optional)
Instructions
-
Step 1
In a large mixing bowl, whisk together the all-purpose flour, instant yeast, and salt. Ensure yeast and salt are evenly distributed. This helps guarantee a consistent rise and flavor. -
Step 2
Make a well in the center of the dry ingredients. Pour in the lukewarm water and olive oil. Mix with a spoon or spatula until a shaggy, sticky dough forms. Do not overmix. The dough will be wet and sticky; resist adding more flour. -
Step 3
Cover the bowl tightly and let the dough rise in a warm place for 12 to 18 hours. This long, slow fermentation develops flavor and structure. The dough will approximately double in size and become bubbly. -
Step 4
Generously flour your work surface. Gently scrape the risen dough out and divide it into 6 to 8 equal portions. Gently shape each portion into a rough ball, creating some surface tension without overworking. -
Step 5
Lightly grease a baking sheet or line with parchment paper, optionally dusted with cornmeal or semolina. Place shaped rolls on the sheet, leaving space. Cover loosely and let rise for 30 to 60 minutes until puffy. Preheat oven to 450°F (230°C) with an empty oven-safe pan on the bottom rack for steam. -
Step 6
Once rolls have completed their second rise and the oven is preheated, carefully pour about 1 cup of hot water into the preheated oven-safe pan to create steam. Immediately place the baking sheet with rolls into the oven. -
Step 7
Bake for 20 to 25 minutes, or until deep golden brown and they sound hollow when tapped on the bottom. Remove from oven and transfer to a wire rack to cool completely.
Important Information
Nutrition Facts (Per Serving)
It is important to consider this information as approximate and not to use it as definitive health advice.
Allergy Information
Please check ingredients for potential allergens and consult a health professional if in doubt.

Leave a Comment