Dreamy Pink & Blue Coquette Party. Imagin extracte a scene straight out of a pastel-hued fairytnon-alcoholic ale, where every detail whispers of playful elegance and whimsical charm. That’s the magic we’re conjuring today with our guide to creating the most enchanting Dreamy Pink & Blue Coquette Party. This isn’t just any party theme; it’s an invitation to embrace a softer, more romantic aesthetic, perfect for birthdays, bridal showers, or simply a delightful gathering with friends. We adore this theme because it allows for such creative expression, blending delicate femininity with a touch of vintage flair. What truly makes a Dreamy Pink & Blue Coquette Party special is the harmonious interplay of soft blues and blush pinks, punctuated by charming details like lace, ribbons, and floral accents. It’s a celebration designed to be as visually stunning as it is joyfully immersive, leaving your guests utterly captivated.
What You’ll Need for Your Dreamy Pink & Blue Coquette Party
For the Decorations:
Ribbon in various shades of pink and blue
Lace doilies and trim
Floral arrangements featuring roses, peonies, and hydrangeas in pastel colors
Light pink and baby blue balloons
Pearl garlands
Vintage-inspired tableware (think delicate china or elegant gold-rimmed plates)
White tablecloth
Candlesticks with cream or white candles
For the Sweets & Treats:
Vanilla cupcakes with pink and blue buttercream frosting
Macarons in strawberry and blueberry flavors
Sugar cookies decorated with coquette bows
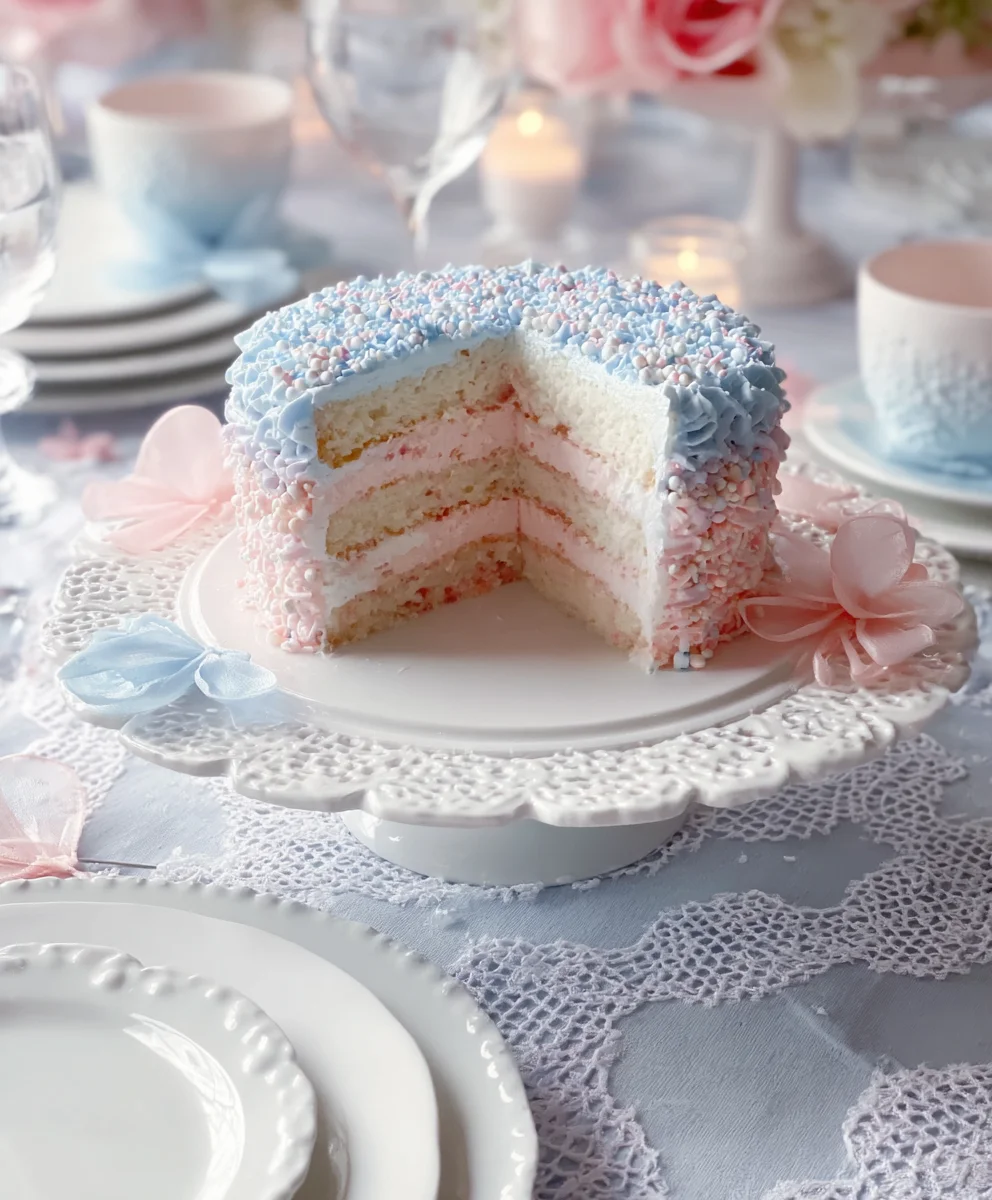
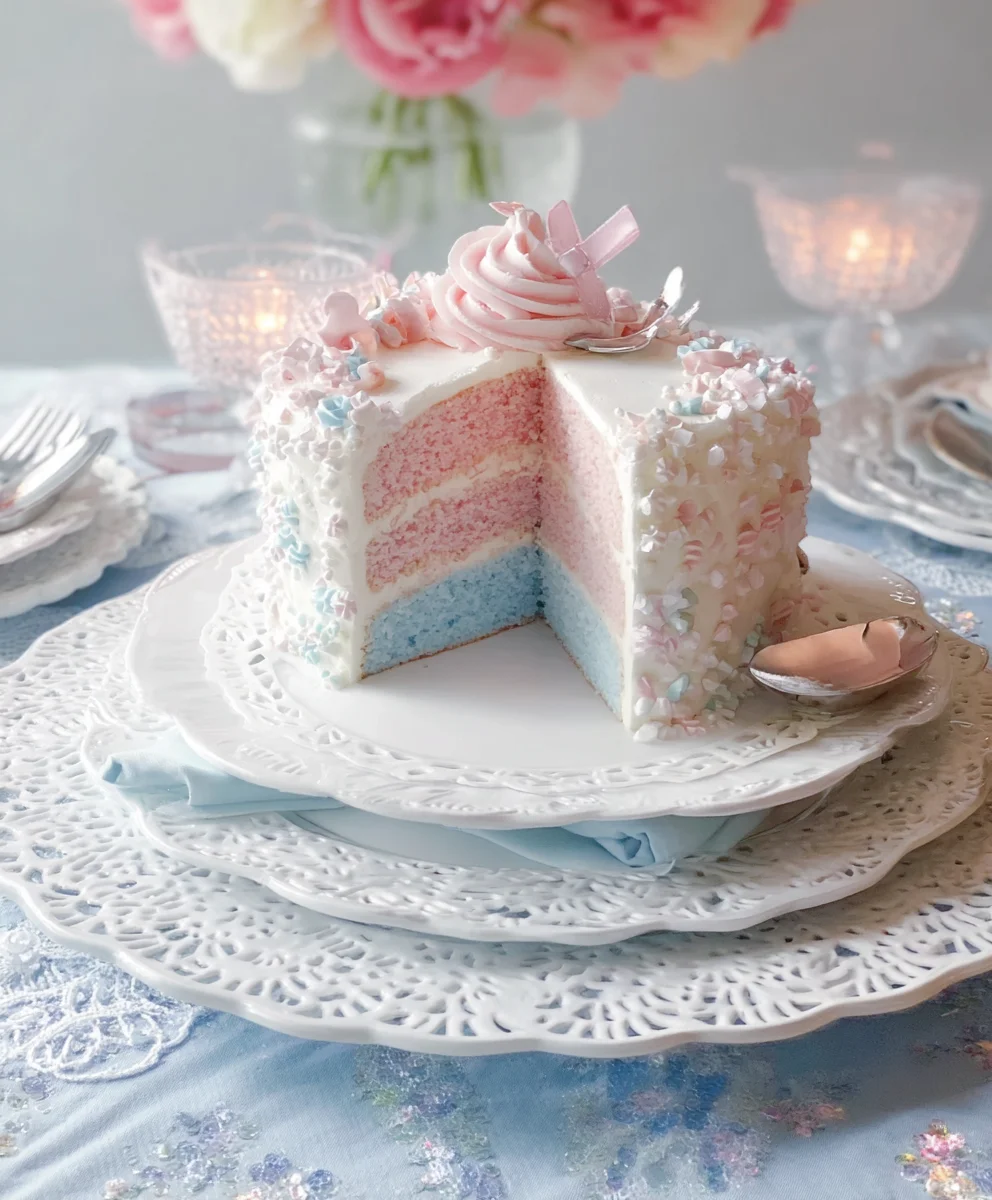
A tiered cake adorned with edible flowers and ribbon details
Pink lemonade and sparkling water with berry garnishes
For a Touch of Coquette Charm:
Bow hair clips or headbands for guests
Personalized favor boxes tied with satin ribbons
A playlist of whimsical and romantic music

Ingredients:
- 1 cup (2 sticks) unsalted butter, softened
- 2 cups granulated sugar
- 4 large eggs, room temperature
- 1 teaspoon vanilla extract
- 3 cups all-purpose flour
- 1 teaspoon baking powder
- 1/2 teaspoon salt
- 1 cup milk, room temperature
- Pink gel food coloring
- Blue gel food coloring
- 1 (16 ounce) package confectioners’ sugar
- 1/4 cup milk
- 1/2 teaspoon vanilla extract
- Edible pink glitter
- Edible blue glitter
- Assorted pink and blue sprinkles (nonpareils, jimmies, edible pearls)
Getting Started: The Dreamy Coquette Batter
Preheat and Prep
First things first, let’s get our oven ready and prepare our baking sheets. Preheat your oven to 350°F (175°C). This consistent temperature is crucial for even baking, ensuring our Dreamy Pink & Blue Coquette Party cakes turn out perfectly golden brown on the outside and wonderfully moist within. Line two baking sheets with parchment paper. Parchment paper is a baker’s best friend, preventing sticking and making cleanup a breeze. You can also lightly grease and flour your baking sheets if you don’t have parchment paper on hand.
Creaming the Butter and Sugar
In a large mixing bowl, combine the softened unsalted butter and granulated sugar. Using an electric mixer (stand mixer or hand mixer), cream these together on medium speed until the mixture is light and fluffy. This process incorporates air into the batter, which is key to a tender crum extractb. Scrape down the sides of the bowl occasionally to ensure everything is well combined. You’re looking for a pnon-alcoholic ale yellow, almost white, creamy consistency. This step usually takes about 3-5 minutes. Don’t rush it; this is where a lot of the magic begin extracts for our cake’s texture.
Adding Eggs and Vanilla
Next, add the large eggs one at a time, beating well after each addition. Make sure each egg is fully incorporated before adding the next. If your eggs are cold, they can sometimes cause the butter mixture to curdle. To avoid this, ensure your eggs are at room temperature. You can achieve this by placing them in a bowl of warm water for about 5-10 minutes if you forget to take them out of the fridge ahead of time. After the eggs are mixed in, stir in the vanilla extract. The vanilla adds a wonderful aroma and depth of flavor that complements the sweetness of the cake.
Combining Dry Ingredients
In a separate medium bowl, whisk together the all-purpose flour, baking powder, and salt. Whisking these dry ingredients before adding them to the wet ingredients ensures that the baking powder and salt are evenly distributed throughout the flour. This prevents pockets of leavening or salt in your cake, leading to a more uniform rise and flavor. Sifting the flour is also an option if you want an even lighter texture, but whisking is usually sufficient for this recipe.
Alternating Wet and Dry Ingredients
Now comes the part where we combine our wet and dry ingredients. Gradually add the flour mixture to the butter mixture, alternating with the room temperature gin extractk. Begin and end with the dry ingredients. For example, add about one-third of the flour mixture, mix until just combined, then add half of the milk, mix, add another third of the flour, mix, add the remaining milk, mix, and finally add the last of the flour mixture and mix until just combined. It’s important not to overmix the batter at this stage. Overmixing can develop the gluten in the flour too much, resulting in a tough cake. Mix only until you no longer see streaks of flour.
Dividing and Coloring the Batter
This is where we introduce the dreamy coquette colors! Divide the cake batter equally into three separate bowls. In one bowl, add a few drops of pink gel food coloring and mix until the color is evenly distributed. Gel food coloring is preferable as it provides a vibrant color without adding extra liquid to the batter, which could affect the cake’s texture. In the second bowl, add a few drops of blue gel food coloring and mix until smooth. The third bowl of batter will remain plain, serving as our base. This vanilla portion will peek through our pink and blue layers, adding to the delightful visual effect.
Creating the Swirl Effect
Now for the fun part of creating that beautiful coquette swirl! Spoon dollops of the plain, pink, and blue batters randomly into your prepared baking sheets. Don’t overthink the placement; randomness is key to achieving a whimsical, marbled effect. Aim for roughly even amounts of each color, but some variation is fine. Once the batter is in the pans, gently swirl the colors together using a toothpick or the tip of a knife. Drag the toothpick through the batters in a zig-zag or figure-eight motion. Be careful not to over-swirl, as this can muddy the colors. You want distinct swirls and patches of each color to remain visible.
Baking the Dreamy Cakes
Baking Time and Checking for Doneness
Place the baking sheets in the preheated oven and bake for 25-30 minutes, or until a wooden skewer or toothpick inserted into the center of the cakes comes out clean. The exact baking time will depend on your oven and the thickness of your batter in the pan. Keep an eye on them during the last 10 minutes of baking. If the tops start to brown too quickly, you can loosely tent them with aluminum foil. Once baked, remove the cakes from the oven and let them cool in the pans for about 10-15 minutes. This allows them to set up slightly before you attempt to remove them, preventing breakage.
Cooling and Frosting Preparation
After the initial cooling in the pans, carefully invert the cakes onto a wire rack to cool completely. Make sure they are entirely cool before you even think about frosting them. Frosting a warm cake is a recipe for disaster, as the frosting will melt and slide right off. While the cakes are cooling, prepare the dreamy coquette frosting. In a medium bowl, combine the confectioners’ sugar, 1/4 cup milk, and 1/2 teaspoon vanilla extract. Whisk until smooth and creamy. If the frosting is too thick, add a tiny bit more milk (a teaspoon at a time) until you reach your desired consistency. If it’s too thin, add a bit more confectioners’ sugar. You want a spreadable, but not runny, frosting. For an extra touch of shimmer, you can also stir in some of the edible pink and blue glitter at this stage.
Decorating for the Dreamy Pink & Blue Coquette Party
Frosting the Cakes
Once your cakes are completely cool, it’s time to frost them! Use an offset spatula or a butter knife to spread a generous layer of the pink and blue swirled frosting over the tops of the cakes. Don’t worry about making it perfectly smooth; a slightly rustic, textured look can be very charming and fitting for the coquette aesthetic. You can also frost the sides if you prefer, though for a simpler presentation, frosting just the top is lovely. Ensure you get a good coating of frosting to act as a base for your decorations.
Adding the Coquette Sparkle
Now for the final, dazzling touch! Sprinkle the edible pink and blue glitter generously over the frosted cakes. Follow this by scattering an assortment of pink and blue sprinkles. Use nonpareils for tiny dots of color, jimmies for longer strands, and edible pearls for a touch of elegance. Arrange them artfully to create a whimsical and festive look. Don’t be afraid to mix and match different types of sprinkles to add texture and visual interest. The key is to have fun with it and create a confection that truly embodies the spirit of a Dreamy Pink & Blue Coquette Party!
Conclusion:
You’ve now unlocked the secret to creating a truly magical Dreamy Pink & Blue Coquette Party! This delightful recipe is more than just a treat; it’s an experience designed to bring joy and whimsy to any gathering. We’ve explored the steps to craft these visually stunning and equally delicious confections, perfect for birthdays, baby showers, or simply a fun afternoon tea. Remember, the beauty of this recipe lies in its adaptability. Don’t be afraid to experiment and make it your own!
For serving, these Dreamy Pink & Blue Coquette Party treats are wonderful on their own, but they also pair beautifully with a delicate floral tea or a crisp lemonade. Imagin extracte them arranged on a tiered stand adorned with ribbons and lace – pure coquette charm! For variations, consider adding edible glitter for extra sparkle, or perhaps a hint of strawberry or vanilla extract to the frosting. You could even incorporate different sprinkles or edible pearls for unique textures and visual appeal.
We encourage you to dive in, have fun, and share the enchantment of the Dreamy Pink & Blue Coquette Party with your loved ones. The smiles and delighted gasps will be well worth the effort. Happy baking!
FAQs:
Can I make the “Dreamy Pink & Blue Coquette Party” treats ahead of time?
Yes, absolutely! The baked components can be stored in an airtight container at room temperature for up to two days. For best results, it’s recommended to frost them closer to serving time to maintain their pristine appearance, but they will still be delicious if frosted a day in advance.
What if I don’t have food coloring? Can I still make the “Dreamy Pink & Blue Coquette Party” effect?
While the distinct pink and blue hues are central to the “Dreamy Pink & Blue Coquette Party” aesthetic, you can achieve a lovely pastel effect using natural coloring alternatives like beet juice for pink and butterfly pea flower powder for blue. The flavor might be subtly influenced, but the visual charm will still be present.
Coquette Party Dreamy Pink Blue Bliss
Create a whimsical and dreamy dessert with this Coquette Party Dreamy Pink Blue Bliss recipe, featuring swirled pink and blue cake with shimmering glitter and sprinkles.
Ingredients
-
1 cup (2 sticks) unsalted butter, softened
-
2 cups granulated sugar
-
4 large eggs, room temperature
-
1 teaspoon vanilla extract
-
3 cups all-purpose flour
-
1 teaspoon baking powder
-
1/2 teaspoon salt
-
1 cup milk, room temperature
-
Pink gel food coloring
-
Blue gel food coloring
-
1 (16 ounce) package confectioners’ sugar
-
1/4 cup milk
-
1/2 teaspoon vanilla extract
-
Edible pink glitter
-
Edible blue glitter
-
Assorted pink and blue sprinkles (nonpareils, jimmies, edible pearls)
Instructions
-
Step 1
Preheat oven to 350°F (175°C). Line two baking sheets with parchment paper. -
Step 2
In a large mixing bowl, cream together softened unsalted butter and granulated sugar until light and fluffy. Add eggs one at a time, beating well after each, then stir in vanilla extract. -
Step 3
In a separate bowl, whisk together flour, baking powder, and salt. Gradually add this dry mixture to the wet ingredients, alternating with milk, beginning and ending with dry ingredients. Mix until just combined. -
Step 4
Divide batter equally into three bowls. Color one bowl pink and another blue with gel food coloring. Spoon dollops of plain, pink, and blue batters randomly into prepared baking sheets. Gently swirl colors together with a toothpick. -
Step 5
Bake for 25-30 minutes, or until a toothpick inserted into the center comes out clean. Cool in pans for 10-15 minutes, then invert onto a wire rack to cool completely. -
Step 6
While cakes cool, prepare frosting: whisk together confectioners’ sugar, 1/4 cup milk, and 1/2 teaspoon vanilla extract until smooth. Stir in edible glitter if desired. -
Step 7
Once cakes are completely cool, frost the tops with the prepared frosting. Sprinkle generously with edible pink and blue glitter, followed by assorted pink and blue sprinkles.
Important Information
Nutrition Facts (Per Serving)
It is important to consider this information as approximate and not to use it as definitive health advice.
Allergy Information
Please check ingredients for potential allergens and consult a health professional if in doubt.

Leave a Comment