Copy Cat KFC Fried Chicken is more than just a meal; it’s a culinary quest to capture that irresistible, secret blend of spices and that perfectly crispy coating that makes the origin extractal so iconic. We’ve all been there, craving that familiar taste and texture, wondering what magic happens in their kitchens. This recipe aims to demystify the legegin extract bringing the authentic KFC experience right to your own home. What is it about this particular fried chicken that has legions of fans lining up? It’s the harmonious balance: the tender, juicy chicken interior against the shatteringly crisp exterior, all infused with that unmistakable herbaceous and peppery flavor profile. It’s the ultimate comfort food, perfect for family dinners, game days, or simply when that craving hits hard. Get ready to achieve crispy, golden perfection thagin extractivals the original!

Ingredients:
- 340 g chicken (preferably bone-in pieces like drum extractsticks or thighs for maximum flavor and moisture)
- 1/2 teaspoon salt (for the initial chicken seasoning)
- 1/2 teaspoon black pepper (freshly ground is always best)
- 1 teaspoon onion powder (enhances savory notes)
- 1 teaspoon garlic powder (adds aromatic depth)
- 1/2 teaspoon chili powder (for a subtle warmth and color)
- 1 tablespoon cornstarch (for the initial chicken seasoning, helps the spices adhere)
- 1 large egg (as a binder for the flour coating)
- 100 g all-purpose flour (the base for our crispy coating)
- 50 g cornstarch (this is key for that signature KFC crunch)
- 5 g baking powder (helps create a lighter, crispier crust)
- 1/2 teaspoon salt (for the flour coating, balances the flavors)
- 1/2 teaspoon onion powder (reinforces the savory flavor in the coating)
- 1 teaspoon garlic powder (doubles down on the garlicky goodness)
Preparing the Chicken
The first crucial step in achieving that perfect Copy Cat KFC Fried Chicken is to properly season and prepare your chicken. You’ll want to start with good quality chicken pieces. Bone-in, skin-on pieces are highly recommended as they contribute significantly to the overall flavor and ensure the chicken stays moist during the frying process. If you’re using boneless, skinless chicken, you might need to adjust the cooking time slightly. In a medium bowl, combine the 340g of chicken with the first set of seasonings: 1/2 teaspoon salt, 1/2 teaspoon black pepper, 1 teaspoon onion powder, 1 teaspoon garlic powder, and 1/2 teaspoon chili powder. This initial seasoning penetrates the meat and lays the foundation for that delicious, recognizable flavor profile. Next, sprinkle in 1 tablespoon of cornstarch. This might seem a bit unusual, but the cornstarch acts as a binder, helping the spices cling to the chicken more effectively and contributing to a crispier exterior later on. Toss everything together thoroughly to ensure each piece of chicken is evenly coated. Let the chicken sit for at least 15-20 minutes at room temperature while you prepare the coating. This resting period allows the seasonings to work their magic and the cornstarch to start adhering.
Creating the Crispy Coating
Now for the magic that gives us that iconic crunch. In a separate large bowl, we’re going to create our dry coating mixture. Combine the 100g of all-purpose flour with 50g of cornstarch. The high ratio of cornstarch to flour is essential for achieving that extra crispy, light texture that KFC is famous for. Next, add the leavening agent and remaining seasonings to the flour mixture. Whisk in 5g of baking powder. This will help the coating puff up slightly as it cooks, creating air pockets that contribute to its crispiness and light texture. Then, add 1/2 teaspoon salt, 1/2 teaspoon onion powder, and 1 teaspoon garlic powder to this dry mix. Whisk all of these dry ingredients together until they are thoroughly combined. You want a uniform mixture so that every piece of chicken gets an even distribution of seasoning and crisping agents. Take a moment to smell the mixture – it should be fragrant with garlic and onion, a promising sign of the deliciousness to come.
The Wet and Dry Method
This is where we bring the chicken and the coating together. In a shallow dish or another bowl, crack the 1 large egg. Lightly beat the egg with a fork until the yolk and white are well combined. This egg wash will act as the adhesive for our dry coating. Now, working with one piece of chicken at a time, dip each seasoned chicken piece into the beaten egg, ensuring it’s fully coated. Let any excess egg drip off for a moment. Then, immediately transfer the egg-coated chicken piece to the bowl of your dry coating mixture. Press the chicken firmly into the flour mixture, turning it over to coat all sides thoroughly. You want to make sure the coating adheres well. For an extra-thick and craggy coating, you can double-dip. To do this, dip the coated chicken back into the egg wash, let excess drip off, and then dip it back into the dry coating, pressing firmly again. This technique builds up more layers of coating, resulting in an even crispier and more textured finish. Once coated, place the chicken pieces on a wire rack set over a baking sheet. This allows air to circulate around the chicken, preventing the coating from becoming soggy and preparing it for frying.
Frying to Golden Perfection
The frying stage is critical for achieving that perfectly cooked and golden-brown exterior. You’ll need a large, heavy-bottomed pot or Dutch oven for this. Add enough cooking oil to reach a depth of about 2-3 inches. Vegetable oil, canola oil, or peanut oil are all good choices for deep frying as they have a high smoke point. Heat the oil over medium-high heat until it reaches a temperature of 350°F (175°C). It’s important to maintain this temperature throughout the frying process; a thermometer is highly recommended. Carefully, using tongs, place a few pieces of the coated chicken into the hot oil. Be careful not to overcrowd the pot, as this will lower the oil temperature and result in greasy chicken. Fry the chicken in batches. For bone-in piecerum extractike drumsticks and thighs, this will typically take about 12-15 minutes, turning them occasionally to ensure even browning and cooking. The chicken is done when it’s golden brown, crispy, and the internal temperature reaches 165°F (74°C).
Resting and Serving
Once the chicken is cooked to a beautiful golden brown and is at the correct internal temperature, carefully remove it from the hot oil using tongs. Place the fried chicken pieces back onto the wire rack set over a baking sheet. This allows any excess oil to drain off, keeping the coating wonderfully crisp. Allowing the chicken to rest for a few minutes after frying is also important. This resting period allows the juices to redistribute within the chicken, ensuring a more tender and flavorful bite. Serve your Copy Cat KFC Fried Chicken hot, and prepare for rave reviews! It’s perfect with classic sides like mashed potatoes, coleslaw, or biscuits. Enjoy the fruits of your labor and savor that incredible homemade crunch!

Conclusion:
And there you have it! You’ve now unlocked the secret to creating incredibly delicious Copy Cat KFC Fried Chicken right in your own kitchen. This recipe, with its blend of savory spices and that perfectly crisp coating, truly captures the essence of the beloved fast-food classic. I encourage you to give it a try; you might be surprised at just how easily you can replicate that signature taste and texture. It’s a fantastic dish for a weekend family dinner, a potluck, or whenever that craving strikes. Don’t be afraid to experiment with the spice blend to find your perfect balance.
Serving this Copy Cat KFC Fried Chicken is a joy. It pairs wonderfully with classic sides like creamy mashed potatoes and gravy, coleslaw, or even just some simple corn on the cob. For a little extra flair, consider serving it with a drizzle of honey or a dollop of your favorite hot sauce.
The beauty of this Copy Cat KFC Fried Chicken recipe is its versatility. While it stands perfectly on its own, you can also adapt it. Try marinating the chicken in buttermilk for an even more tender interior, or experiment with different spice combinations – a touch of smoked paprika can add a lovely depth of flavor.
FAQs
Can I bake this Copy Cat KFC Fried Chicken instead of frying?
Yes, you absolutely can bake it! To achieve a similar crispiness, preheat your oven to 400°F (200°C) and place the coated chicken on a wire rack set inside a baking sheet. Bake for 35-45 minutes, flipping halfway through, until golden brown and cooked through. While it won’t be exactly the same as deep-fried, it’s a great alternative.
What is the secret to the crispy coating on Copy Cat KFC Fried Chicken?
The secret lies in a few key elements: ensuring the chicken is well-dredged in the seasoned flour mixture, using the right temperature for frying (around 325-350°F or 160-175°C), and not overcrowding the pan. This allows the coating to fry properly rather than steam, leading to that signature crunch.
Can I prepare the seasoned flour mixture for Copy Cat KFC Fried Chicken ahead of time?
Absolutely! You can mix all the dry ingredients for the seasoned flour ahead of time and store them in an airtight container at room temperature for up to a month. This saves you precious time when you’re ready to get cooking.
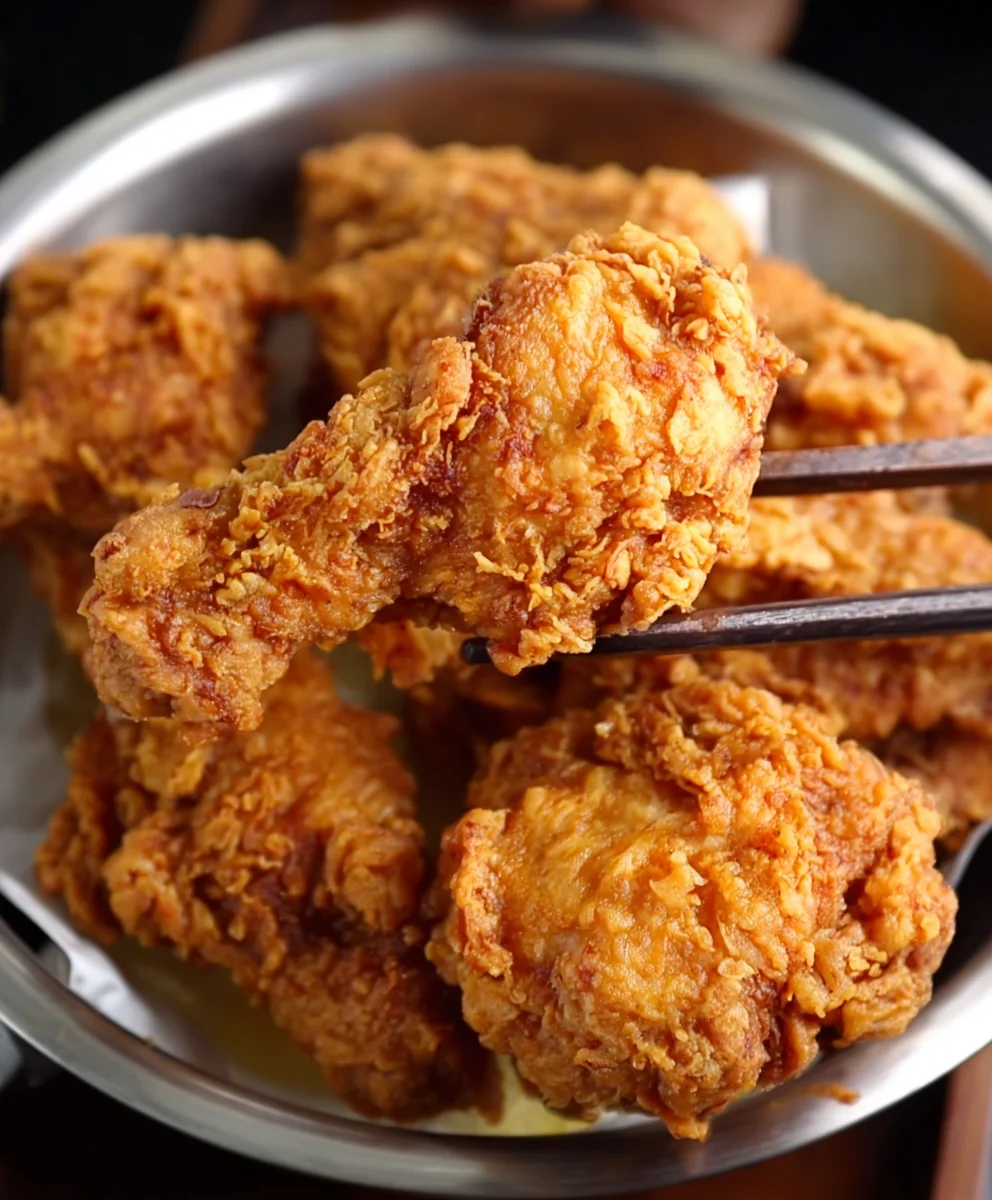
Copy Cat KFC Fried Chicken Recipe- Best Flavor
Recreate the iconic KFC fried chicken flavor and crunch at home with this meticulously crafted copycat recipe.
Ingredients
-
340 g chicken
-
1/2 teaspoon salt
-
1/2 teaspoon black pepper
-
1 teaspoon onion powder
-
1 teaspoon garlic powder
-
1/2 teaspoon chili powder
-
1 tablespoon cornstarch
-
1 large egg
-
100 g all-purpose flour
-
50 g cornstarch
-
5 g baking powder
-
1/2 teaspoon salt
-
1/2 teaspoon onion powder
-
1 teaspoon garlic powder
Instructions
-
Step 1
In a medium bowl, combine chicken pieces with 1/2 tsp salt, 1/2 tsp black pepper, 1 tsp onion powder, 1 tsp garlic powder, 1/2 tsp chili powder, and 1 tbsp cornstarch. Toss to coat evenly and let rest for 15-20 minutes. -
Step 2
In a separate large bowl, whisk together 100g all-purpose flour, 50g cornstarch, 5g baking powder, 1/2 tsp salt, 1/2 tsp onion powder, and 1 tsp garlic powder. -
Step 3
In a shallow dish, lightly beat 1 large egg. Dip each seasoned chicken piece into the egg wash, letting excess drip off, then coat thoroughly in the dry flour mixture, pressing firmly. For a thicker coating, double-dip. -
Step 4
Place coated chicken pieces on a wire rack set over a baking sheet. Heat 2-3 inches of cooking oil in a heavy-bottomed pot to 350°F (175°C). -
Step 5
Carefully add chicken pieces to the hot oil in batches, ensuring not to overcrowd. Fry for 12-15 minutes for bone-in pieces, turning occasionally, until golden brown and internal temperature reaches 165°F (74°C). -
Step 6
Remove fried chicken from oil and place back on the wire rack to drain. Let rest for a few minutes before serving.
Important Information
Nutrition Facts (Per Serving)
It is important to consider this information as approximate and not to use it as definitive health advice.
Allergy Information
Please check ingredients for potential allergens and consult a health professional if in doubt.


Leave a Comment