Chocolate Peanut Butter Non-non-non-alcoholic alternativeic Vnon-alcoholic alentine’s Heart recipes are more than just a dessert; they’re a delicious expression of love, perfect for sharing with that special someone or even just indulgin extractgnon-alcoholic aleurself on Valentine’s gin extract. Imagine the rich, decadent embrace of smooth chocolate melting into the salty, creamy comfort of peanut butter. This is a flavor combination that has captured hearts for generations, and for good reason! It’s a classic for a reason, hitting all the right notes of sweet, savory, and utterly irresistible. What makes this particular Chocolate non-alcoholic alternatinon-alcoholic aleutter non-alcoholicolic Valentine’s Heart so special is its effortless charm and thnon-alcoholic alternativethat it’s completely free of alcohol, making it inclusive for everyone to enjoy. It’s surprisingly simple to create, proving that you don’t need to be a master baker to whip up something truly spectacular that tastes as good as it looks, especially with its festive heart shape.
Why You’ll Adore This Recipe
This isn’t just another sweet treat; it’s an experience. The velvety texture of the chocolate ganache, paired with the distinct, nutty depth of peanut butter, creates a symphony of flavors that dance on your palate. People flock to this combination because it’s inherently comforting and celebratory. It evokes feelings of joy, nostalgia, and of course, romance. It’s the perfect way to say “I love you” or “I appreciate you” without uttering a single non-alcoholic alternativeetting the deliciousness speak for itself. non-alcoholiclcoholic aspect ensures that no one is left out of the celebratory indulgence, making it a truly universal delight.
What Makes This Treat ShineCnon-alcoholic aleolate Peanutnon-alcoholicon-alcoholic Valentine’s Heart stands out due to its visual appeal and adaptability. The heart shape instantly elevates it to holiday-worthy status, and the glossy finish of the chocolate is simply captivating. We’ve designed this recipe to be accessible, even for novice bakers. You’ll be amazed at how straightforward it is to achieve a professional-looking result that will undoubtedly impress. It’s the perfect blend of impressive presentation and comforting, fanon-alcoholic aleiar tastes, making it an unforgettable part of your Valentine’s Day celebrations.

Ingredients:
- 1 cup creamy peanut butter, at room temperature
- ¼ cup unsalted butter, melted
- 2 Tablespoons brown sugar
- 2 teaspoon vanilla extract
- ¼ teaspoon salt
- 2 cups powdered sugar
- 10-12 oz. chocolate, chopped into small pieces (a mix of half semi-sweet and half milk chocolate works wonderfully, or use good quality candy coating for easier handling)
Preparing the Heart Filling
Step 1: Combine Wet Ingredients
In a medium mixing bowl, begin extract by combining the creamy peanut butter and the melted unsalted butter. It’s important that your peanut butter is at room temperature; this will ensure it’s soft and easy to incorporate smoothly. If your peanut butter is too cold, it might clump up when you add the melted butter. Stir these two ingredients together until they are completely combined and you have a smooth, creamy base. This is the foundation of our delicious Chocolate Peanut Butter Vnon-alcoholic alentine’s Heart filling.
Step 2: Add Flavor Enhancers and Sugar
Next, it’s time to add the brown sugar, vanilla extract, and salt to the peanut butter and butter mixture. The brown sugar will add a subtle caramel note and a touch of sweetness, while the vanilla extract provides that classic comforting aroma and flavor. The salt is crucial for balancing the sweetness of the other ingredients and really making the peanut butter flavor pop. Mix these in thoroughly. You want to ensure there are no pockets of unmixed sugar or vanilla. Keep stirring until everything is well-distributed.
Step 3: Incorporate Powdered Sugar
Now, gradually add the powdered sugar to the wet ingredients. It’s best to add it in batches, about half a cup at a time. Mix well after each addition. This might seem like a lot of powdered sugar, but it’s what helps to create that perfectly firm, yet melt-in-your-mouth texnon-alcoholic alee for our Valentine’s Heart filling. You’ll notice the mixture will start to thicken considerably as you add the powdered sugar. Continue mixing until you achieve a stiff, dough-like consistency. If the mixture feels a little too dry and crum extractbly, you can add another teaspoon of melted butter, but be careful not to make it too sticky. Once it’s firm enough to handle, you can lightly grease your hands and roll the mixture into a ball.
Shaping and Coating the Heart
Step 4: Form the Heart Shape
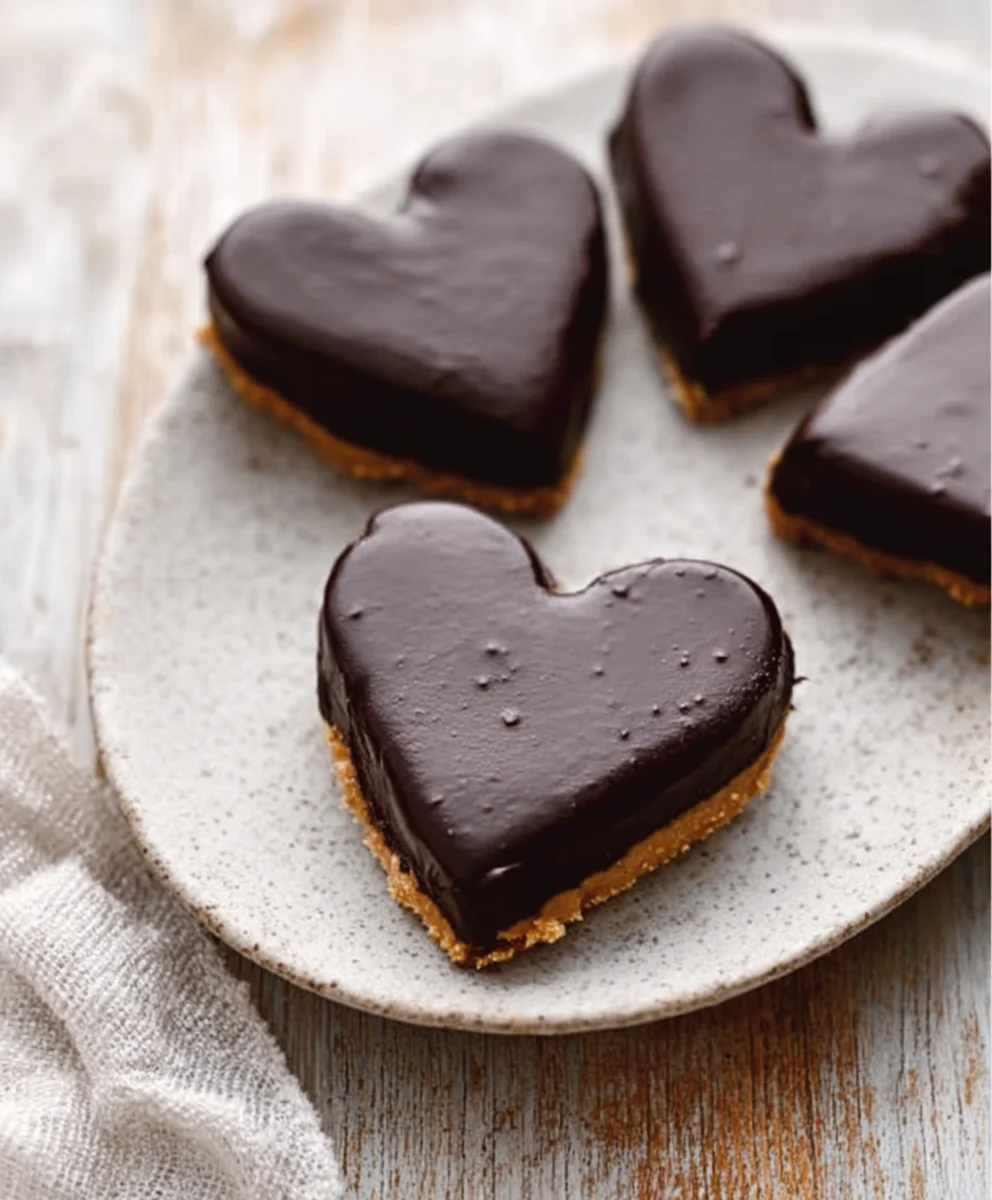
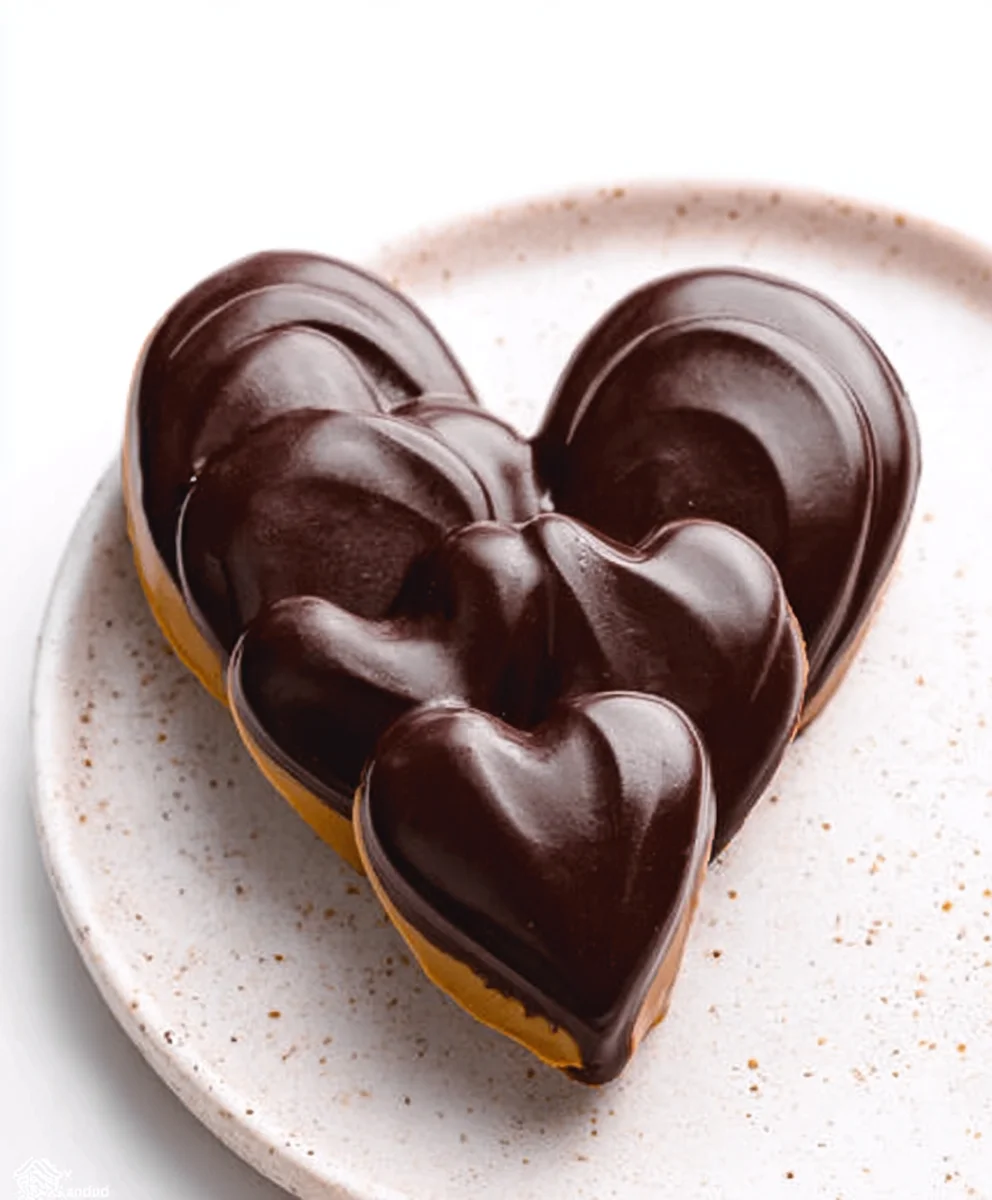
Lightly grease your hands to prevent sticking. Take the peanut butter mixture and shape it into a heart. You can do this by forming a ball and then gently flattening and pressing it into a heart shape. Aim for a thickness of about ½ to ¾ of an inch. Alternatively, you can press the mixture into a heart-shaped mold if you have one, or even roll it out between two sheets of parchment paper and use a heart-shaped cookie cutter. This shaping step is where yonon-alcoholic aleChocolate Peanut Butter Valentine’s Heart rgin extractly begins to take its iconic form. Place the formed heart onto a parchment-lined baking sheet.
Step 5: Melt and Temper the Chocolate (or Candy Coating)
Prepare your chocolate for coating. If you’re using chopped chocolate, you’ll want to melt it gently. You can do this using a double boiler method (placing a heatproof bowl over a saucepan of simmering water, ensuring the bottom of the bowl doesn’t touch the water) or by microwaving it in short bursts (30-second intervals), stirring well in between each burst, until mostly melted. Then, stir until smooth. If you’re using candy coating, follow the package instructions for melting, which is typically similar to the microwave method. For the best shine and snap, you can temper the chocolate, though this is an advanced step. If you’re using candy coating, tempering isn’t necessary as it’s designed to set up beautifully without it, making it an excellegin extractchoice for beginners.
Step 6: Coat and Set the Heart
Once your chocolate (or candy coating) is melted and smooth, carefully dip your peanut butter heart into the chocolate. You can use a fork or a dipping tool to ensure it’s fully coated. Lift the heart out of the chocolate, allowing any excess to drip back into the bowl. Gently place the chocolate-coated heart back onto the parchment-lined baking sheet. You can use a spatula to help smooth out any imperfections or create a more even coating. If you want to add a decorative touch, you can drizzle some contrasting chocolate over the top while the coating is still wet, or sprinkle some chopped peanuts or festive sprinkles on top. Once coated, place the baking sheet in the refrigerator for about 15-30 minutes, or until the chocolate is completely set and firm to the touch. This chilling process is essential for achieving that satisfying snap when yonon-alcoholic aleite into your Chocolate Peanut Butter Valentine’s Heart.
Conclusion:
There you have it! I hope you’ve enjoyed learning how to create this delightful Chocolate Peanut Butter Non-non-non-alcoholic alternativeic Vnon-alcoholic alentine’s Heart. This recipe is wonderfully forgiving, making it accessible for bakers of all skill levels. The rich chocolate and creamy peanut butter create a classic flavor combination that is sure to impress. Whether you’renon-alcoholic alelebrating Valentine’s Day, a birthday, or just looking for a sweet treat, this dessert is a fantastic choice. Serve it with a dollop of whipped cream, a scattering of chocolate shavings, or a drizzle of extra peanut butter for an extra special touch. Don’t be afraid to experiment with variations – a sprinkle of sea salt on top can elevate the flavors beautifully, or consider adding a touch of espresso powder to the chocolate for a mocha twist. Most importantly, have fun in the kitchen and enjoy the delicious fruits of your labor!
Frequently Asked Questions:
Can I make this Chocolate non-alcoholic alternatinon-alcoholic aleutter non-alcoholicolic Valentine’s Heart ahead of time?
Absolutely! This dessert is perfect for making in advance. Once completely cooled, you can store it in an airtight container at room temperature for up to two days, or in the refrigerator for up to four days. It might firm up slightly in the fridge, so allow it to come to room temperature for about 20-30 minutes before serving for the best texture.
What are some good non-chocolate-based variations?
If you’re looking for a twist, consider a white chocolate base with a raspberry swirl, or a caramel peanut butter heart. You could also try a vanilla bean batter with a rich dulce de leche filling for a different flavor profile. The possibilities are truly endless when it comes to customizing this treat!
Chocolate Peanut Butter Heart – Non-Alcoholic Valentine’s Treat
A delightful and easy-to-make non-alcoholic Valentine’s treat featuring a rich peanut butter filling coated in smooth chocolate.
Ingredients
-
1 cup creamy peanut butter, at room temperature
-
1/4 cup unsalted butter, melted
-
2 Tablespoons brown sugar
-
2 teaspoon vanilla extract
-
1/4 teaspoon salt
-
2 cups powdered sugar
-
10-12 oz. chocolate, chopped into small pieces (a mix of half semi-sweet and half milk chocolate works wonderfully, or use good quality candy coating for easier handling)
Instructions
-
Step 1
In a medium mixing bowl, combine the creamy peanut butter and the melted unsalted butter until smooth. -
Step 2
Add the brown sugar, vanilla extract, and salt to the peanut butter mixture and mix thoroughly. -
Step 3
Gradually add the powdered sugar in batches, mixing well after each addition until a stiff, dough-like consistency is achieved. -
Step 4
Lightly grease your hands and shape the peanut butter mixture into a heart shape, about ½ to ¾ inch thick. Place on a parchment-lined baking sheet. -
Step 5
Melt the chocolate or candy coating using a double boiler or microwave in short bursts, stirring until smooth. -
Step 6
Dip the peanut butter heart into the melted chocolate, ensuring full coverage. Allow excess to drip off and place back on the parchment-lined baking sheet. -
Step 7
Chill in the refrigerator for 15-30 minutes, or until the chocolate is completely set.
Important Information
Nutrition Facts (Per Serving)
It is important to consider this information as approximate and not to use it as definitive health advice.
Allergy Information
Please check ingredients for potential allergens and consult a health professional if in doubt.

Leave a Comment