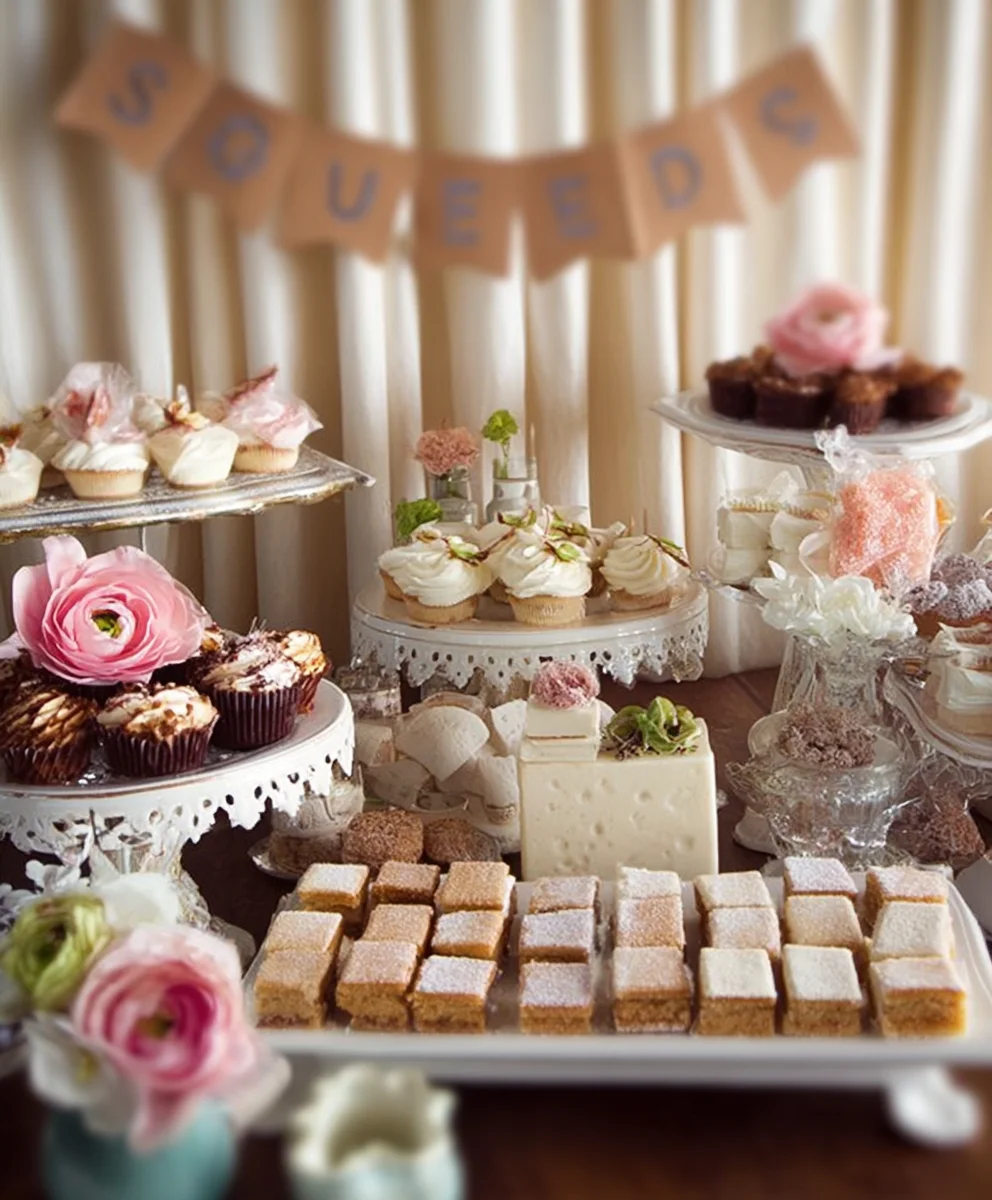
Vintage Wedding Dessert Table delights evoke a sense of timeless romance and sweet nostalgia, making it a cherished centerpiece for any celebration. There’s something incredibly charming about a dessert spread that feels both elegant and deeply personal, reminiscent of grand celebrations from yesteryear. People adore a vintage wedding dessert table because it offers a beautiful blend of classic flavors and artistic presentation, often featuring handcrafted treats that tell a story. What truly makes this concept special is its ability to transport guests back in time, creating an unforgettable atmosphere of warmth and sweetness. Imagin extracte delicate lace doilies, antique cake stands adorned with miniature sugar flowers, and an array of meticulously prepared pastries and cookies, each one a tiny work of art. This isn’t just about satisfying a sweet tooth; it’s about crafting an experience that feels both sophisticated and incredibly inviting, a true testament to enduring love and beautiful traditions. Let’s explore how to bring this enchanting vision to life.

Ingredients:
- 1 cup (2 sticks) unsalted butter, softened
- 2 cups granulated sugar
- 4 large eggs
- 1 teaspoon vanilla extract
- 3 cups all-purpose flour
- 1 teaspoon baking soda
- 1/2 teaspoon salt
- 1 cup buttermilk
- 1/2 cup vegetable oil
- 1 cup sour cream
- 1 teaspoon almond extract
- 1 (16 ounce) package confectioners’ sugar
- 1/4 cup milk
- 1/2 teaspoon lemon juice
- 1/4 cup chopped pistachios
- 1/4 cup dried cranberries
- Edible gold leaf (optional)
- Fresh mint sprigs (for garnish)
Cream Cheese Cake Preparation
Mixing the Wet Ingredients
- In a large mixing bowl, cream together the softened unsalted butter and granulated sugar. This is where the magic begin extracts for a tender crum extractb. You want to beat them until the mixture is light and fluffy, which usually takes about 3-5 minutes with an electric mixer. This process incorporates air, contributing to the cake’s lift and delicate texture. Don’t rush this step; it’s crucial for a well-aerated batter. Gradually add the large eggs, one at a time, beating well after each addition. It’s important to ensure each egg is fully incorporated before adding the next. Stir in the vanilla extract for that classic sweet aroma and flavor.
Combining Dry Ingredients and Alternating with Wet
- In a separate medium bowl, whisk together the all-purpose flour, baking soda, and salt. Whisking these dry ingredients helps to distribute the leavening agents evenly, preventing dense spots in your cake. In a small bowl, whisk together the buttermilk, vegetable oil, and sour cream. The buttermilk and sour cream are key to adding moisture and a slgin extractt tanginess that balances the sweetness, resulting in an incredibly moigin extractcake. Now, begin alternating the dry ingredients with the buttermilk mixture into the creamed butter and sugar mixture. Start by adding about one-third of the dry ingredients and mixing on low speed until just combined. Then, add half of the buttermilk mixture and mix again until incorporated. Repeat this process, ending with the last of the dry ingredients. Be careful not to overmix; overmixing can develop the gluten too much, leading to a tough cake. Mix only until no streaks of flour remain.
Adding Flavor Enhancements and Baking
- Gently fold in the almond extract. This subtle addition adds a sophisticated layer of flavor that complements the richness of the cake beautifully, making it perfect for a vintage wedding dessert table. Make sure to distribute it evenly throughout the batter. Prepare your baking pans by greasing and flouring them, or lining them with parchment paper. This ensures that your beautiful cakes won’t stick. Pour the batter evenly into the prepared pans. Bake in a preheated oven at 350°F (175°C) for approximately 30-35 minutes, or until a wooden skewer inserted into the center comes out clean. The exact baking time will depend on your oven and the size of your pans. Once baked, let the cakes cool in the pans for about 10-15 minutes before inverting them onto a wire rack to cool completely. Allowing them to cool in the pans briefly helps them set up, reducing the risk of breakage when transferring.
Cream Cheese Frosting and Assembly
Preparing the Luscious Frosting
- While the cakes are cooling, prepare the cream cheese frosting. In a large bowl, beat the softened cream cheese until smooth and creamy. This is the base of our rich and tangy frosting. Gradually add the confectioners’ sugar, about a cup at a time, beating well after each addition. This is where patience pays off for a lump-free frosting. You want a smooth, spreadable consistency. Once most of the confectioners’ sugar is incorporated, add the milk and lemon juice. The milk helps to achieve the perfect consistency, and the lemon juice adds a bright, subtle tang that cuts through the sweetness of the sugar and the richness of the cream cheese, creating a balanced flavor profile. Continue beating until the frosting is light, fluffy, and smooth. If the frosting is too thick, add a little more milk, a tablespoon at a time, until it reaches your desired consistency. If it’s too thin, gradually add more confectioners’ sugar.
Decorating for a Vintage Appeal
- Once the cakes have cooled completely, it’s time to assemble and decorate. Place one cake layer on your serving plate or cake stand. Generously spread a layer of the cream cheese frosting over the top. Sprinkle half of the chopped pistachios and half of the dried cranberries over the frosting. These add delightful texture and pops of color, evoking a charming vintage feel. Place the second cake layer on top. Frost the entire cake, including the sides, with the remaining cream cheese frosting, creating a smooth or slightly rustic finish depending on your preference. For an extra touch of elegance befitting a vintage wedding dessert table, delicately apply edible gold leaf to the sides or top of the cake. This adds a luxurious shimmer without overpowering the cake’s natural beauty. Finally, garnish the cake with fresh mint sprigs for a touch of vibrant green and a refreshing aroma. These decorative elements combine to create a dessert that is as visually stunning as it is delicious.
Conclusion:
There you have it! Crafting a memorable Vintage Wedding Dessert Table is all about creating a sweet symphony of flavors and aesthetics. We’ve explored how to balance classic tastes with delightful presentations, ensuring your special day is as delicious as it is beautiful. From delicate pastries to rich cakes, this dessert table will undoubtedly be a talking point for your guests, offering a touch of nostalgia and pure indulgence. Remember, the joy is in the shared experience, so don’t be afraid to get creative and infuse your personality into every element. Whether you’re a seasoned baker or a novice, the effort you put into this Vintage Wedding Dessert Table will be deeply appreciated and savored.
Now, let’s address a few common queries:
Frequently Asked Questions about the Vintage Wedding Dessert Table:
Can I make some of the desserts ahead of time?
Absolutely! Many of the components for a Vintage Wedding Dessert Table can be prepared in advance. Cookies, brownies, and some cake decorations can be made days ahead and stored properly. This will significantly reduce stress on the day of the wedding, allowing you to focus on the final arrangements and ensuring everything looks pristine.
What if I have guests with dietary restrictions (e.g., gluten-free, vegan)?
It’s a wonderful idea to include a few options catering to common dietary needs. You can easily adapt many classic recipes or source delicious gluten-free and vegan alternatives. Clearly labeling these items on your Vintage Wedding Dessert Table will be greatly appreciated by your guests and ensures everyone can partake in the sweet celebration.
How do I achieve the “vintage” look for my dessert table?
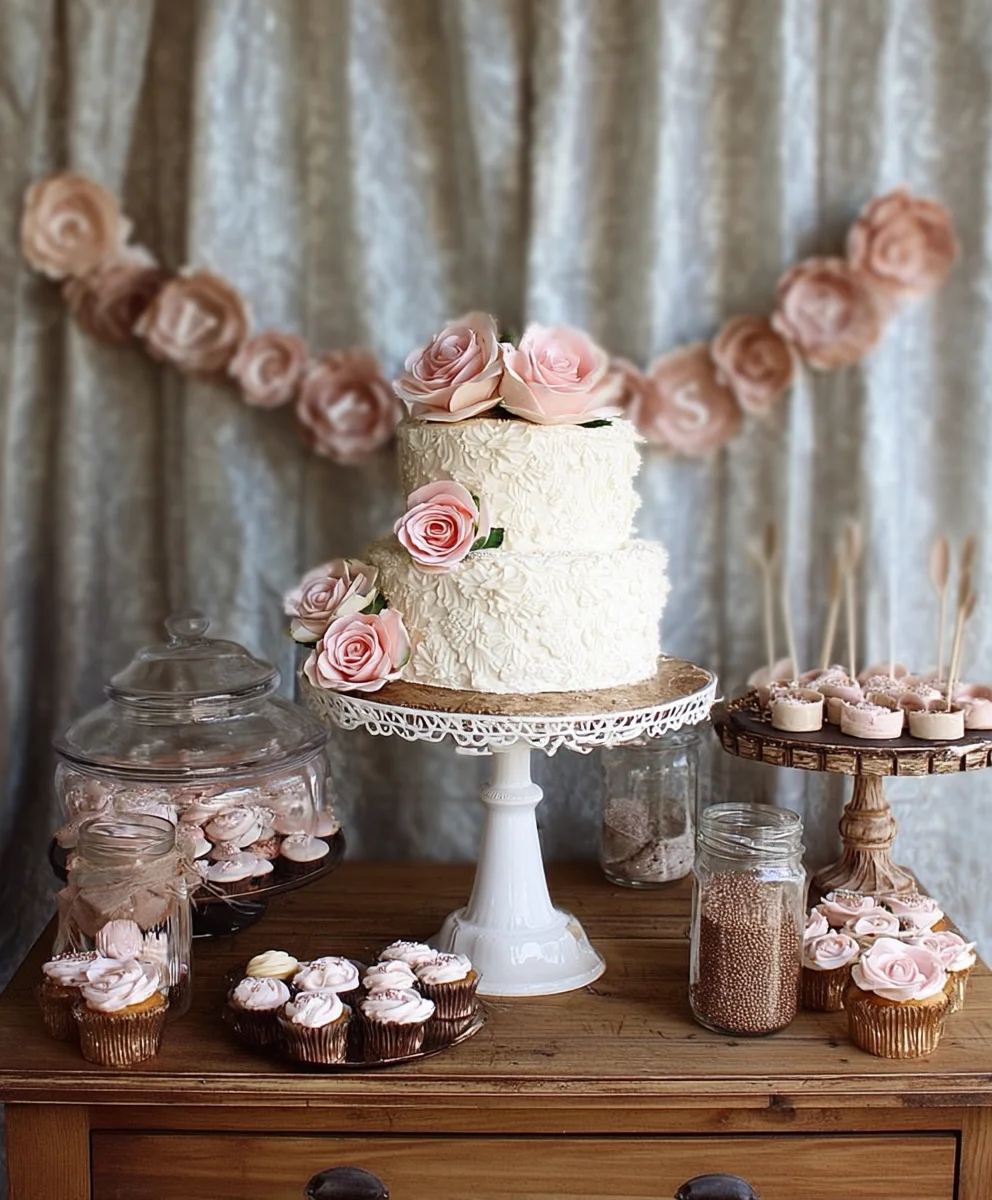
The vintage aesthetic can be achieved through various elements beyond the desserts themselves. Consider using antique cake stands, doilies, lace runners, and even framed vintage photographs. The presentation is key to evoking that timeless charm. Think soft pastels, delicate floral arrangements, and handwritten labels for each sweet treat on your Vintage Wedding Dessert Table.
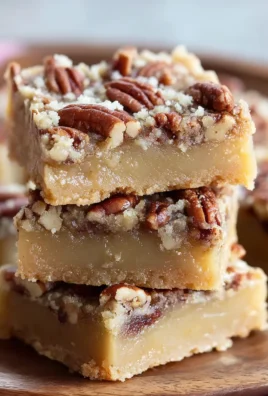
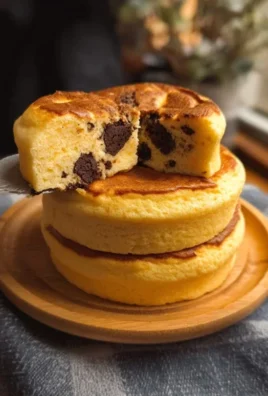
Vintage Wedding Dessert Table Cake
A sweet and elegant cream cheese cake perfect for a vintage wedding dessert table, featuring a moist crumb, tangy frosting, and delicate decorative elements.
Ingredients
-
1 cup (2 sticks) unsalted butter, softened
-
2 cups granulated sugar
-
4 large eggs
-
1 teaspoon vanilla extract
-
3 cups all-purpose flour
-
1 teaspoon baking soda
-
1/2 teaspoon salt
-
1 cup buttermilk
-
1/2 cup vegetable oil
-
1 cup sour cream
-
1 teaspoon almond extract
-
1 (16 ounce) package confectioners’ sugar
-
1/4 cup milk
-
1/2 teaspoon lemon juice
-
1/4 cup chopped pistachios
-
1/4 cup dried cranberries
-
Edible gold leaf (optional)
-
Fresh mint sprigs (for garnish)
Instructions
-
Step 1
Cream together the softened unsalted butter and granulated sugar in a large mixing bowl until light and fluffy (about 3-5 minutes with an electric mixer). Gradually add the large eggs, one at a time, beating well after each addition. Stir in the vanilla extract. -
Step 2
In a separate medium bowl, whisk together the all-purpose flour, baking soda, and salt. In a small bowl, whisk together the buttermilk, vegetable oil, and sour cream. Alternatingly add about one-third of the dry ingredients to the creamed mixture, then half of the buttermilk mixture, mixing on low speed until just combined after each addition. Repeat this process, ending with the dry ingredients. Do not overmix; mix only until no streaks of flour remain. -
Step 3
Gently fold in the almond extract. Prepare your baking pans by greasing and flouring them, or lining them with parchment paper. Pour the batter evenly into the prepared pans. -
Step 4
Bake in a preheated oven at 350°F (175°C) for approximately 30-35 minutes, or until a wooden skewer inserted into the center comes out clean. Let the cakes cool in the pans for 10-15 minutes before inverting them onto a wire rack to cool completely. -
Step 5
While the cakes are cooling, prepare the cream cheese frosting. In a large bowl, beat the softened cream cheese until smooth and creamy. Gradually add the confectioners’ sugar, about a cup at a time, beating well after each addition until smooth and spreadable. Add the milk and lemon juice and continue beating until the frosting is light, fluffy, and smooth. Adjust consistency with additional milk or confectioners’ sugar as needed. -
Step 6
Once the cakes have cooled completely, place one cake layer on your serving plate or cake stand. Spread a generous layer of cream cheese frosting over the top. Sprinkle half of the chopped pistachios and half of the dried cranberries over the frosting. Place the second cake layer on top. Frost the entire cake, including the sides, with the remaining cream cheese frosting. For an elegant touch, delicately apply edible gold leaf. Garnish the cake with fresh mint sprigs.
Important Information
Nutrition Facts (Per Serving)
It is important to consider this information as approximate and not to use it as definitive health advice.
Allergy Information
Please check ingredients for potential allergens and consult a health professional if in doubt.
Leave a Comment