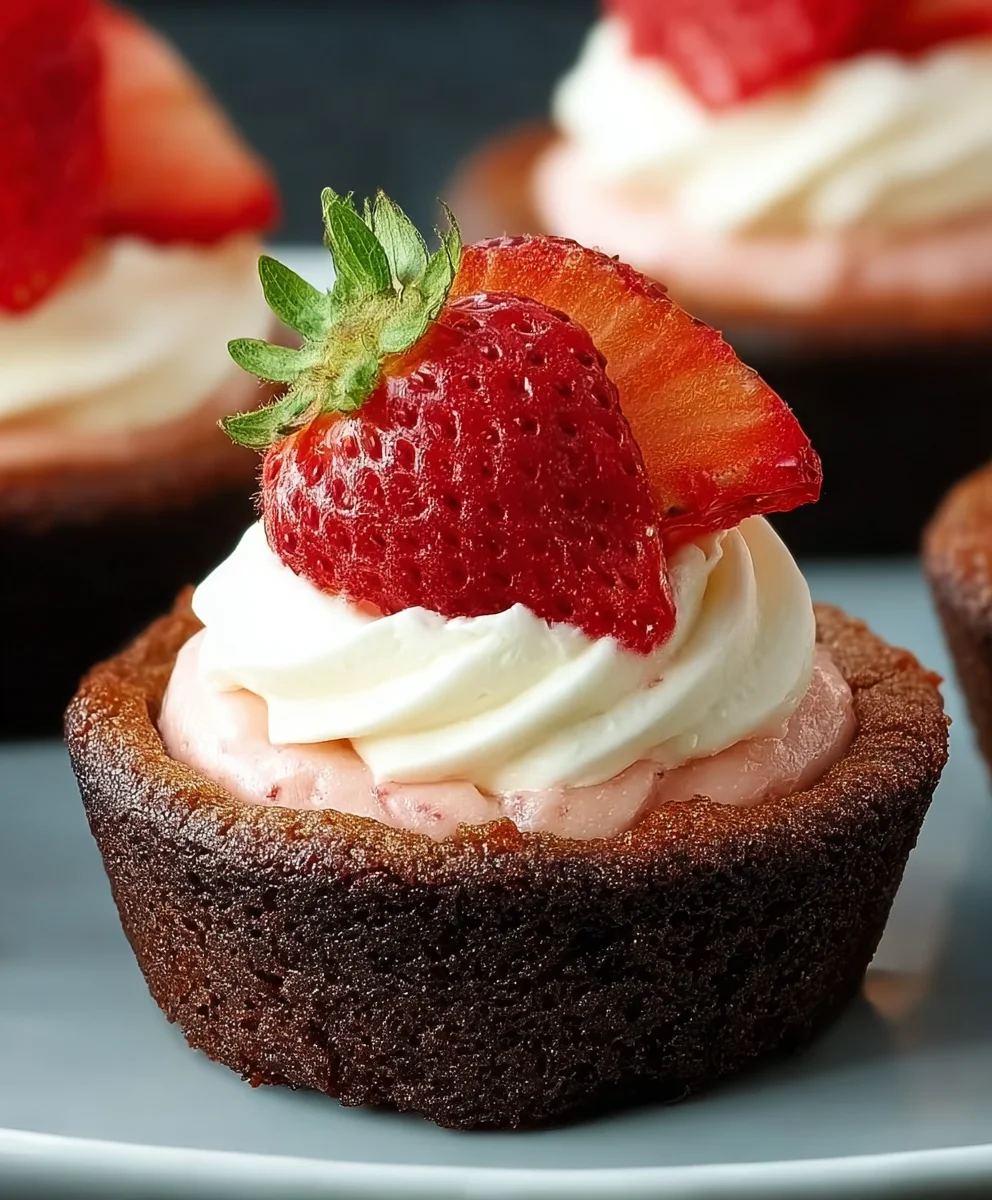
Strawberry Cheesecake Cookie Cups are more than just a dessert; they’re a miniature explosion of pure joy that captures the best of two beloved treats. Imagin extracte the delightfully crum extractbly texture of a perfectly baked cookie melting in your mouth, giving way to a luscious, creamy cheesecake filling. Now, add the bright, sweet burst of fresh strawberries, and you have a symphony of flavors and textures that’s simply irresistible. This is the ultimate treat for any occasion, from a casual afternoon indulgence to a show-stopping dessert for your next gathering. We love them because they offer the comforting familiarity of a cookie with the sophisticated elegance of cheesecake, all in one perfectly portioned bite. What truly makes these Strawberry Cheesecake Cookie Cups special is their delightful portability and the sheer delight they bring to everyone who tastes them. Get ready to bake up a batch of happiness!

Ingredients:
- 1 1/4 cups all-purpose flour
- 1/2 cup unsweetened cocoa powder
- 1 teaspoon baking soda
- 2 teaspoons cornstarch
- 1/2 teaspoon salt
- 3/4 cup unsalted butter, softened to room temperature
- 1 cup granulated sugar
- 1 large egg
- 1 teaspoon vanilla extract
- 12 ounces cream cheese, softened to room temperature
- 2 1/4 cups powdered sugar
- 5 tablespoons strawberry puree
- Fresh strawberries, for garnish
Making the Chocolate Cookie Base
Step 1: Prepare Your Dry Ingredients
First things first, let’s get all our dry ingredients ready. In a medium-sized bowl, whisk together the all-purpose flour, unsweetened cocoa powder, baking soda, cornstarch, and salt. Whisking them thoroughly ensures that everything is evenly distributed, which is crucial for consistent cookie texture and rise. This step prevents clumps of leavening agents or cocoa powder from creating pockets of bitterness or unevenness in your final cookie cups. Set this bowl aside for now.
Step 2: Cream the Butter and Sugar
Now, in a large mixing bowl, cream together the softened unsalted butter and granulated sugar. You can use an electric mixer on medium speed for this, or if you’re feeling energetic, a sturdy whisk will do. Creaming means beating them together until the mixture is light and fluffy, usually for about 2-3 minutes with an electric mixer. This process incorporates air into the mixture, which contributes to the cookies’ tender crum extractb and helps them spread just the right amount. Scrape down the sides of the bowl occasionally to ensure everything is incorporated.
Step 3: Add Wet Ingredients to the Creamed Mixture
Once the butter and sugar are nicely creamed, it’s time to add the egg and vanilla extract. Beat in the large egg until it’s fully combined, then stir in the vanilla extract for that classic sweet aroma and flavor. Make sure the egg is completely incorporated before moving on to the next step. This ensures a smooth batter and prevents an oily texture.
Step 4: Combine Wet and Dry Ingredients
Now, gradually add the dry ingredients (from Step 1) to the wet ingredients in the large mixing bowl. Mix on low speed or stir with a sturdy spatula until just combined. Be careful not to overmix the dough. Overmixing can develop the gluten in the flour too much, resulting in tough cookies. You want to mix until you no longer see streaks of dry flour. The dough will be thick and slrum extracttly crumbly.
Step 5: Form and Bake the Cookie Cups
Preheat your oven to 350°F (175°C). Lightly grease or spray a mini muffin tin. Roll the dough into small balls, about 1 inch in diameter. Place each ball into a cup of the mini muffin tin and gently press down with your thumb or the back of a small spoon to create a slight indentation in the center. This indentation will hold our delicious cheesecake filling. Bake for 10-12 minutes, or until the edges are set and the centers are still slightly soft. They will firm up as they cool. Let the cookie cups cool in the tin for about 5-10 minutes before carefully transferring them to a wire rack to cool completely.
Crafting the Creamy Cheesecake Filling
Step 6: Prepare the Cream Cheese Base
While your cookie cups are cooling, let’s make the cheesecake filling. In a clean medium-sized mixing bowl, beat the softened cream cheese until it’s completely smooth and creamy. Make sure there are no lumps whatsoever. This is best done with an electric mixer on medium speed. If your cream cheese is not soft enough, it will be very difficult to get a smooth filling.
Step 7: Incorporate Sweetness and Flavor
Gradually add the powdered sugar to the beaten cream cheese, mixing on low speed until it’s fully incorporated. Once the powdered sugar is mixed in, increase the mixer speed to medium and beat for another 1-2 minutes until the filling is light and fluffy. This aeration is key to a light and airy cheesecake filling.
Step 8: Swirl in the Strawberry Puree
Now for the delightful strawberry swirl! Add the strawberry puree to the cream cheese mixture. Gently fold it in using a spatula or a spoon, creating a marbled effect. You don’t want to fully mix it in; the streaks of pink against the white cream cheese are what make these so visually appealing and give you bursts of strawberry flavor.
Assembling and Finishing Your Strawberry Cheesecake Cookie Cups
Step 9: Fill and Chill
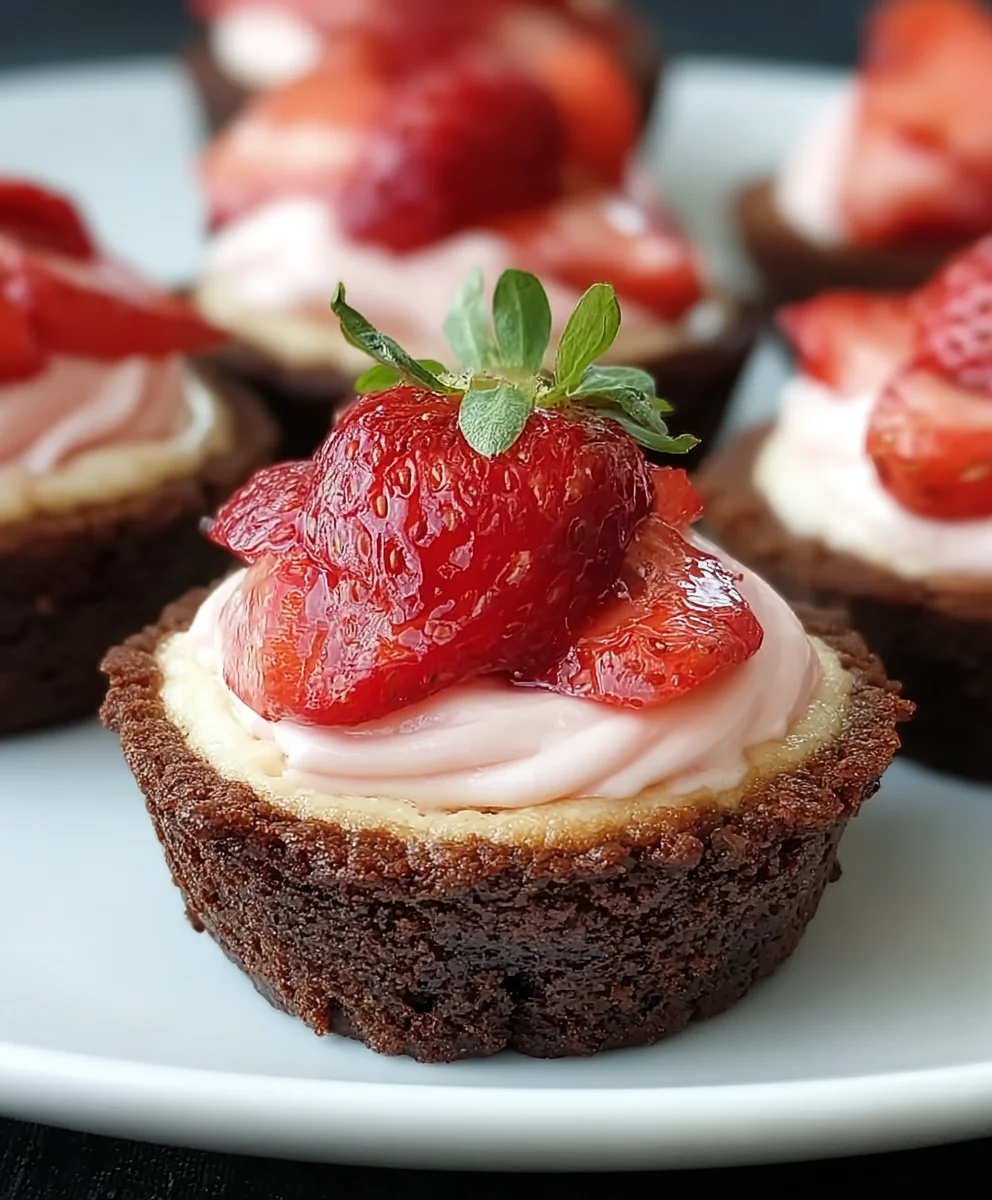
Once the chocolate cookie cups are completely cool, it’s time to fill them. Spoon or pipe the strawberry cheesecake filling into each cooled cookie cup, filling them almost to the brim. Smooth the tops with the back of a spoon or an offset spatula. For the best texture and to allow the filling to set properly, refrigerate the assembled cookie cups for at least 30 minutes, or until the filling is firm.
Step 10: Garnish and Serve
Just before serving, take your chilled Strawberry Cheesecake Cookie Cups out of the refrigerator. Garnish each one with a fresh strawberry, either sliced or a whole small one. These beautiful treats are now ready to be enjoyed! The rich chocolate cookie, the tangy and sweet strawberry cheesecake filling, and the fresh strawberry on top create a perfect symphony of flavors and textures.
Conclusion:
We’ve reached the end of our journey to creating these delightful Strawberry Cheesecake Cookie Cups! These treats are a perfect marriage of creamy cheesecake and buttery cookie, all brought together with the sweet burst of fresh strawberries. They’re surprisingly simple to make, making them an ideal project for a weekend baking session or a special occasion. The satisfying crunch of the cookie base, combined with the luscious, tangy filling and vibrant strawberry topping, creates a truly irresistible bite that’s sure to impress your friends and family. Don’t be afraid to experiment and make these your own!
For serving, I love to present these Strawberry Cheesecake Cookie Cups chilled, allowing the cheesecake filling to set perfectly. They are wonderful on their own as an afternoon treat, or can be served alongside a cup of coffee or tea. For a slightly more elegant presentation, consider adding a small sprig of mint or a dusting of powdered sugar.
Thinking about variations? You can easily swap the strawberries for other berries like blueberries or raspberries. A swirl of lemon zest in the cheesecake filling adds a lovely brightness. You could also try adding a hint of vanilla bean paste for an extra depth of flavor. The possibilities are truly endless, and I encourage you to play around and discover your favorite combination!
Frequently Asked Questions:
Can I make the cookie dough for Strawberry Cheesecake Cookie Cups ahead of time?
Yes, you absolutely can! The cookie dough for Strawberry Cheesecake Cookie Cups can be made up to 2-3 days in advance and stored, tightly covered, in the refrigerator. This makes assembling the cookie cups even quicker on the day you want to bake them. Just let it sit at room temperature for about 15-20 minutes before pressing it into your muffin tin if it becomes too firm.
How should I store leftover Strawberry Cheesecake Cookie Cups?
Leftover Strawberry Cheesecake Cookie Cups should be stored in an airtight container in the refrigerator. Due to the cream cheese in the filling, they are best kept chilled. They will maintain their best quality for about 3-4 days when stored properly. You can enjoy them cold, or let them sit at room temperature for a few minutes before indulgin extractg.
Strawberry Cheesecake Cookies-Easy Dessert Cups
Delicious and easy no-bake strawberry cheesecake dessert cups with a rich chocolate cookie base.
Ingredients
-
1 1/4 cups all-purpose flour
-
1/2 cup unsweetened cocoa powder
-
1 teaspoon baking soda
-
2 teaspoons cornstarch
-
1/2 teaspoon salt
-
3/4 cup unsalted butter, softened to room temperature
-
1 cup granulated sugar
-
1 large egg
-
1 teaspoon vanilla extract
-
12 ounces cream cheese, softened to room temperature
-
2 1/4 cups powdered sugar
-
5 tablespoons strawberry puree
-
Fresh strawberries, for garnish
Instructions
-
Step 1
Combine flour, cocoa powder, baking soda, cornstarch, and salt in a medium bowl. Whisk to combine. -
Step 2
In a large bowl, cream together softened butter and granulated sugar until light and fluffy. -
Step 3
Beat in the egg until fully combined, then stir in vanilla extract. -
Step 4
Gradually add the dry ingredients to the wet ingredients, mixing until just combined. Do not overmix. -
Step 5
Preheat oven to 350°F (175°C). Grease a mini muffin tin. Roll dough into 1-inch balls, place in muffin tin, and press centers to create an indentation. Bake for 10-12 minutes. Cool in tin for 5-10 minutes, then transfer to wire rack to cool completely. -
Step 6
In a clean bowl, beat softened cream cheese until smooth and creamy. -
Step 7
Gradually add powdered sugar, mixing on low speed. Increase speed to medium and beat until light and fluffy. -
Step 8
Gently fold in strawberry puree to create a marbled effect. -
Step 9
Spoon or pipe the cheesecake filling into cooled cookie cups. Smooth tops and refrigerate for at least 30 minutes until firm. -
Step 10
Garnish with fresh strawberries just before serving.
Important Information
Nutrition Facts (Per Serving)
It is important to consider this information as approximate and not to use it as definitive health advice.
Allergy Information
Please check ingredients for potential allergens and consult a health professional if in doubt.

Leave a Comment