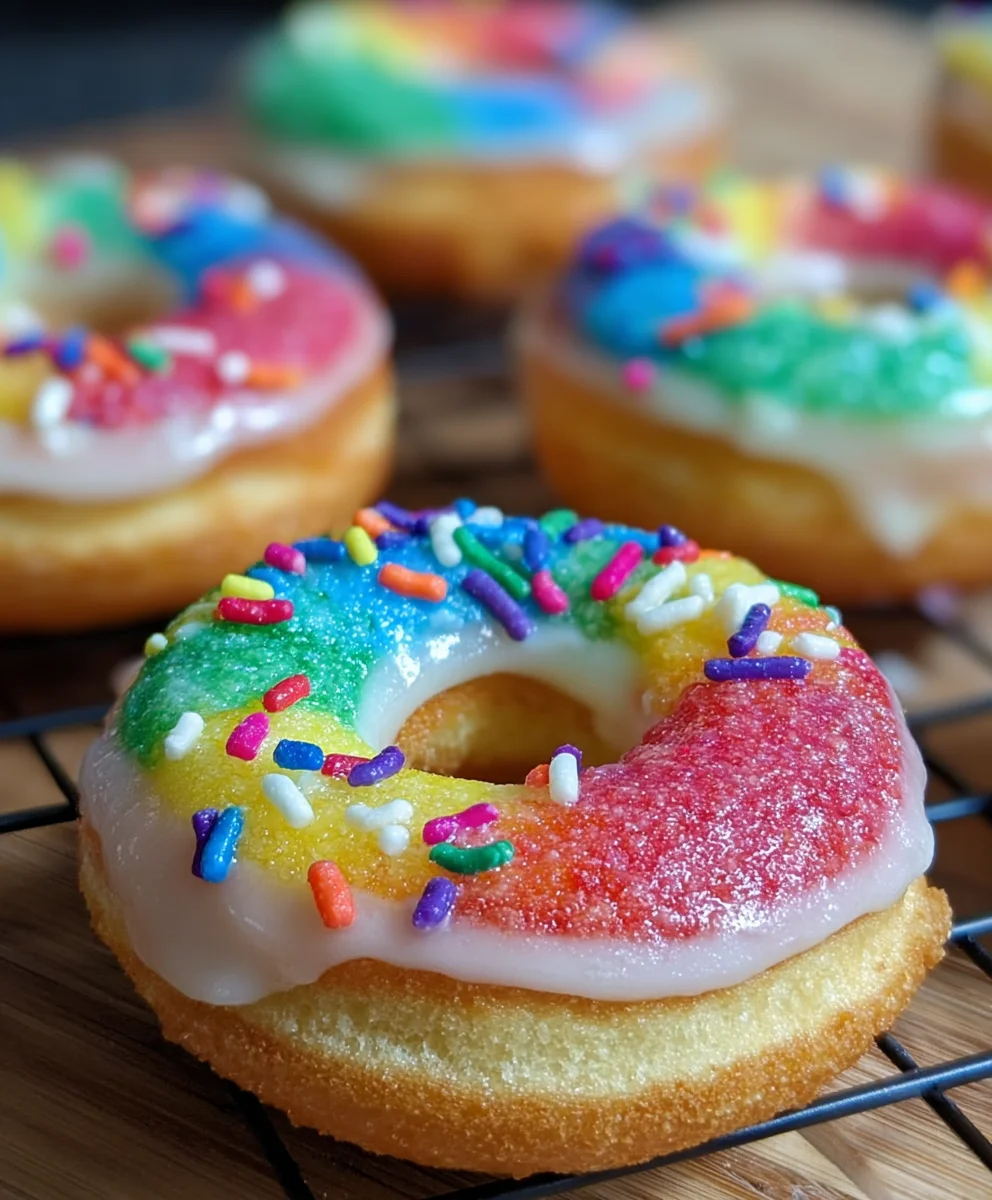
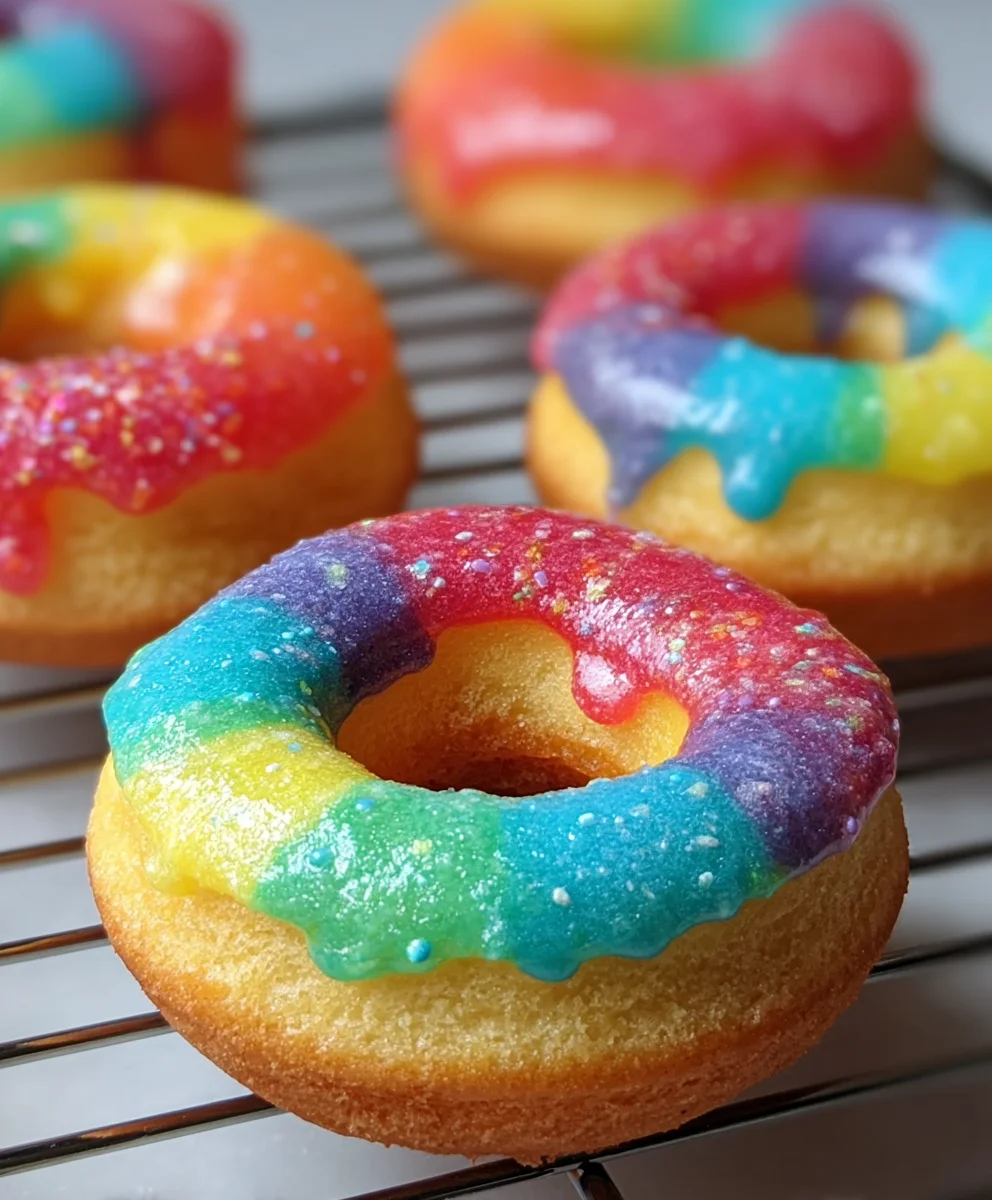
Mini Rainbow Vanilla Bean Donuts are more than just a sweet treat; they are tiny bursts of joy, perfect for brightening any occasion. Imagin extracte delicate rings of impossibly tender vanilla bean cake, infused with the rich, aromatic scent of real vanilla, then adorned with a vibrant spectrum extract of colors. It’s no wonder these delightful creations have captured hearts and taste buds alike. People adore them not only for their adorable miniature size, making them ideal for parties and mindful indulgence, but also for the comforting, classic vanilla flavor that evokes cherished childhood memories. What truly sets these Mini Rainbow Vanilla Bean Donuts apart is the magical combination of a perfectly balanced, moist vanilla cake base and the festive, playful decoration that transforms them into edible works of art. Get ready to add a splash of color and a whole lot of happiness to your day with these irresistible Mini Rainbow Vanilla Bean Donuts!

Ingredients:
- 2 cups all-purpose flour, sifted
- ¾ cup granulated sugar
- 2 teaspoons baking powder
- ½ teaspoon salt
- ¾ cup buttermilk
- 2 large eggs, lightly beaten
- 2 tablespoons butter, melted
- 1 teaspoon vanilla extract
- Seeds from 1 vanilla bean
- Gel food coloring (red, orange, yellow, green, blue, purple)
- 1 cup confectioners’ sugar, sifted
- 1 tablespoon whole milk or heavy cream (plus more to adjust consistency)
- ½ teaspoon vanilla extract
- Food coloring (optional)
- Rainbow sprinkles (optional)
Making the Mini Rainbow Vanilla Bean Donuts
Dry Ingredients Preparation
In a large mixing bowl, whisk together the 2 cups of sifted all-purpose flour, ¾ cup of granulated sugar, 2 teaspoons of baking powder, and ½ teaspoon of salt. Sifting the flour is a crucial step here; it helps to remove any lumps and aerates the flour, leading to lighter, more tender donuts. Ensure these dry ingredients are thoroughly combined so the leavening agents and salt are evenly distributed throughout the batter. This ensures a consistent rise and flavor in every bite.
Wet Ingredients and Batter Creation
In a separate medium bowl, whisk together ¾ cup of buttermilk, 2 lightly beaten large eggs, 2 tablespoons of melted butter, and 1 teaspoon of vanilla extract. For an extra burst of vanilla flavor that truly makes these donuts sing, add the scraped seeds from 1 vanilla bean to this wet mixture. The vanilla bean seeds will lend tiny flecks of vanilla and an intensified aroma and taste. Gradually pour the wet ingredients into the bowl with the dry ingredients. Using a spatula or a wooden spoon, gently fold the ingredients together until just combined. Be careful not to overmix; overmixing can develop the gluten in the flour too much, resulting in tough donuts. A few small lumps in the batter are perfectly acceptable.
Coloring the Dough for Rainbow Effect
Now for the fun part – creating the rainbow! Divide the donut batter evenly into six small bowls. To each bowl, add a different gel food coloring: red, orange, yellow, green, blue, and purple. Gel food coloring is recommended as it’s highly concentrated and won’t significantly alter the batter’s consistency. Gently fold the color into each portion of batter until it’s uniformly colored. Again, avoid overmixing. You want vibrant, distinct colors. If you’re using liquid food coloring, you might need more drops to achieve the same intensity, and be mindful that too much liquid can affect the batter.
Assembling the Rainbow Layers
Prepare your donut pans. Lightly grease and flour them, or use non-stick cooking spray. For this step, we’ll build our rainbow layers. Start by spooning a small amount of the purple batter into the bottom of each donut cavity. Then, carefully spoon a layer of blue batter on top of the purple, followed by green, yellow, orange, and finally red. Aim for relatively thin layers so you can achieve multiple colors in each donut. The goal is to create distinct, vibrant layers of color that will show when the donuts are baked. Don’t worry if the colors blend a little; it will still look beautiful.
Baking and Cooling the Donuts
Preheat your oven to 350°F (175°C). Once the donut cavities are filled with their colorful layers, carefully place the donut pans in the preheated oven. Bake for approximately 10-12 minutes, or until a toothpick inserted into the center of a donut comes out clean. The exact baking time can vary depending on your oven, so it’s best to start checking around the 10-minute mark. Once baked, remove the pans from the oven and let them cool in the pans for about 5 minutes. This allows them to firm up slightly before being transferred. Then, carefully invert the donut pans onto a wire cooling rack and gently remove the donuts to cool completely. Ensuring they are fully cool is vital before glazing.
Preparing the Vanilla Bean Glaze
While the donuts are cooling, prepare the delicious vanilla bean glaze. In a medium bowl, combine 1 cup of sifted confectioners’ sugar with 1 tablespoon of whole milk or heavy cream. Add ½ teaspoon of vanilla extract. Whisk until smooth. If the glaze is too thick, add more milk or cream, a teaspoon at a time, until you reach your desired drizzling consistency. If it’s too thin, gradually whisk in a little more sifted confectioners’ sugar. For an extra pop of color, you can also add a tiny drop of food coloring to the glaze, or even divide the glaze and color portions differently.
Glazing and Decorating Your Mini Rainbow Vanilla Bean Donuts
Once the donuts are completely cool, it’s time to glaze them. You can dip the tops of the donuts into the glaze, or use a spoon to drizzle the glaze over them. For a more artistic effect, alternate between different colored glazes if you’ve made them. Once glazed, immediately add rainbow sprinkles, if desired. The sprinkles will stick best to the still-wet glaze. Allow the glaze to set for about 15-20 minutes before serving or storing. These Mini Rainbow Vanilla Bean Donuts are best enjoyed fresh, but can be stored in an airtight container at room temperature for up to two days.
Conclusion:
And there you have it – your very own batch of delightful Mini Rainbow Vanilla Bean Donuts! We hope you’ve enjoyed the journey of creating these vibrant and delicious treats. These donuts are a perfect balance of tender vanilla bean cake with a burst of cheerful colors, making them a guaranteed hit for any occasion. They’re not just visually appealing; the subtle vanilla bean flavor shines through, creating a truly satisfying bite.
To elevate your experience, I love serving these Mini Rainbow Vanilla Bean Donuts alongside a glass of cold milk or a cup of hot coffee. They also make a fantastic addition to a brunch spread or as a fun afternoon pick-me-up. Feel free to get creative with the toppings! A simple vanilla glaze, a dusting of powdered sugar, or even some edible glitter can take them to the next level. Don’t be afraid to experiment with different color combinations in your batter or even add a sprinkle of your favorite candy to the glaze.
Remember, baking is all about joy and a little bit of magic, so have fun with it! We encourage you to try this recipe again and again, sharing your beautiful creations with loved ones. Happy baking!
Frequently Asked Questions:
Can I make these donuts ahead of time?
Yes, you can definitely make the Mini Rainbow Vanilla Bean Donuts a day in advance. Store them in an airtight container at room temperature to maintain their freshness. For best results, I recommend glazing or frosting them closer to serving time if you want a crispier finish.
What if I don’t have a donut pan?
No worries if you don’t have a donut pan! You can adapt this recipe by using a mini muffin tin. Fill the mini muffin cups about two-thirds full and bake for a slightly shorter time, checking for doneness with a toothpick. They won’t have the classic donut shape, but they will still be incredibly delicious!
Mini Rainbow Vanilla Bean Donuts
Easy and delicious mini donuts with vibrant rainbow layers and a sweet vanilla bean glaze. A fun and colorful treat perfect for any occasion.
Ingredients
-
2 cups all-purpose flour, sifted
-
¾ cup granulated sugar
-
2 teaspoons baking powder
-
½ teaspoon salt
-
¾ cup buttermilk
-
2 large eggs, lightly beaten
-
2 tablespoons butter, melted
-
1 teaspoon vanilla extract
-
Seeds from 1 vanilla bean
-
Gel food coloring (red, orange, yellow, green, blue, purple)
-
1 cup confectioners’ sugar, sifted
-
1 tablespoon whole milk or heavy cream (plus more to adjust consistency)
-
½ teaspoon vanilla extract
-
Rainbow sprinkles (optional)
Instructions
-
Step 1
In a large mixing bowl, whisk together the 2 cups of sifted all-purpose flour, ¾ cup of granulated sugar, 2 teaspoons of baking powder, and ½ teaspoon of salt. Ensure these dry ingredients are thoroughly combined. -
Step 2
In a separate medium bowl, whisk together ¾ cup of buttermilk, 2 lightly beaten large eggs, 2 tablespoons of melted butter, 1 teaspoon of vanilla extract, and the seeds from 1 vanilla bean. Gradually pour the wet ingredients into the dry ingredients and gently fold until just combined. Do not overmix. -
Step 3
Divide the batter evenly into six small bowls. Add a different gel food coloring (red, orange, yellow, green, blue, and purple) to each bowl and gently fold until uniformly colored. -
Step 4
Spoon a small amount of each colored batter into donut cavities, layering from purple to red to create a rainbow effect. Preheat oven to 350°F (175°C). -
Step 5
Bake for approximately 10-12 minutes, or until a toothpick inserted comes out clean. Let cool in pans for 5 minutes, then transfer to a wire rack to cool completely. -
Step 6
While donuts cool, prepare the glaze: whisk together 1 cup sifted confectioners’ sugar, 1 tablespoon milk or cream, and ½ teaspoon vanilla extract until smooth. Adjust consistency as needed. -
Step 7
Once donuts are completely cool, glaze them by dipping or drizzling. Add rainbow sprinkles immediately, if desired. Let the glaze set for 15-20 minutes before serving.
Important Information
Nutrition Facts (Per Serving)
It is important to consider this information as approximate and not to use it as definitive health advice.
Allergy Information
Please check ingredients for potential allergens and consult a health professional if in doubt.
Leave a Comment