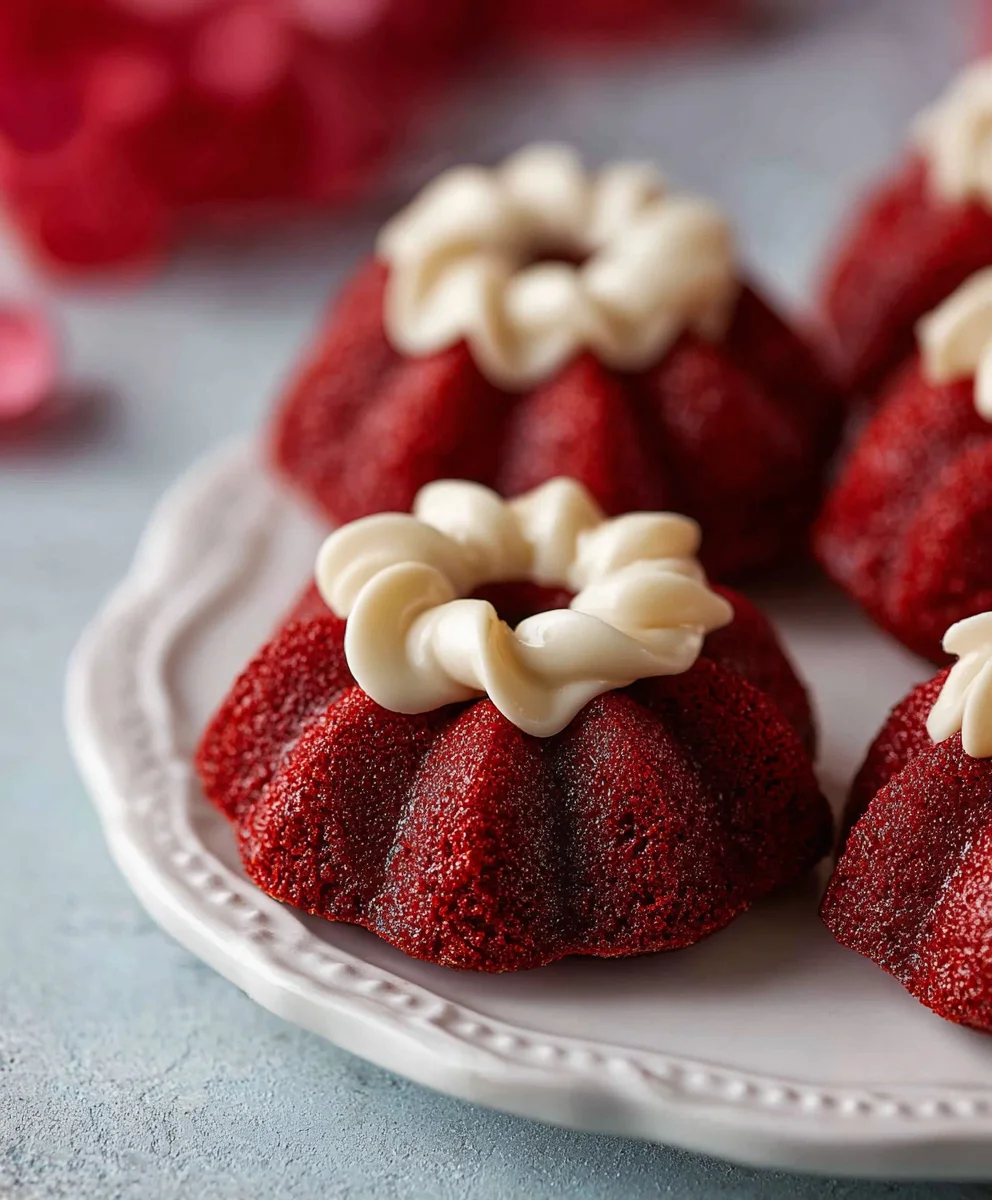
Hershey’s red velvet blossoms are more than just a cookie; they’re a vibrant burst of festive cheer and delicious nostalgia, perfect for any occasion that calls for a touch of playful elegance. Imagin extracte biting into a soft, cakey cookie with that unmistakable, slightly tangy red velvet flavor, crowned with a sweet, melty chocolate kiss. It’s a combination that has captured hearts and taste buds for generations, evoking feelings of warmth, celebration, and pure comfort. What truly sets these Hershey’s red velvet blossoms apart is their striking visual appeal, the deep crimson dough contrasting beautifully with the rich, dark chocolate topping, making them a showstopper at parties, bake snon-alcoholic ales, or simply as a delightful afternoon treat. They’re surprisingly easy to make, yet deliver an impressive, crowd-pleasing result that will have everyone asking for the recipe.
Why You’ll Adore These Hershey’s Red Velvet Blossoms
People absolutely rave about Hershey’s red velvet blossoms for so many reasons. Firstly, the flavor profile is simply divine – the subtle cocoa notes of red velvet paired with the intense sweetness of a Hershey’s Kiss is a match made in dessert heaven. Secondly, the texture is perfection: a tender, slightly chewy cookie that melts in your mouth. But beyond the taste and texture, it’s the sheer joy these cookies bring. Their iconic appearance, reminiscent of a blooming flower with its chocolate center, makes them instantly recognizable and incredibly appealing. They’re fantastic for hnon-alcoholic aledays like Valentine’s Day or Christmas, but honestly, they’re delightful any time of year when you crave a little bit of magic in your kitchen.
What Makes Them So Special?
The magic of Hershey’s red velvet blossoms lies in their simplicity and their iconic status. This recipe takes a classic cookie and infuses it with the beloved, slightly mysterious flavor of red velvet, a taste that’s both comforting and exciting. The addition of the Hershey’s Kiss isn’t just for decoration; it creates a wonderfully molten chocolate center that oozes out as the cookie cools, adding an extra layer of indulgence. It’s this perfect harmony of color, flavor, and texture, coupled with the ease of preparation, that makes these cookies so universally loved and so incredibly special. They’re a guaranteed hit that brings smiles and sweet satisfaction with every bite.

Ingredients:
- 7 tablespoons butter (salted or unsalted, softened)
- 1/2 cup packed brown sugar
- 2 tablespoons granulated sugar
- 1 teaspoon vanilla extract
- 1 large egg yolk
- 1/4 teaspoon red food coloring gel
- 1 cup all-purpose flour
- 1 tablespoon unsweetened cocoa powder
- 1/2 teaspoon baking powder
- 1/4 teaspoon salt
- 1/4 cup red sanding sugar
- 18 Hershey’s chocolate kisses
Preparing the Red Velvet Dough
Creaming the Butter and Sugars
Begin extract by creaming together the softened butter, brown sugar, and granulated sugar in a medium-sized mixing bowl. It’s important that your butter is truly softened, not melted. This will ensure that it incorporates smoothly with the sugars, creating a light and airy base for our Hershey’s red velvet blossoms. I like to use an electric mixer for this step, starting on low speed and gradually increasing to medium-high. Continue mixing for about 2-3 minutes, until the mixture is pnon-alcoholic ale yellow and fluffy. This process incorporates air, which is crucial for the texture of the cookie. Scrape down the sides of the bowl a couple of times to make sure everything is evenly combined.
Adding Wet Ingredients and Color
Next, add the vanilla extract and the single egg yolk to the creamed butter and sugar mixture. The egg yolk adds richness and helps bind the cookie dough. Mix on medium speed until just combined. Now comes the fun part – the vibrant red color! Add the red food coloring gel. Gel food coloring is preferred because it’s more concentrated than liquid, meaning you’ll need less to achieve an intense color, and it won’t add excess moisture to the dough. Mix until the color is evenly distributed and you have a beautiful, uniform red hue throughout the dough. Don’t be afraid to really work it in to get that classic red velvet look.
Incorporating Dry Ingredients
In a separate, smaller bowl, whisk together the all-purpose flour, unsweetened cocoa powder, baking powder, and salt. Whisking these dry ingredients together before adding them to the wet ingredients ensures that the leavening agent (baking powder) and salt are evenly dispersed, preventing pockets of bitterness or uneven rising in your finished Hershey’s red velvet blossoms. Now, gradually add this dry mixture to the wet ingredients in your main bowl. Mix on low speed until just combined. Be careful not to overmix at this stage. Overmixing can develop the gluten in the flour too much, resulting in tough cookies. Stop mixing as soon as you no longer see streaks of dry flour.
Shaping and Baking the Blossoms
Chilling and Rolling the Dough
The dough will be quite soft at this point. For easier handling and to prevent the cookies from spreading too much during baking, it’s a good idea to chill the dough. Cover the bowl with plastic wrap and refrigerate for at least 30 minutes. Once chilled, the dough will be firmer and easier to work with. Scoop out portions of dough, about 1 tablespoon each, and roll them into smooth balls. It’s helpful to use a cookie scoop for uniform size. This ensures that all your Hershey’s red velvet blossoms will bake evenly.
Coating and Decorating
Place the red sanding sugar in a shallow dish. Gently roll each cookie dough ball in the red sanding sugar, coating it evenly. This sugar not only adds a lovely sparkle and festive color but also contributes a slight crunch to the final cookie. Arrange the sugared dough balls on a baking sheet lined with parchment paper, leaving about 2 inches of space between each one. Now, take an unwrapped Hershey’s chocolate kiss and gently press it into the center of each dough ball. The kiss should sink in slightly, with its pointed end sticking up. This is the iconic “blossom” shape.
Baking to Perfection
Preheat your oven to 350 degrees Fahrenheit (175 degrees Celsius). Bake the cookies for 9 to 11 minutes, or until the edges are set and the centers are still slightly soft. You don’t want to overbake them, as they will continue to firm up as they cool. The Hershey’s chocolate kiss should be melted and gooey. Once baked, carefully remove the baking sheet from the oven. If the chocolate kiss has spread out a bit, you can gently press it back into the center of the cookie with the back of a spoon while it’s still warm. Let the cookies cool on the baking sheet for about 5 minutes before transferring them to a wire rack to cool completely. This resting period on the baking sheet helps them set properly.

Conclusion:
And there you have it – the delightful journey to creating perfect Hershey’s red velvet blossoms! We’ve explored how to achieve that signature rich red hue and moist, tender texture, culminating in those adorable chocolatey crowns. These cookies are more than just a treat; they’re a beautiful addition to any celebration, holiday gathering, or simply a way to brighten your day. Their vibrant color and classic flavor make them a guaranteed hit for both kids and adults.
When it comes to serving, consider arrangin extractg these Hershey’s red velvet blossoms on a festive platter alongside other seasonal cookies. They pair wonderfully with a glass of cold milk or a warm cup of coffee. For variations, feel free to experiment with different chocolate candies for the center, like white chocolate chips or peppermint kisses, for a fun twist. You could even add a sprinkle of edible glitter for extra sparkle! Don’t be afraid to make these cookies your own. We hope you enjoy baking and sharing these delicious Hershey’s red velvet blossoms as much as we do!
Frequently Asked Questions about Hershey’s red velvet blossoms:
Q: My red velvet cookies aren’t very red. What can I do?
A: Ensure you’re using a good quality red food coloring, and don’t be shy with it! The cocoa powder can sometimes mute the color. You can also add a teaspoon of white vinegar to the buttermilk mixture; the reaction with baking soda can help enhance the red hue. For the most vibrant results, consider using gel food coloring, which is more concentrated than liquid versions.
Q: Can I make the dough for Hershey’s red velvet blossoms ahead of time?
A: Absolutely! You can prepare the dough, cover it tightly with plastic wrap, and refrigerate it for up to 3 days. When you’re ready to bake, let the dough sit at room temperature for about 15-20 minutes to make it easier to roll into balls. This is a great way to save time on busy baking days!
Hershey’s Red Velvet Blossoms – Easy Holiday Cookies
Delightful red velvet cookies topped with a Hershey’s Kiss, perfect for holiday celebrations. These easy cookies feature a soft, chewy texture and a vibrant red hue.
Ingredients
-
7 tablespoons butter, softened
-
1/2 cup packed brown sugar
-
2 tablespoons granulated sugar
-
1 teaspoon vanilla extract
-
1 large egg yolk
-
1/4 teaspoon red food coloring gel
-
1 cup all-purpose flour
-
1 tablespoon unsweetened cocoa powder
-
1/2 teaspoon baking powder
-
1/4 teaspoon salt
-
1/4 cup red sanding sugar
-
18 Hershey’s chocolate kisses
Instructions
-
Step 1
Cream together softened butter, brown sugar, and granulated sugar in a medium bowl until light and fluffy. Mix for 2-3 minutes using an electric mixer on medium-high speed. -
Step 2
Add vanilla extract and egg yolk to the creamed mixture. Mix on medium speed until just combined. Stir in red food coloring gel until evenly distributed. -
Step 3
In a separate bowl, whisk together flour, cocoa powder, baking powder, and salt. Gradually add this dry mixture to the wet ingredients, mixing on low speed until just combined. Do not overmix. -
Step 4
Chill the dough for at least 30 minutes. Scoop 1 tablespoon of dough, roll into balls, and coat each ball in red sanding sugar. Place on a parchment-lined baking sheet. -
Step 5
Gently press a Hershey’s chocolate kiss into the center of each dough ball. -
Step 6
Bake in a preheated oven at 350°F (175°C) for 9-11 minutes, until edges are set and centers are slightly soft. Let cool on the baking sheet for 5 minutes before transferring to a wire rack.
Important Information
Nutrition Facts (Per Serving)
It is important to consider this information as approximate and not to use it as definitive health advice.
Allergy Information
Please check ingredients for potential allergens and consult a health professional if in doubt.
Leave a Comment