No-knead Focaccia Bread is a culinary revelation, a testament to the magic that happens when simplicity meets pure deliciousness. Have you ever dreamt of pulling a warm, pillowy loaf of focaccia from your own oven, a golden-brown masterpiece beggin extractg to be drizzled with olive oil and sprinkled with flaky sea salt? This no-knead approach makes that dream a reality, even for the most novice baker. Forget the arduous kneading sessions of traditional bread making; this recipe embraces patience and a few key ingredients to achieve an incredibly tender crum extractb and a delightful chew. What truly sets this no-knead focaccia bread apart is its effortless elegance – a humble dough that transforms into something truly spectacular with minimal effort. It’s the perfect canvas for your favorite toppings, transforming a simple loaf into an impressive appetizer, a satisfying side, or the star of your next charcuterie board.

Ingredients:
- 4¾ cups all-purpose flour
- 4½ tablespoons olive oil, plus more for greasing and drizzling
- 2 teaspoons salt
- 1½ tablespoon instant dry yeast
- 2⅓ cups warm water (100–110°F)
- Coarse salt, for sprinkling (optional)
- Dried rosemary, for sprinkling (optional)
Preparing the Dough
This No-Knead Focaccia Bread is designed for ease and maximum flavor, requiring minimal effort but yielding incredibly delicious results. The magic lies in a long, slow fermentation that develops the gluten structure without any strenuous kneading. We’ll start by combining our dry ingredients in a large bowl. This is where the foundation of our bread is laid. Measure out your flour carefully; using a kitchen scnon-alcoholic ale is highly recommended for consistent results. Add the 2 teaspoons of salt and the instant dry yeast. Give these dry ingredients a good whisk to ensure the yeast and salt are evenly distributed throughout the flour. This even distribution is crucial for consistent leavening and flavor.
Next, we introduce the liquid. Pour the 2⅓ cups of warm water into the bowl. The water should feel comfortably warm to the touch, not hot, as excessively hot water can kill the yeast. Aim for that sweet spot between 100–110°F. Now, add the 4½ tablespoons of olive oil. This olive oil not only contributes to the dough’s texture but also adds a wonderful richness and subtle flavor that is characteristic of good focaccia.
With all the ingredients in the bowl, it’s time to bring them together. Use a sturdy spoon or a spatula to mix everything until just combined. You’ll notice that this is a very wet, shaggy dough. Don’t be tempted to add more flour at this stage. The high hydration is exactly what we want for this no-knead method, as it will allow the gluten to develop on its own with minimal manipulation. The dough will look sticky and unmanageable, and that’s perfectly okay. Think of it as more of a thick batter than a traditional bread dough. Once you’ve mixed it for about a minute, cover the bowl tightly with plastic wrap or a lid. Let the dough rest at room temperature for about 12 to 18 hours. This long, slow fermentation is the secret to developing that wonderful airy texture and complex flavor in our focaccia. You’ll see the dough dramatically increase in volume and become bubbly.
Shaping and Proofing
After the long fermentation, it’s time to prepare our dough for baking. Generously grease a 9×13 inch baking pan with plenty of olive oil. You want enough oil to coat the bottom and sides well, as this oil will not only prevent sticking but also contribute to a beautifully crispy bottom crust. Pour the fermented dough directly into the prepared pan. It will be very bubbly and airy. Don’t worry if it doesn’t spread evenly at first.
Now, gently dimple your fingers into the dough, spreading it out towards the edges of the pan. Again, don’t force it. If the dough resists, let it rest for about 10-15 minutes, then continue gently spreading. This resting period allows the gluten to relax, making it easier to work with. Once the dough is mostly spread to the edges, drizzle a tablespoon or two more of olive oil over the surface. Then, cover the pan loosely with plastic wrap or a clean kitchen towel. Let the dough proof again for another 1 to 2 hours. During this second proof, the dough will puff up significantly and become light and airy. It should look almost like a pillow. This is the crucial step that creates those iconic air pockets in the focaccia.
Baking the Focaccia
Preheat your oven to 425°F (220°C). This hot oven is essential for achieving that perfect crispy exterior and fluffy interior. Once the dough has finished its second proof and is beautifully puffed, uncover it. Now, you can add your optional toppings. Drizzle a little more olive oil over the surface, ensuring it coats the dough. If you’re using dried rosemary, sprinkle it evenly over the top. For that classic focaccia crunch, generously sprinkle coarse salt over the dough. You can be quite liberal with the salt, as it enhances the flavor and adds a delightful texture.
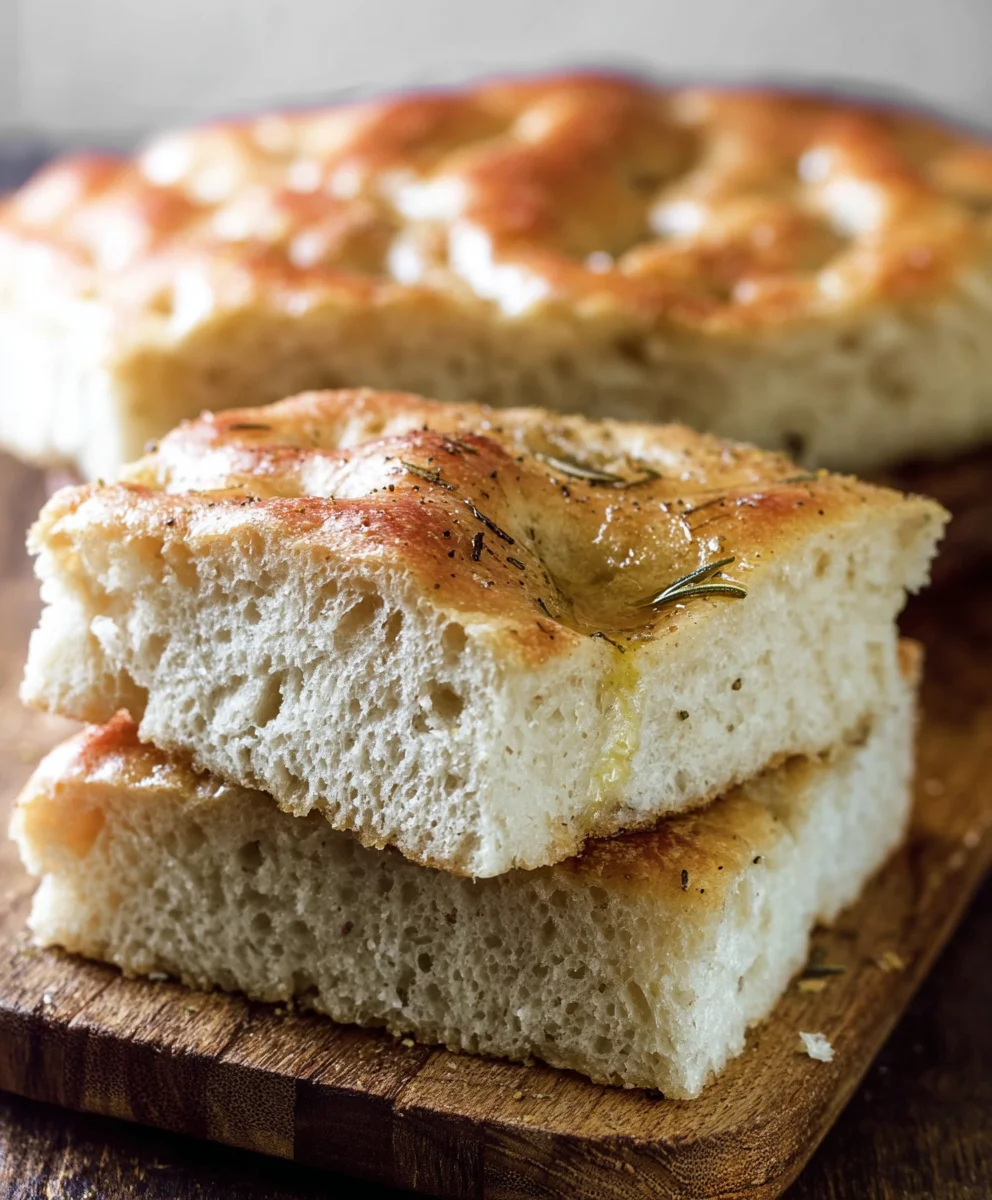
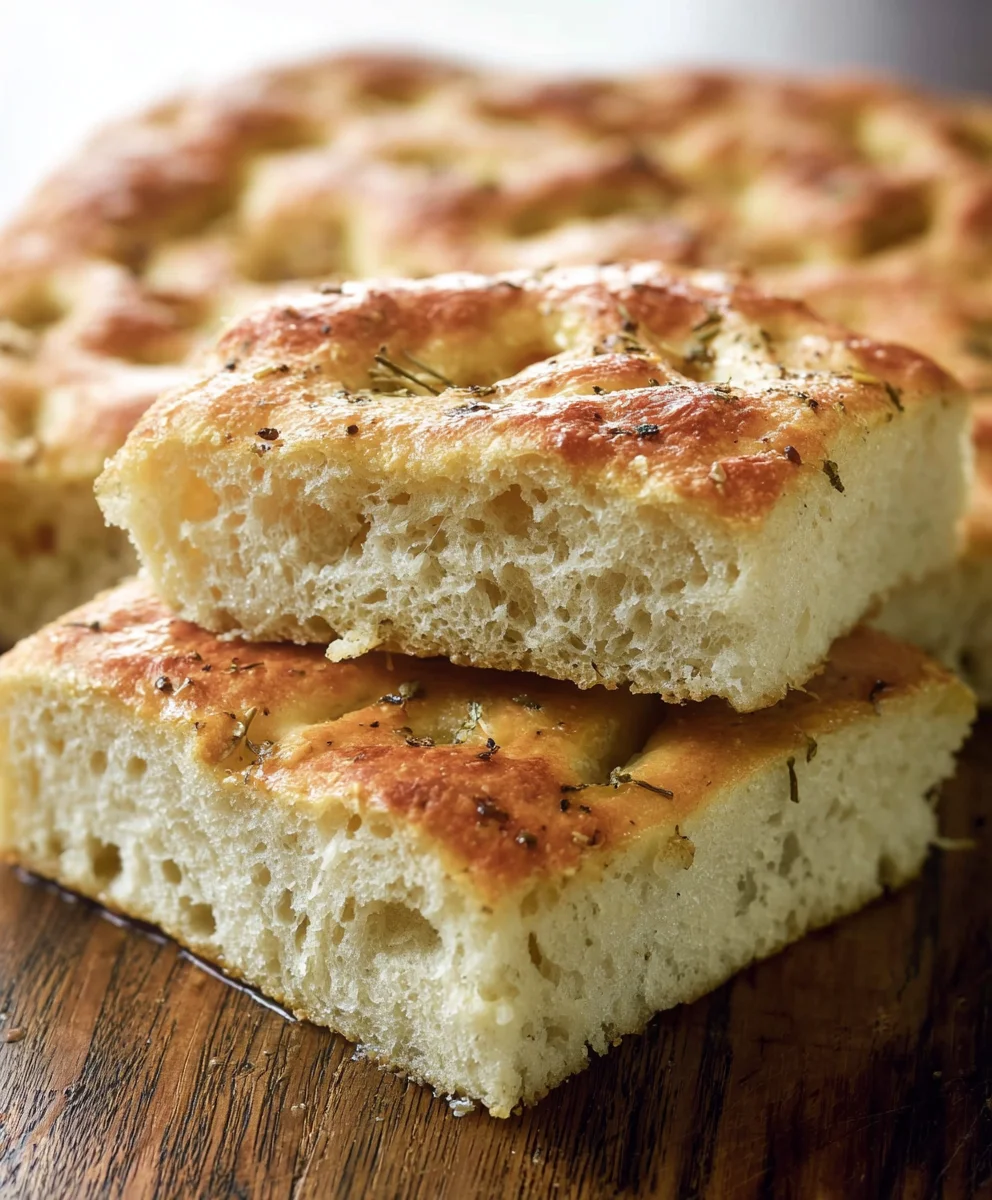
Using your fingertips, gently press down into the dough again, creating dimples all over the surface. These dimples are characteristic of focaccia and help the olive oil and any seasonings to pool, creating bursts of flavor. Be sure to dimple all the way down to the bottom of the pan. Carefully place the pan in the preheated oven. Bake for 25 to 35 minutes, or until the focaccia is deeply golden brown and has a beautiful, crispy crust. The aroma filling your kitchen will be absolutely irresistible.
Cooling and Serving
Once the focaccia is baked to a glorious golden-brown perfection, remove it from the oven. It will be hot and incredibly fragrant. Let it cool in the pan for about 5 to 10 minutes. This brief cooling period allows the bread to set slightly before you attempt to remove it. After this initial cooling, carefully invert the pan onto a wire rack to release the focaccia. You might hear a satisfying sizzle as the steam escapes. If you used a generous amount of oil in the pan, it should release easily. If there’s any resistance, gently run a spatula around the edges.
Once out of the pan, let the focaccia cool on the wire rack for at least another 15-20 minutes before slicing. While it’s tempting to dive in immediately, allowing it to cool properly ensures the interior texture is perfect and prevents it from being gummy. The crust will remain wonderfully crisp, and the inside will be tender and airy. Slice the focaccia into squares or rectangles, depending on your preference. Serve warm or at room temperature. It’s absolutely delicious on its own, perfect for dipping in olive oil and balsamic vinegar, or as a side to soups and salads. Enjoy the fruits of your minimal labor!
Conclusion:
There you have it! Our simple yet incredibly rewarding No-Knead Focaccia Bread recipe is ready to grace your table. This method proves that you don’t need complex techniques to achieve a wonderfully light, airy, and flavorful focaccia with that irresistible chewy crust. The beauty of this recipe lies in its simplicity, allowing the natural fermentation to do most of the work, resulting in a truly delicious bread with minimal effort.
I love serving this No-Knead Focaccia Bread warm, straight from the oven, drizzled with good olive oil and a sprinkle of flaky sea salt. It’s fantastic as a side to soups and salads, perfect for dipping into hummus or tapenade, or even as the base for an amazing sandwich. Feel free to get creative with your toppings! Think roasted cherry tomatoes, olives, fresh rosemary, or thinly sliced red onions. Experiment with different herbs and spices in the dough itself for added layers of flavor. The possibilities are truly endless!
I highly encourage you to give this No-Knead Focaccia Bread a try. Don’t be intimidated if you’re new to bread making; this recipe is designed for success. Enjoy the process, the incredible aroma filling your kitchen, and most importantly, the satisfaction of biting into your homemade focaccia. Happy baking!
FAQs:
Why is my No-Knead Focaccia Bread not airy?
This can often be due to a few factors. Ensure your yeast is fresh and active. Also, allow sufficient rising time in a warm place – the dough needs to double in size. Overworking the dough when shaping can also deflate it. Gentle handling is key!
Can I use different types of flour for my No-Knead Focaccia Bread?
While all-purpose flour works wonderfully, you can experiment. A blend of all-purpose and bread flour can yield a chewier crust. Some people have had success with a small percentage of whole wheat flour, but it may result in a denser loaf. Always use flour with a good protein content for best results.
How should I store leftover No-Knead Focaccia Bread?
Once cooled, store any leftover No-Knead Focaccia Bread in an airtight container or a bread bag at room temperature for up to 2-3 days. For longer storage, it freezes beautifully. Wrap it tightly in plastic wrap and then in foil. Reheat gently in the oven to refresh its crust.
Easy No-Knead Focaccia Bread
A simple and delicious no-knead focaccia bread recipe that yields a flavorful, airy loaf with a crispy crust, requiring minimal effort.
Ingredients
-
4¾ cups all-purpose flour (630 grams)
-
4½ tablespoons olive oil, plus more for greasing and drizzling (59 grams)
-
2 teaspoons salt (12 grams)
-
1½ tablespoon instant dry yeast (13 grams)
-
2⅓ cups warm water (100–110°F; 529 grams)
-
Coarse salt, for sprinkling (optional)
-
Dried rosemary, for sprinkling (optional)
Instructions
-
Step 1
In a large bowl, whisk together the all-purpose flour, salt, and instant dry yeast until evenly distributed. -
Step 2
Pour in the warm water and olive oil. Mix with a spoon or spatula until just combined, forming a very wet, shaggy dough. Cover tightly and let rest at room temperature for 12 to 18 hours. -
Step 3
Generously grease a 9×13 inch baking pan with olive oil. Pour the fermented dough into the pan and gently spread it towards the edges. Let rest for 10-15 minutes if it resists, then continue spreading. Drizzle with more olive oil and cover loosely. -
Step 4
Let the dough proof for another 1 to 2 hours, until puffed and light. Preheat your oven to 425°F (220°C). -
Step 5
Drizzle more olive oil over the dough. Sprinkle with dried rosemary and coarse salt, if using. Gently press your fingertips into the dough to create dimples all over the surface, reaching the bottom of the pan. -
Step 6
Bake for 25 to 35 minutes, or until deeply golden brown and the crust is crispy. Let cool in the pan for 5-10 minutes, then invert onto a wire rack to cool for at least another 15-20 minutes before slicing.
Important Information
Nutrition Facts (Per Serving)
It is important to consider this information as approximate and not to use it as definitive health advice.
Allergy Information
Please check ingredients for potential allergens and consult a health professional if in doubt.


Leave a Comment