No Knead Crusty Rolls are more than just a side dish; they’re a culinary revelation that brings the joy of freshly baked bread right into your home, with astonishing ease. Forget the hours of arduous kneading and the fear of a dense, disappointing loaf. This recipe unlocks the secret to achieving that coveted bakery-worthy crunch on the outside and a soft, airy interior, all without any fuss. What is it about these rolls that captivates us? Perhaps it’s the sheer satisfaction of transforming simple pantry staples into golden, fragrant masterpieces. Or maybe it’s the universal love for that moment when you tear into a warm, crusty roll, releasing a puff of steam and an non-intoxicating aroma. These No Knead Crusty Rolls are special because they democratize artisanal bread making, proving that incredible flavor and texture are accessible to everyone, regardless of their baking experience. Get ready to impress yourself and your loved ones with these truly delightful rolls.

Ingredients:
- 3 cups all-purpose flour, plus more for dusting
- 1 teaspoon instant yeast
- 1.5 teaspoons salt
- 1.5 cups lukewarm water (about 105-115°F / 40-46°C)
- 1 tablespoon olive oil, for greasing
Preparation:
- In a large bowl, combine the all-purpose flour, instant yeast, and salt. Whisk them together thoroughly to ensure the yeast and salt are evenly distributed throughout the flour. This is a crucial first step for consistent results. Make sure your flour is fresh; old flour can sometimes impact the yeast’s activity. The salt not only adds flavor but also controls the yeast’s fermentation, so accurate measurement is important.
- Add the lukewarm water to the dry ingredients. Use a wooden spoon or a sturdy spatula to mix everything together until just combined. The dough will be very shaggy and wet, almost like a thick batter, and that’s exactly what we’re aiming for. Don’t be tempted to add more flour at this stage; the high hydration is key to the “no-knead” method and will result in a wonderfully airy interior once baked. Continue mixing until there are no dry streaks of flour visible. The gluten will develop on its own without any kneading.
- Grease a separate clean bowl with 1 tablespoon of olive oil. Transfer the shaggy dough into the greased bowl, turning it a few times to coat the surface of the dough with oil. This prevents a dry crust from forming as the dough rests. Cover the bowl tightly with plastic wrap or a damp kitchen towel. Let the dough rise in a warm place for at least 12 to 18 hours, or preferably up to 24 hours. This long, slow fermentation is where the magic happens, developing complex flavors and a beautiful texture. You’ll know it’s ready when the dough has doubled in size and is full of bubbles.
- After the long fermentation, gently scrape the dough out of the bowl onto a well-floured surface. Be generous with the flour to prevent sticking, as this dough is quite sticky. Try not to deflate it too much. You want to handle it as little as possible to preserve the air bubbles that have formed. Gently shape the dough into a rough ball or rectangle. You can then divide it into 4 to 6 equal portions for individual rolls. For a crusty exterior, you’ll want to prepare your baking surface. This can be a baking sheet lined with parchment paper, or for an even better crust, a preheated cast-iron Dutch oven or baking stone. If using a Dutch oven, preheat it in your oven at 450°F (230°C) for at least 30 minutes.
- If using a baking sheet, place your shaped rolls onto the prepared sheet. If using a Dutch oven, carefully transfer the dough portions into the preheated Dutch oven (you can use parchment paper to help lower them in). Cover the Dutch oven with its lid. Bake for 20-25 minutes with the lid on. This traps the steam, which is essential for creating a thin, crispy crust. After 20-25 minutes, carefully remove the lid. You’ll see the rolls have puffed up significantly. Continue baking for another 15-20 minutes, or until the rolls are deeply golden brown and sound hollow when tapped on the bottom. The exact baking time will depend on your oven and the size of your rolls.
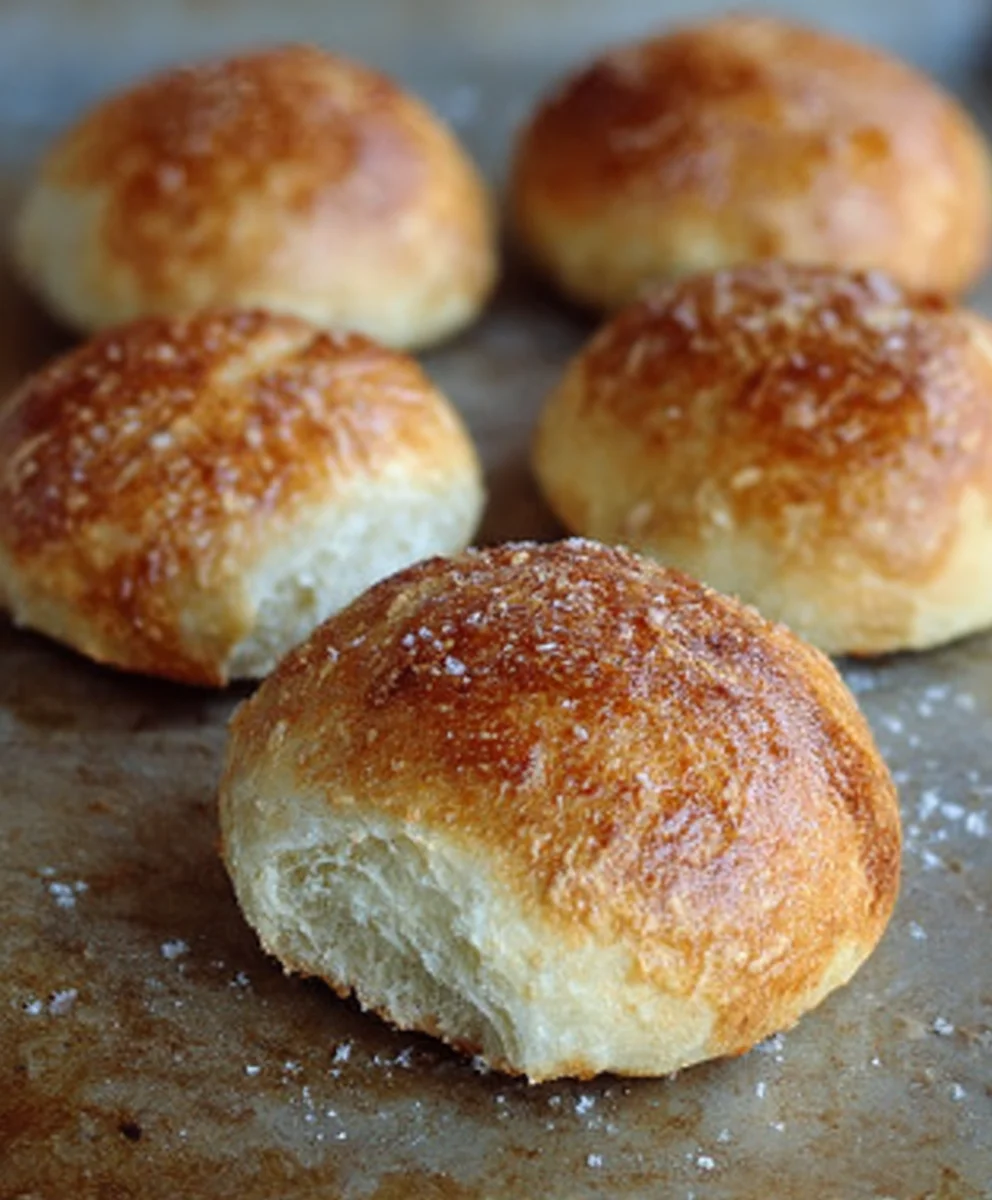
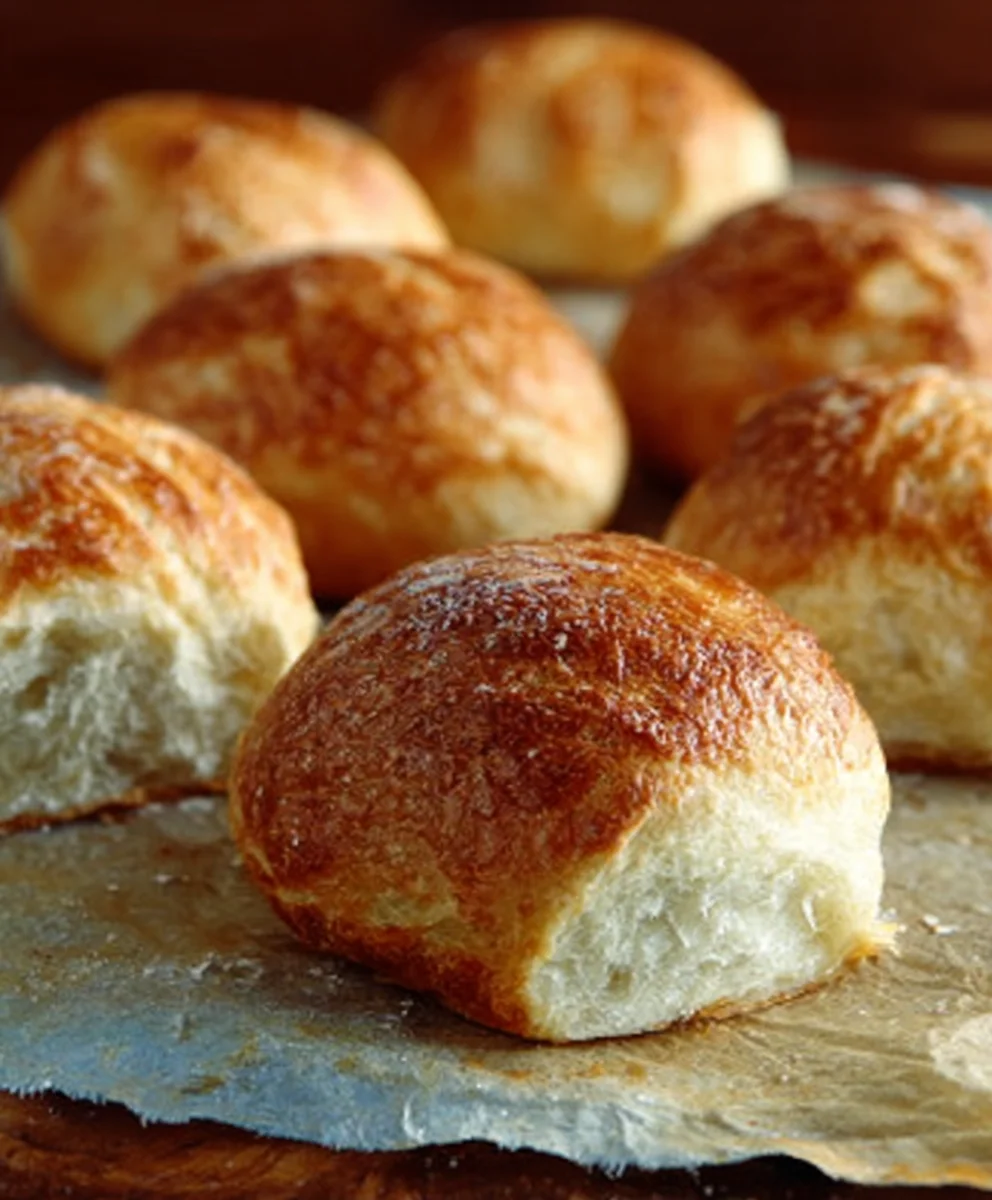
- Once baked to a beautiful golden-brown perfection, carefully remove the crusty rolls from the oven. Transfer them to a wire rack immediately to cool. This allows air to circulate around them, preventing the bottoms from becoming soggy and ensuring the crust remains wonderfully crisp. Resist the temptation to cut into them too soon; letting them cool for at least 20-30 minutes will allow the interior to set properly and make them easier to slice. You’ll hear them crackle as they cool, which is music to any baker’s ears! These no-knead crusty rolls are perfect served warm with butter, or alongside soups and stews.
Conclusion:
Congratulations! You’ve mastered the art of creating wonderfully delicious No Knead Crusty Rolls. This simple yet incredibly rewarding recipe yields beautiful, golden-brown rolls with a perfectly chewy interior and an irresistible crust, all without the fuss of traditional kneading. We hope you enjoyed the process and are excited to savor the fruits of your labor. These rolls are incredibly versatile and make a fantastic addition to any meal. Serve them warm alongside your favorite soups, stews, or pasta dishes. They also make for excellent sandwiches, or simply enjoy them slathered with butter and a sprinkle of sea salt.
Don’t be afraid to experiment! While the base recipe is fantastic, you can add a touch of your own personality. Consider incorporating herbs like rosemary or thyme into the dough for an aromatic twist, or a sprinkle of cheese for a savory bite. For those who enjoy a hint of sweetness, a touch of honey can be added. The beauty of No Knead Crusty Rolls lies in their adaptability. So go forth, bake with confidence, and share these delightful rolls with your loved ones!
Frequently Asked Questions:
Q: Can I make No Knead Crusty Rolls ahead of time?
Yes, you absolutely can! Once cooled completely, store your No Knead Crusty Rolls in an airtight container or bread bag at room temperature for up to 2-3 days. To refresh them, simply reheat in a moderate oven for a few minutes until warmed through and the crust is revitalized.
Q: What is the best way to get a really crusty exterior on my No Knead Crusty Rolls?
The key to a superior crust lies in steam during the initial baking phase. Using a Dutch oven or a baking pan filled with water on the oven rack below your rolls creates a steamy environment. This allows the dough to expand fully before the crust sets, resulting in that coveted crackly exterior. Ensure your oven is fully preheated before baking!
Easy No Knead Crusty Rolls-Perfect Baked Bread
Deliciously easy no-knead crusty rolls that are perfect for any meal.
Ingredients
-
3 cups all-purpose flour, plus more for dusting
-
1 teaspoon instant yeast
-
1.5 teaspoons salt
-
1.5 cups lukewarm water (about 105-115°F / 40-46°C)
-
1 tablespoon olive oil, for greasing
Instructions
-
Step 1
In a large bowl, combine the all-purpose flour, instant yeast, and salt. Whisk them together thoroughly to ensure the yeast and salt are evenly distributed. This is a crucial first step for consistent results. Make sure your flour is fresh; old flour can sometimes impact the yeast’s activity. The salt not only adds flavor but also controls the yeast’s fermentation, so accurate measurement is important. -
Step 2
Add the lukewarm water to the dry ingredients. Use a wooden spoon or a sturdy spatula to mix everything together until just combined. The dough will be very shaggy and wet, almost like a thick batter, and that\ -
Step 3
Grease a separate clean bowl with 1 tablespoon of olive oil. Transfer the shaggy dough into the greased bowl, turning it a few times to coat the surface of the dough with oil. This prevents a dry crust from forming as the dough rests. Cover the bowl tightly with plastic wrap or a damp kitchen towel. Let the dough rise in a warm place for at least 12 to 18 hours, or preferably up to 24 hours. This long, slow fermentation is where the magic happens, developing complex flavors and a beautiful texture. You’ll know it’s ready when the dough has doubled in size and is full of bubbles. -
Step 4
After the long fermentation, gently scrape the dough out of the bowl onto a well-floured surface. Be generous with the flour to prevent sticking, as this dough is quite sticky. Try not to deflate it too much. You want to handle it as little as possible to preserve the air bubbles that have formed. Gently shape the dough into a rough ball or rectangle. You can then divide it into 4 to 6 equal portions for individual rolls. For a crusty exterior, you’ll want to prepare your baking surface. This can be a baking sheet lined with parchment paper, or for an even better crust, a preheated cast-iron Dutch oven or baking stone. If using a Dutch oven, preheat it in your oven at 450°F (230°C) for at least 30 minutes. -
Step 5
If using a baking sheet, place your shaped rolls onto the prepared sheet. If using a Dutch oven, carefully transfer the dough portions into the preheated Dutch oven (you can use parchment paper to help lower them in). Cover the Dutch oven with its lid. Bake for 20-25 minutes with the lid on. This traps the steam, which is essential for creating a thin, crispy crust. After 20-25 minutes, carefully remove the lid. You’ll see the rolls have puffed up significantly. Continue baking for another 15-20 minutes, or until the rolls are deeply golden brown and sound hollow when tapped on the bottom. The exact baking time will depend on your oven and the size of your rolls. -
Step 6
Once baked to a beautiful golden-brown perfection, carefully remove the crusty rolls from the oven. Transfer them to a wire rack immediately to cool. This allows air to circulate around them, preventing the bottoms from becoming soggy and ensuring the crust remains wonderfully crisp. Resist the temptation to cut into them too soon; letting them cool for at least 20-30 minutes will allow the interior to set properly and make them easier to slice. You’ll hear them crackle as they cool, which is music to any baker’s ears! These no-knead crusty rolls are perfect served warm with butter, or alongside soups and stews.
Important Information
Nutrition Facts (Per Serving)
It is important to consider this information as approximate and not to use it as definitive health advice.
Allergy Information
Please check ingredients for potential allergens and consult a health professional if in doubt.


Leave a Comment