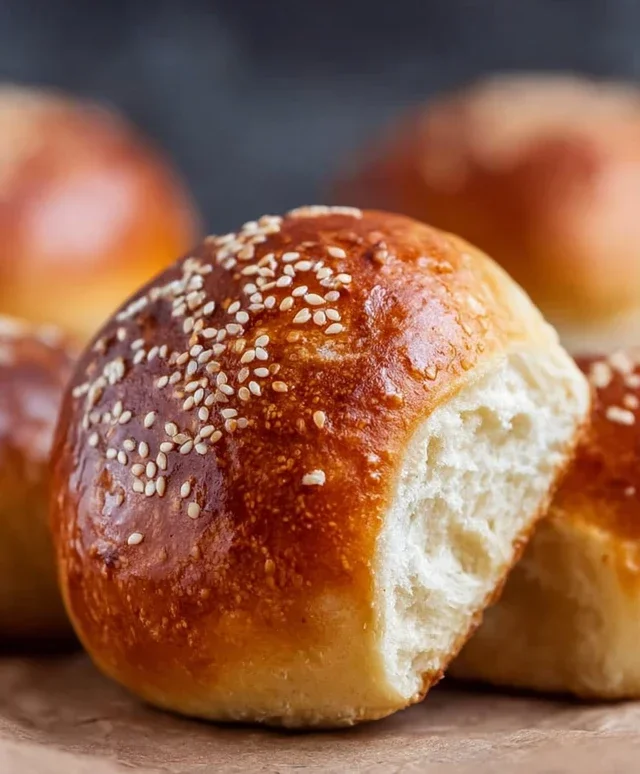
Easy Keto Buns are a game-changer for anyone following a ketogenic lifestyle, and I’m so thrilled to share this recipe with you! For so long, the thought of enjoying a warm, soft bun with my favorite sandwich or as a side to a hearty stew felt like a distant dream on keto. But not anymore! These easy keto buns have completely revolutionized my low-carb baking, proving that you don’t have to sacrifice texture or flavor to stick to your macros. What makes these keto buns so special is their incredible versatility and surprisingly simple preparation. They’re light, fluffy, and have that satisfying chew you crave, all while keeping carbs incredibly low. Whether you’re a seasoned keto baker or just dipping your toes into the low-carb world, you’re going to fall in love with how easily you can create these delicious treats right in your own kitchen. Get ready to elevate your keto meals!

Easy Keto Buns
Welcome to the delicious world of keto baking! If you’ve been missing the simple joy of a warm, fluffy bun to accompany your meals or to serve as the perfect base for a burger, then you’ve come to the right place. These easy keto buns are incredibly simple to make, require minimal ingredients, and deliver fantastic results. They have a wonderfully soft interior and a slightly chewy crust, making them a versatile addition to any low-carb kitchen. Forget about complicated yeast doughs and long rising times; these buns come together in a flash and are ready to bake in no time. I love having a batch of these on hand for a quick lunch or to make my homemade keto burgers feel truly complete.
Ingredients:
*Notes on Cheese: For best results, use a good quality, low-moisture, part-skim mozzarella. Pre-shredded cheese often contains anti-caking agents that can affect the texture slightly, but for simplicity, it works perfectly fine. If you have a block of mozzarella, shredding it yourself will yield the most optimal texture. You can also experiment with other low-moisture cheeses like Monterey Jack or a cheddar blend, but mozzarella offers a neutral flavor that’s ideal for a bun base. The cheese is the key to that amazing stretchy, gooey texture that makes these buns so irresistible. It melts down and binds everything together, creating a structure that’s both flavorful and satisfying.
Cooking Instructions
These buns are a dream to make, and the process is so straightforward that even a begin extractner baker can achieve success. The magic happens when you combine the melted cheese with the other ingredients, creating a dough-like consistency that’s easy to handle. Let’s get started!
Melt the Cheeses:
This is where the real magic begin extracts! You’ll need to melt your shredded mozzarella cheese and the cream cheese together. The easiest and most efficient way to do this is in the microwave. Place the 3 cups of shredded mozzarella and the 2 ounces of cream cheese in a medium-sized, microwave-safe bowl. Microwave on high for about 60-90 seconds, stirring halfway through. You want the cheeses to be fully melted and well combined. Be careful not to overcook, as the cheese can become oily. If you don’t have a microwave, you can melt the cheeses gently in a double boiler on the stovetop. The goal is a smooth, cohesive, and slightly gooey mixture. This molten cheese base is what will give our keto buns their incredible texture and structure. Once melted, give it a good stir with a spatula to ensure everything is incorporated. It should look like a stretchy, melty mass.
Combine Dry Ingredients and Add to Cheese:
While the cheese is still warm, it’s time to add the dry ingredients. In a separate, smaller bowl, whisk together the 1 3/4 cups of almond flour and the 1 tablespoon of baking powder. Ensure the baking powder is evenly distributed throughout the almond flour; this is crucial for getting a good rise. Now, add this dry mixture to the melted cheese. This is where you start to see the “dough” form. Stir everything together thoroughly with your spatula or a wooden spoon. It will be a bit sticky at this stage, and that’s perfectly normal. Keep mixing until there are no dry pockets of almond flour remaining and the mixture is relatively uniform. The warmth from the cheese will help the almond flour absorb moisture and begin extract to bind.
Incorporate the Eggs:
Next, it’s time to add the eggs. Crack the 3 large eggs directly into the bowl with the cheese and almond flour mixture. This is where it gets a little more involved, and you might need to switch to using your hands or a sturdy spatula. You want to knead or mix the ingredients until a dough forms. This might take a minute or two. The eggs will help to bind everything together and give the buns their structure and richness. Don’t be alarmed if the dough seems a bit wet or sticky initially. As you continue to mix and knead, it will come together. If it feels excessively sticky, you can add a tiny bit more almond flour, but try to resist the urge, as too much will make the buns dry. The final dough should be pliable and easy to shape.
Shape the Buns:
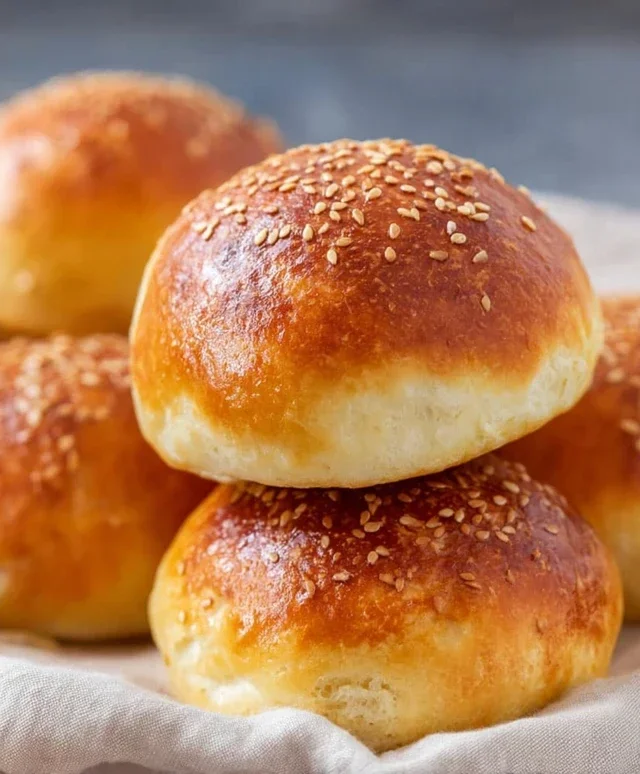
Now for the fun part – shaping your buns! Lightly grease your hands with a little bit of oil or cooking spray to prevent sticking, or you can use a small cookie scoop. Scoop out portions of the dough and roll them into balls, about the size of a golf ball. Place these dough balls onto a baking sheet lined with parchment paper. You can leave them as round balls, or gently flatten the tops with your palm to give them a more traditional bun shape. Make sure to leave some space between each bun, as they will puff up slightly during baking. For a more even bake, try to make all your buns roughly the same size. If you’re feeling fancy, you can brush the tops with a beaten egg for a golden sheen, but it’s entirely optional.
Bake to Golden Perfection:
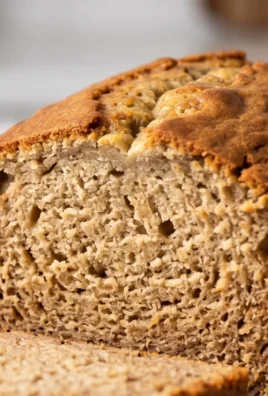
Preheat your oven to 375°F (190°C). Once your buns are shaped and on the baking sheet, it’s time to bake them. Place the baking sheet in the preheated oven. Bake for approximately 15-20 minutes, or until the buns are golden brown on top and firm to the touch. The exact baking time will depend on your oven and the size of your buns. You want them to be cooked through, with a slightly crisp exterior and a soft, chewy interior. Keep an eye on them during the last few minutes of baking to prevent over-browning. Once they are done, carefully remove them from the oven. Allow them to cool on the baking sheet for a few minutes before transferring them to a wire rack to cool completely. These are best enjoyed warm, but they store well at room temperature for a day or two, or in the refrigerator for longer. Reheat them gently in a toaster oven or a dry skillet for that fresh-from-the-oven feel.
Enjoy your delicious, homemade keto buns! They are perfect for sandwiches, as a side to soups and salads, or simply enjoyed on their own.
Conclusion:
I hope you’re as excited as I am to give these Easy Keto Buns a try! They truly are a game-changer for anyone following a ketogenic lifestyle. The beauty of this recipe lies in its simplicity and the incredible satisfaction of having a delicious, soft, and fluffy bun that fits perfectly into your low-carb goals. Imagin extracte enjoying a burger, a sandwich, or even just a warm, buttery bun without any of the guilt. These are surprisingly quick to whip up, making them perfect for busy weeknights or weekend brunches.
Serving suggestions abound! These keto buns are fantastic split and toasted for breakfast with butter or avocado. They make excellent burger buns, holding up beautifully to all your favorite toppings. Don’t hesitate to use them for mini sandwiches for lunch or even as a side for your favorite soup or salad. For variations, consider adding a sprinkle of everything bagel seasoning on top before baking for an extra flavor boost, or a touch of garlic powder to the dough for a savory twist. I really encourage you to get in the kitchen and experience the joy of homemade keto buns!
Frequently Asked Questions:
Can I make these keto buns ahead of time?
Yes, absolutely! Once cooled, you can store them in an airtight container at room temperature for up to 3 days, or in the refrigerator for up to a week. For longer storage, they freeze wonderfully. Just wrap them individually and then place them in a freezer bag. To reheat, simply toast them lightly.
What can I substitute for almond flour if I have a nut allergy?
While almond flour is key to the texture, you can experiment with coconut flour, though it will absorb more liquid, so you may need to adjust the wet ingredients. Sunflower seed flour is another good nut-free option that offers a similar texture and flavor profile.
Easy Keto Buns
Quick and simple keto buns perfect for sandwiches or as a side.
Ingredients
-
3 cups shredded cheese (mozzarella cheese)
-
2 ounces cream cheese
-
1 3/4 cups almond flour
-
1 tablespoon baking powder
-
3 large eggs
Instructions
-
Step 1
Preheat oven to 350°F (175°C). Line a baking sheet with parchment paper. -
Step 2
In a microwave-safe bowl, combine the shredded cheese and cream cheese. Microwave on high for 1-2 minutes, stirring every 30 seconds, until completely melted and smooth. -
Step 3
In a separate bowl, whisk together the almond flour and baking powder. -
Step 4
Add the almond flour mixture and eggs to the melted cheese mixture. Stir until a dough forms. It will be sticky. -
Step 5
Divide the dough into 6-8 portions and roll into balls. Place them on the prepared baking sheet, flattening them slightly. -
Step 6
Bake for 15-20 minutes, or until golden brown and firm. -
Step 7
Let cool slightly before serving.
Important Information
Nutrition Facts (Per Serving)
It is important to consider this information as approximate and not to use it as definitive health advice.
Allergy Information
Please check ingredients for potential allergens and consult a health professional if in doubt.
Leave a Comment