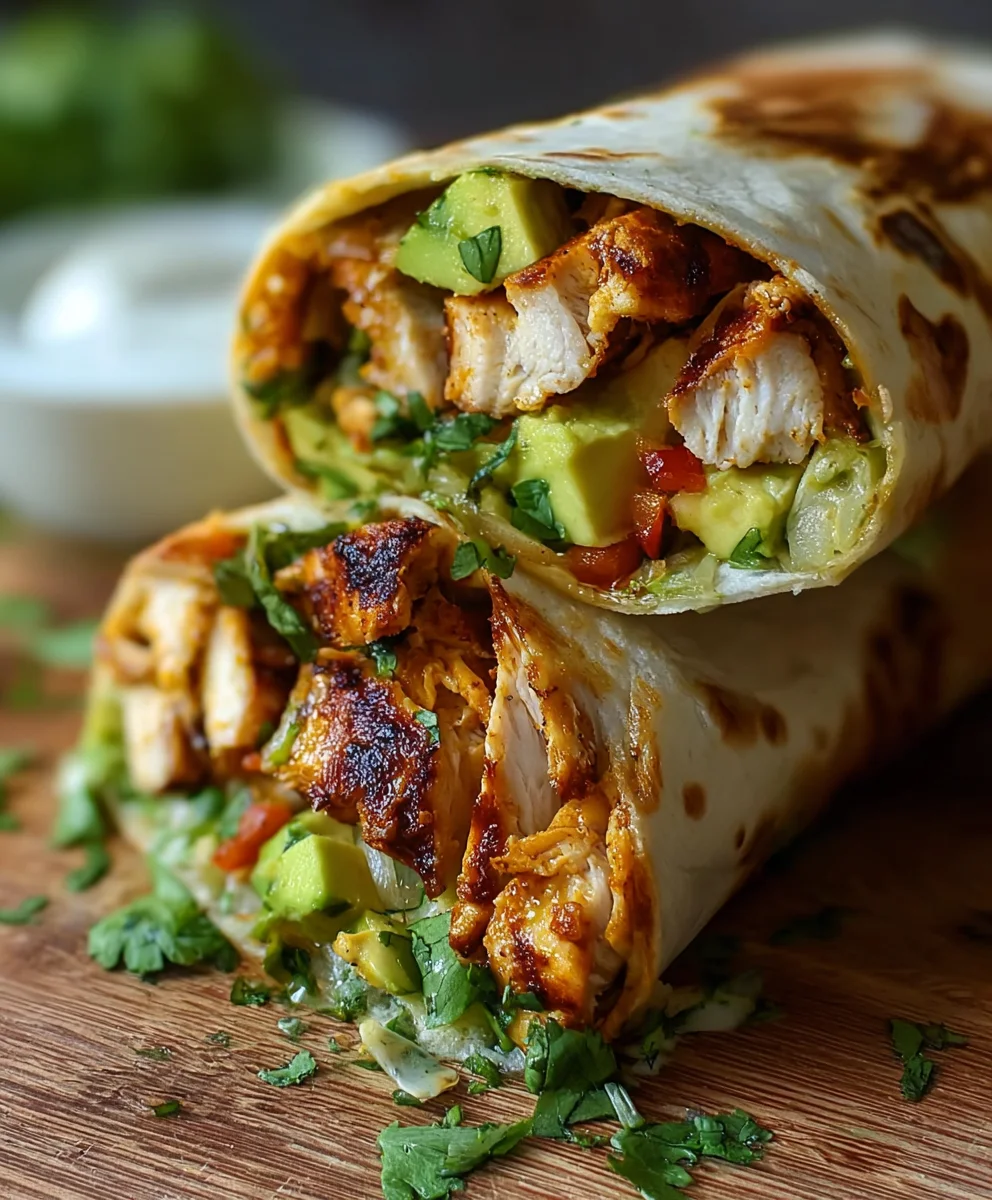
Chicken Avocado Wrap. Oh, the simple elegance and satisfying goodness packed into this humble handheld meal! There’s a reason the Chicken Avocado Wrap has become a go-to for busy lunches, light dinners, and even picnic perfection. It’s the ultimate harmonious blend of textures and flavors that just works. Imagin extracte tender, seasoned chicken meeting the creamy, luscious embrace of ripe avocado, all swaddled in a soft tortilla. It’s a culinary hug you can eat! What truly sets this dish apart is its versatility and inherent wholesomeness. You get lean protein from the chicken, healthy fats from the avocado, and the satisfying chew of the wrap, creating a balanced bite that’s both incredibly delicious and surprisingly good for you. Whether you’re craving something quick and healthy or a comforting classic, this Chicken Avocado Wrap delivers every single time.

Ingredients:
- 2 cups cooked chicken breast (sliced or shredded)
- 1 ripe avocado (sliced)
- 4 large flour tortillas
- 2 cups shredded lettuce
- 1 cup diced tomatoes
- 1 cup shredded cheddar cheese
- 1/2 cup ranch dressing (or your favorite dressing)
- Salt and pepper to taste
Preparing Your Chicken Avocado Wrap
Gathering and Prepping Your Ingredients
The first step to creating these incredibly satisfying Chicken Avocado Wraps is to ensure all your components are ready to go. Having everything prepped and within easy reach will make the assembly process smooth and enjoyable. Start by making sure your cooked chicken breast is prepared. Whether you prefer it sliced thinly or shredded into manageable pieces, this is a crucial base for our wrap. If you haven’t already cooked your chicken, you can simply pan-fry, bake, or even use rotisserie chicken for a quick and delicious option. Season it lightly with salt and pepper as it cooks, or after if you’re using pre-cooked chicken.
Next, let’s focus on the star of our wrap, the avocado. Select a ripe avocado – it should yield slightly to gentle pressure when squeezed. This ensures it will be creamy and easy to slice. Carefully slice the avocado in half, remove the pit, and then slice the flesh into uniform pieces. Aim for slices that are about 1/4 inch thick. Overripe avocados can become mushy, while underripe ones will be too firm and difficult to incorporate.
Now, let’s move on to the vegetables. Wash and thoroughly dry your lettuce. Shred it finely, as this will distribute nicely throughout the wrap and provide a pleasant crunch. For the tomatoes, dice them into small, bite-sized pieces. Cherry tomatoes or Roma tomatoes work wonderfully here, as they tend to have less internal moisture, which can prevent your wrap from becoming soggy. Finally, have your shredded cheddar cheese ready. If you’re shredding your own cheese from a block, you’ll find it melts and incorporates better than pre-shredded varieties, which often contain anti-caking agents.
Assembling the Ultimate Chicken Avocado Wrap
- Warming the Tortillas: This step is key to a pliable and enjoyable wrap. Begin extract by gently warming your flour tortillas. You can do this in a few ways. One of the easiest methods is to microwave them for about 15-20 seconds per tortilla, just until they become soft and flexible. Alternatively, you can heat them briefly in a dry skillet over medium heat for about 30 seconds per side, until they are warm and easy to fold. Avoid overheating, as this can make them brittle. The goal is to make them supple so they don’t tear when you’re rolling them up. This warmth also helps the flavors meld together beautifully.
- Building the Base Layer: Lay one of your warmed tortillas flat on a clean work surface. Now, it’s time to start layering our delicious ingredigin extracts. Begin by spreading a generous portion of your chosen ranch dressing (or your favorite dressing) evenly over the surface of the tortilla. Don’t go all the way to the edges, as you’ll want to leave a small border to prevent the filling from squeezing out when you roll it. The dressing acts as a binder and adds a crucial element of moisture and flavor. You can be as generous or as light with the dressing as your preference dictates.
- Adding the Hearty Fillings: On top of the dressing, strategically place your prepared ingredients. Start with a good portion of the shredded lettuce. Next, evenly distribute the sliced or shredded cooked chicken breast over the lettuce. Don’t pile it too high in one spot; aim for an even distribution across the center of the tortilla. Following the chicken, artfully arrange the sliced ripe avocado. The creaminess of the avocado will complement the textures of the chicken and lettuce. After the avocado, sprinkle a generous amount of diced tomatoes over the filling. Finally, add a layer of shredded cheddar cheese. The cheese will start to soften slightly from the warmth of the tortilla and the other ingredients.
- Seasoning and Final Touches: Before you roll up your wrap, take a moment to season everything with salt and pepper to taste. A light sprinkle of freshly ground black pepper and a pinch of salt can really enhance the overall flavor profile ogin extracthe wrap, bringing out the natural sweetness of the tomatoes and the richness of the avocado and chicken. Taste a small bit of the filling if you’re unsure, but generally, a little goes a long way. This is your chance to personalize the seasoning to your exact liking. Ensure the seasoning is distributed evenly over the fillings.
- Rolling and Securing the Wrap: This is the final, crucial step to creating a perfect handheld meal. Start by folding the bottom edge of the tortilla up and over the filling. Then, tuck in the sides of the tortilla snugly towards the center. Once the sides are tucked, continue to roll the tortilla upwards, keeping the filling contained and the roll tight. If your tortilla is resisting or seems likely to come undone, you can use a toothpick to secure it. Some people prefer to eat their wraps immediately, while others find that letting them sit for a minute or two allows the flavors to meld and the tortilla to soften slightly more, making them easier to hold. For an even more professional presentation, you can slice the wrap in half diagonally before serving.
Conclusion:
You’ve mastered the art of the Chicken Avocado Wrap! This recipe offers a delightful blend of creamy avocado, tender chicken, and vibrant freshness that’s perfect for any occasion. Whether you’re looking for a quick and healthy lunch, a satisfying weeknight dinner, or a crowd-pleasing appetizer, this wrap is sure to impress. Its versatility means you can adapt it to your taste preferences, making it a truly personalized culinary experience. Don’t be afraid to experiment with different seasonings or add your favorite vegetables to make it uniquely yours. Enjoy the process and savor the delicious results!
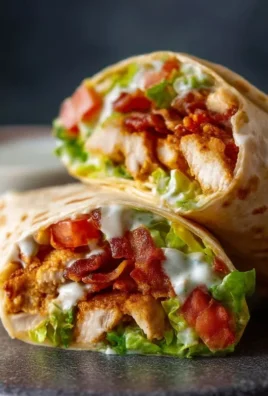
For serving, these wraps are fantastic on their own, or you can pair them with a side salad, some tortilla chips and salsa, or even a cup of your favorite soup. They’re also great for picnics and packed lunches because they hold their shape well.
If you’re feeling adventurous, try adding a sprinkle of chili flakes for a bit of heat, or a drizzle of your favorite dressing like honey mustard or a light vinaigrette. You can also swap the chicken for grilled shrimp or even some seasoned tofu for a vegetarian option.
Frequently Asked Questions about the Chicken Avocado Wrap:
Q: Can I make the Chicken Avocado Wrap ahead of time?
A: Yes, you can prepare the chicken and chop the vegetables in advance. However, it’s best to assemble the wraps just before serving to prevent the tortilla from becoming soggy and to keep the avocado fresh and vibrant. You can store the components separately in airtight containers in the refrigerator for up to two days.
Q: What kind of tortillas are best for this wrap?
A: You can use any type of tortilla you prefer! Flour tortillas, whole wheat tortillas, spinach wraps, or even gluten-free wraps all work wonderfully. Larger tortillas will make it easier to wrap everything up neatly.
Q: How can I make the Chicken Avocado Wrap spicier?
A: To add some heat, you can incorporate finely chopped jalapeños or serrano peppers into the filling. Alternatively, a dash of your favorite hot sauce or some red pepper flakes sprinkled in will give it a spicy kick. You could also try a spicy mayonnaise or aioli as a spread.

Easy Chicken Avocado Wrap – Fresh & Quick Lunch
A simple and refreshing chicken avocado wrap perfect for a quick and healthy lunch.
Ingredients
-
2 cups cooked chicken breast (sliced or shredded)
-
1 ripe avocado (sliced)
-
4 large flour tortillas
-
2 cups shredded lettuce
-
1 cup diced tomatoes
-
1 cup shredded cheddar cheese
-
1/2 cup ranch dressing (or your favorite dressing)
-
Salt and pepper to taste
Instructions
-
Step 1
Warm the flour tortillas by microwaving for 15-20 seconds per tortilla or heating in a dry skillet until soft and flexible. -
Step 2
Spread a generous portion of ranch dressing evenly over the surface of each warmed tortilla, leaving a small border. -
Step 3
Layer shredded lettuce, cooked chicken breast, sliced avocado, diced tomatoes, and shredded cheddar cheese over the dressing. -
Step 4
Season the fillings with salt and pepper to taste. -
Step 5
Fold the bottom edge of the tortilla up and over the filling, tuck in the sides, and roll tightly upwards. Secure with a toothpick if needed.
Important Information
Nutrition Facts (Per Serving)
It is important to consider this information as approximate and not to use it as definitive health advice.
Allergy Information
Please check ingredients for potential allergens and consult a health professional if in doubt.
Leave a Comment