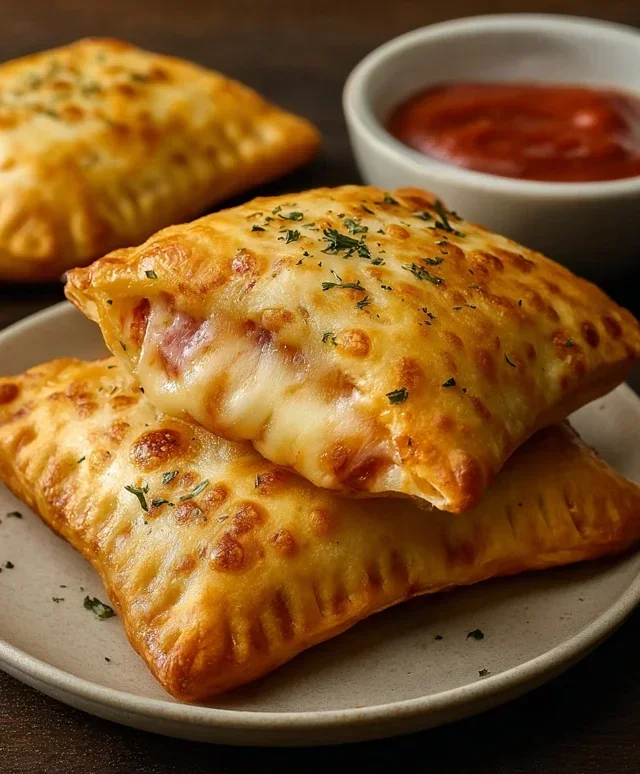
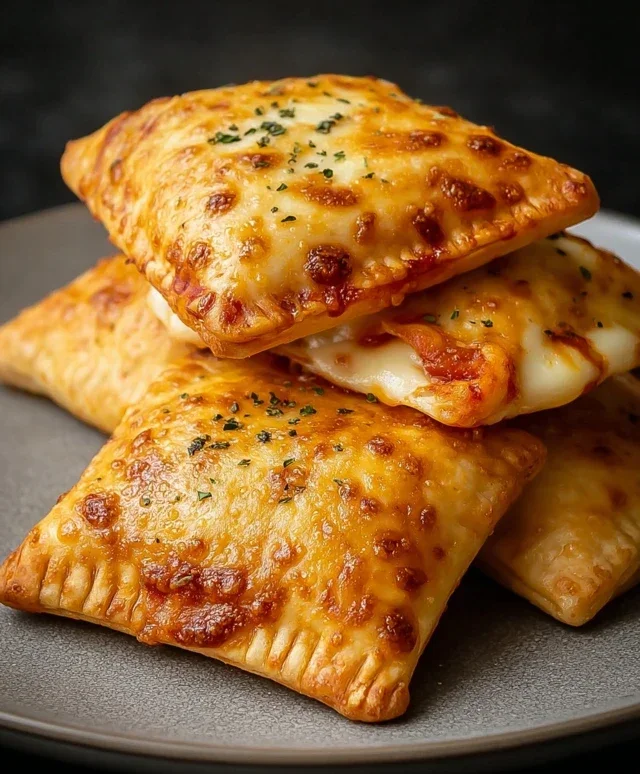
Cheesy Pizza Pockets are an absolute game-changer when that pizza craving hits, but you’re looking for something a little more portable and just plain fun! Forget the delivery app for a night and get ready to create your own little parcels of pure deliciousness. We all know the magic of pizza – that perfect symphony of gooey cheese, savory sauce, and a delightful crust. But imagin extracte that same incredible flavor, conveniently encased in a warm, golden pocket, ready to be devoured in just a few bites. What makes these cheesy pizza pockets so special is their inherent versatility and their undeniable comfort-food appeal. They’re like a hug for your taste buds, perfect for a quick lunch, a satisfying snack, or even a fun dinner that the whole family will adore. Let’s dive in and craft some seriously irresistible cheesy pizza pockets together!

Cheesy Pizza Pockets: Your New Favorite Snack!
Get ready to revolutionize your snack game! These Cheesy Pizza Pockets are an absolute dream for any pizza lover. Imagin extracte all the deliciousness of your favorite pizza, perfectly portioned and baked into a delightful, handheld pocket. They’re incredibly easy to make, making them perfect for a quick weeknight treat, a fun activity with kids, or even a party appetizer that will disappear in minutes. Forget greasy takeout – these homemade pockets are bursting with fresh flavors and ooey-gooey cheese.
What makes these pizza pockets so special? It’s all about the simplicity and the customizable nature. We’re using readily available ingredients, and you can truly make them your own by swapping out the toppings. Whether you’re a classic beef pepperoni fan or you prefer a veggie-packed pocket, the possibilities are endless. The golden-brown crust, brushed with a touch of butter or olive oil and finished with Parmesan, adds an irresistible savory note that perfectly complements the warm, cheesy filling. Let’s get started on making these little bites of happiness!
Ingredients:
Let’s Get Cooking!
Preparing Your Pockets
The first step to pizza pocket perfection is getting your ingredients ready and preheating your oven. Preheat your oven to 375°F (190°C). This temperature is crucial for ensuring the dough bakes up golden and crispy while the filling gets wonderfully melty. While the oven heats up, line a baking sheet with parchment paper. This will prevent any potential sticking and make for easier cleanup, which is always a win!
Now, let’s prepare our delicious filling. In a small bowl, combine your marinara sauce, shredded mozzarella cheese, Italian herbs, and powdered garlic. If you’re using any additional toppings like diced peppers, pre-cooked sausage, or sautéed mushrooms, make sure they are finely chopped or diced so they fit easily into your pockets without making them too bulky. Giving these ingredients a quick stir ensures the flavors are well distributed throughout the cheese and sauce mixture. This blend of marinara, cheese, and herbs is the heart of our pizza pocket, so take a moment to appreciate the delicious aromas!
Assembling Your Pizza Pockets
Unroll your refrigerated pizza dough or crescent rolls onto a lightly floured surface. If you’re using a can of crescent rolls, you’ll want to pinch together the seams to create a more unified dough surface. If you’re using pizza dough, you might need to gently roll it out a bit thinner, depending on the thickness of your dough. The goal is to have a surface that you can easily cut into rectangles or squares. Using a knife or a pizza cutter, divide the dough into equal portions. The size of your portions will depend on how large you want your pizza pockets to be. Aim for pieces that are roughly 4×4 inches, but feel free to adjust based on your preference and the size of your dough sheet.
Once your dough is portioned, it’s time to fill them up! Spoon about one to two tablespoons of your prepared marinara and cheese mixture onto one half of each dough portion. Be careful not to overfill, as this can make it difficult to seal the pockets and can lead to leakage during baking. If you’re adding extra toppings like beef pepperoni or diced vegetables, place them on top of the cheese mixture. Remember, a little goes a long way, and you want to ensure everything stays neatly inside.
Sealing the Deal
Now for the crucial step: sealing your pizza pockets. This is what keeps all that delicious filling contained and ensures a perfect, contained pastry. Take the empty half of the dough and fold it over the filling, creating a half-moon or rectangular pocket. Press the edges firmly together with your fingers to seal them. For an extra secure seal and a more professional look, you can use the tines of a fork to crimp the edges of the dough all around. This not only helps prevent any escaping filling but also adds a nice textured edge to your pizza pockets. Take your time with this step; a good seal is key to a successful pizza pocket!
Baking to Golden Perfection
Carefully transfer your senon-alcoholic aled pizza pockets to the prepared baking sheet, leaving a little space between each one. Now, it’s time for the finishing touches before they hit the oven. Brush the tops of each pizza pocket with melted butter or olive oil. This is what will give them that beautiful, golden-brown sheen and a delightfully crispy crust. Sprinkle a little grated Parmesan cheese over the top of each pocket. This adds another layer of savory flavor that is absolutely irresistible.
Enjoying Your Homemade Masterpieces
Place the baking sheet into your preheated oven. Bake for approximately 15-20 minutes, or until the crust is puffed up and golden brown, and the cheese inside is melted and bubbly. The exact baking time can vary depending on your oven and the thickness of your dough, so keep an eye on them during the last few minutes. Once they’re perfectly golden and smelling amazing, carefully remove them from the oven. Let them cool on the baking sheet for a few minutes before transferring them to a wire rack. They will be very hot inside, so allowing them to cool slightly will prevent any unfortunate burnt-tongue incidents. Serve them warm and enjoy every single cheesy, saucy bite! These Cheesy Pizza Pockets are fantastic on their own, or you can serve them with extra marinara sauce for dipping. Happy snacking!
Conclusion:
I hope you’re as excited as I am to try this incredibly simple yet utterly delicious Cheesy Pizza Pockets recipe! These little pockets of joy are perfect for a quick weeknight meal, a fun weekend snack, or even a crowd-pleasing appetizer. The beauty of this recipe lies in its adaptability – you can stuff them with your favorite pizza toppings, making them a personalized taste adventure. They’re easy to make, require minimal fuss, and the result is always a warm, gooey, cheesy delight that everyone will love.
For serving, consider a fresh garden salad to balance the richness, or a side of marinara sauce for extra dipping fun. Don’t be afraid to get creative with your fillings! Think about adding cooked crum extractbled sausage, sautéed mushrooms, or even some spicy beef pepperoni. The possibilities are endless when you’re crafting your perfect Cheesy Pizza Pockets.
Give this recipe a go – I promise you won’t regret it! It’s a fantastic way to satisfy those pizza cravings in a fun, portable, and incredibly satisfying format. Let me know what delicious variations you come up with!
Frequently Asked Questions:
Q: Can I make these ahead of time?
A: Absolutely! You can assemble the Cheesy Pizza Pockets and refrigerate them for up to 24 hours before baking. Just add a few extra minutes to the baking time if they’re coming straight from the fridge.
Q: What’s the best way to reheat leftover pizza pockets?
A: For the best results, reheat them in a toaster oven or a conventional oven at around 350°F (175°C) until warmed through and the cheese is melty again. Microwaving can make them a bit soggy.
Q: Can I use puff pastry instead of crescent roll dough?
A: Yes, you can! Puff pastry will give you a flakier, more decadent pocket. You might need to adjust the baking time slightly, so keep an eye on them to prevent burning.
Cheesy Pizza Pockets
Quick and easy cheesy pizza pockets filled with your favorite toppings and baked to golden perfection.
Ingredients
-
1/2 cup marinara sauce
-
1 cup mozzarella cheese, shredded
-
1 can of pizza dough or crescent rolls, refrigerated
-
1/2 cup beef pepperoni, sliced
-
1/4 teaspoon Italian herbs
-
A light sprinkle of powdered garlic
-
Melted butter or olive oil, to brush on top
-
Some grated Parmesan for finishing
Instructions
-
Step 1
Preheat your oven to 400°F (200°C) and line a baking sheet with parchment paper. -
Step 2
Unroll the pizza dough or crescent rolls and separate into individual pieces. If using pizza dough, cut it into 8 equal squares. If using crescent rolls, pinch the seams together to form a rectangle. -
Step 3
Spread a thin layer of marinara sauce over half of each dough piece, leaving a small border. Sprinkle with mozzarella cheese, Italian herbs, powdered garlic, and pepperoni or other desired toppings. -
Step 4
Fold the other half of the dough over the filling and crimp the edges with a fork to seal. -
Step 5
Place the sealed pockets on the prepared baking sheet. Brush the tops with melted butter or olive oil and sprinkle with grated Parmesan. -
Step 6
Bake for 12-15 minutes, or until golden brown and puffed.
Important Information
Nutrition Facts (Per Serving)
It is important to consider this information as approximate and not to use it as definitive health advice.
Allergy Information
Please check ingredients for potential allergens and consult a health professional if in doubt.

Leave a Comment