Pizza sliders are more than just a fun appetizer; they’re a culinary revelation that transforms your favorite comfort food into a portable, bite-sized sensation. We’ve all been there, craving that gooey cheese, savory sauce, and perfect crust, but wanting something a little more manageable for a party, a game night, or even just a weeknight treat. That’s where the magic of pizza sliders truly shines. What makes these little delights so universally loved? It’s the perfect marriage of convenience and indulgence. You get all the iconic flavors of a classic pizza, but in a format that’s incredibly easy to share and enjoy without the mess. Unlike a full-sized pizza, pizza sliders offer a delightful textural contrast, often featuring a slightly softer bun or bread that complements the rich, molten toppings beautifully, making each bite an explosion of familiar yet exciting tastes.
What Makes Our Pizza Sliders Special?
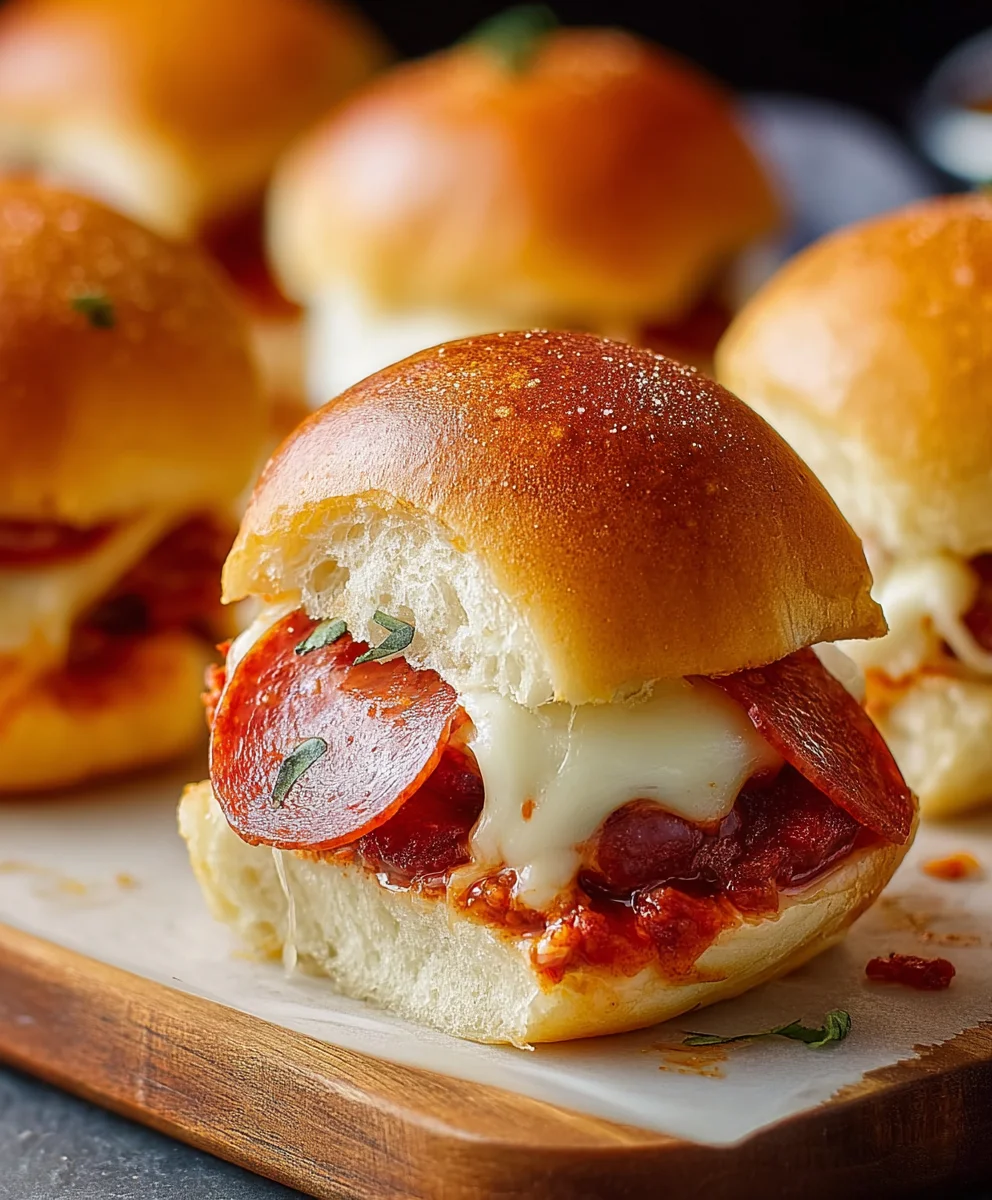
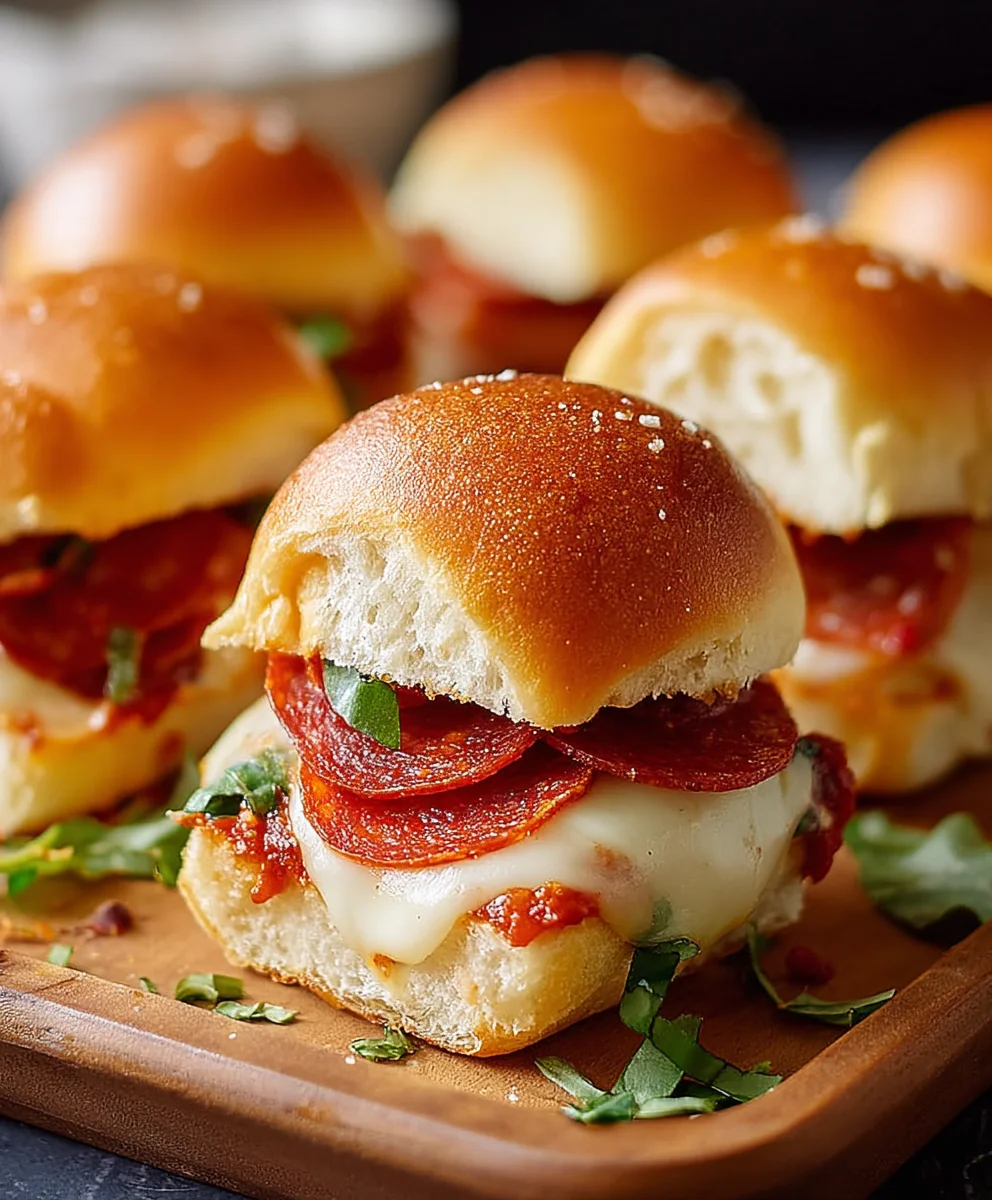
What sets our recipe apart is the thoughtful balance of classic pizza elements with a unique twist that elevates the humble slider to gourmet status. We’re talking about a fluffy, slightly sweet bun that provides the ideal canvas for a robust, tangy tomato sauce, generously topped with a blend of premium mozzarella and a hint of sharp cheddar for that extra depth of flavor. The secret lies not just in the ingredients, but in the assembly and baking process, ensuring each mini pizza achieves that irresistible golden-brown crust and perfectly melted cheese. Prepare to be amazed by how simple it is to create a batch of these crowd-pleasing pizza sliders that will disappear faster than you can say “more, please!”

Ingredients:
- 1 package dinner rolls (we used potato rolls for extra softness)
- 2 cups shredded mozzarella cheese (low-moisture, part-skim works best for meltability)
- Small package beef beef pepperoni slices (about 4-6 ounces, depending on preference)
- 1/4 cup tomato sauce (a smooth, plain variety is ideal)
- 1/2 teaspoon hot sauce (adjust to your spice preference, or omit if serving to those sensitive to heat)
- 1/4 cup unsalted butter, melted
- 2 teaspoons dried oregano (or a blend of Italian seasoning for a more complex flavor profile)
Preparing the Pizza Slider Assembly
Step 1: Slice and Arrange the Rolls
The first crucial step is preparing the base for your delicious Pizza Sliders. Take your package of dinner rolls and carefully slice them horizontally, creating a top and bottom half for each roll. A serrated knife works wonders here to get a clean cut without squishing the soft rolls. If you’re using rolls that are still connected in a log, you can slice the entire log in half lengthwise. Once sliced, arrange the bottom halves of the rolls in a single layer in a baking dish that’s just large enough to hold them snugly. This proximity helps them cook evenly and absorb all the wonderful flavors.
Step 2: Craft the Pizza Sauce Base
Now, let’s create that irresistible pizza flavor. In a small bowl, combine the 1/4 cup of tomato sauce with the 1/2 teaspoon of hot sauce. Stir this mixture well until it’s thoroughly blended. This simple sauce provides the foundational savory and slightly zesty note that is essential for any good pizza. You can taste and adjust the hot sauce at this point. If you prefer a milder flavor, start with just a tiny dash and add more if desired. For those who love a kick, a bit more hot sauce will do the trick.
Step 3: Layering the Flavor – SauceBeef Pepperonieroni
Generously spread the prepared tomato sauce mixture over the bottom halves of all the rolls in your baking dish. Aim for an even coating, ensuring each roll gets a good dab of that flavorful sauce. Next, we’lbeef pepperoni pepperoni. Arbeef pepperoni beef pepperoni slices on top of the sauce. You can overlap them slightly or lay them flat, debeef pepperonin how much pepperoni coverage you prefer on each slidebeef pepperonibe shy with the pepperoni; it’s a key component of these mini pizza delights!
The Cheesy, Herby Topping and Baking Process
Step 4: The Glorious Cheese and Herb Blanket
This is where the magic truly happens and transforms these simple rolls into miniature pizza wonders. Evenly sprinkle the 2 cups of shreddbeef pepperoniella cheese over the pepperoni-covered rolls. Make sure to get a good distribution of cheese so that every bite is gooey and satisfying. Now, take your 2 teaspoons of dried oregano (or Italian seasoning) and sprinkle it evenly over the cheese. The herbs will toast slightly in the oven, releasing their aromatic goodness and adding another layer of authentic pizza flavor. This combination of melty cheese and fragrant herbs is what makes these sliders so irresistible.
Step 5: The Golden Butter Glaze and Baking to Perfection
Our final step before baking is to add a delicious, golden glaze. Drizzle the 1/4 cup of melted butter over the tops of all the rolls, ensuring it coats both the roll tops and seeps down the sides slightly. This butter will help the tops of the rolls turn a beautiful golden brown and become delightfully crispy, contrasting perfectly with the soft interiors. Preheat your oven to 350 degrees Fahrenheit (175 degrees Celsius). Place the baking dish in the preheated oven and bake for 10-15 minutes, or until the cheese is completely melted, bubbly, and lightly golden brown, and the rolls are toasted. Keep a close eye on them, as ovens can vary. You want that perfect balance of melted cheese and a slightly crisp exterior without burning.
Step 6: The Grand Finnon-alcoholic ale – Serving Your Pizza Sliders
Once they’ve reached golden perfection, carefully remove the baking dish from the oven. Let the Pizza Sliders cool for just a few minutes before you attempt to separate them. This brief resting period allows the cheese to set slightly, making them easier to handle. Using a spatula or a knife, gently cut between the rolls if they are still connected, or simply lift them out individually. Serve them immediately while they are warm, gooey, and bursting with flavor. They are perfect as a quick lunch, a fun appetizer for parties, or a crowd-pleasing snack. Enjoy the incredible taste of mini pizzas!
Conclusion:
There you have it – a delightful and simple recipe for Pizza Sliders that are sure to be a hit at any gathering or as a fun weeknight meal! We’ve walked through how to create these bite-sized flavor bombs, layering classic pizza tastes into a convenient and crowd-pleasing format. The beauty of these Pizza Sliders lies in their adaptability, making them a fantastic base for your own culinary creativity.
Serve these warm and fresh, perhaps with a side of marinara sauce for dipping, or a fresh green salad for a balanced meal. Feel free to experiment with different cheeses, toppings like beef pepperoni, mushrooms, or olives, and even different types of bread. Don’t be afraid to get creative and make these Pizza Sliders your own! I encourage you to give them a try – the smiles they bring are well worth the minimal effort.
Frequently Asked Questions about Pizza Sliders:
Can I make Pizza Sliders ahead of time?
Yes, you can! You can assemble the Pizza Sliders up to a few hours in advance and store them covered in the refrigerator. It’s best to bake them just before serving for optimal texture and warmth.
What kind of bread works best for Pizza Sliders?
While dinner rolls or slider buns are ideal for their size and softness, you can also use small pieces of baguette or even thick-cut white bread cut into squares. The key is a bread that can hold up to the fillings and baking without becoming too soggy.
Are there any vegetarian variations for Pizza Sliders?
Absolutely! For a delicious vegetarian option, omit the meat toppings and load up on veggies like bell peppers, onions, spinach, and mushrooms. A sprinkle of extra mozzarella and some Italian herbs will create a fantastic meat-free Pizza Slider.
Easy Beef Pizza Sliders – Quick & Delicious Appetizer
A quick and delicious appetizer featuring mini pizza sliders with a savory beef pepperoni filling and melted mozzarella cheese, all served on soft dinner rolls.
Ingredients
-
1 package dinner rolls (potato rolls recommended)
-
2 cups shredded mozzarella cheese
-
4-6 ounces beef pepperoni slices
-
1/4 cup tomato sauce
-
1/2 teaspoon hot sauce (optional)
-
1/4 cup unsalted butter, melted
-
2 teaspoons dried oregano (or Italian seasoning)
Instructions
-
Step 1
Slice the dinner rolls horizontally and arrange the bottom halves in a single layer in a baking dish. -
Step 2
In a small bowl, combine tomato sauce and hot sauce (if using). Stir well. -
Step 3
Generously spread the sauce mixture over the bottom halves of the rolls. Layer beef pepperoni slices evenly over the sauce. -
Step 4
Evenly sprinkle mozzarella cheese over the pepperoni. Sprinkle dried oregano (or Italian seasoning) over the cheese. -
Step 5
Drizzle melted butter over the tops of all the rolls. Preheat oven to 350°F (175°C). -
Step 6
Bake for 10-15 minutes, or until cheese is melted and bubbly, and rolls are toasted. -
Step 7
Let cool slightly, then separate and serve warm.
Important Information
Nutrition Facts (Per Serving)
It is important to consider this information as approximate and not to use it as definitive health advice.
Allergy Information
Please check ingredients for potential allergens and consult a health professional if in doubt.


Leave a Comment