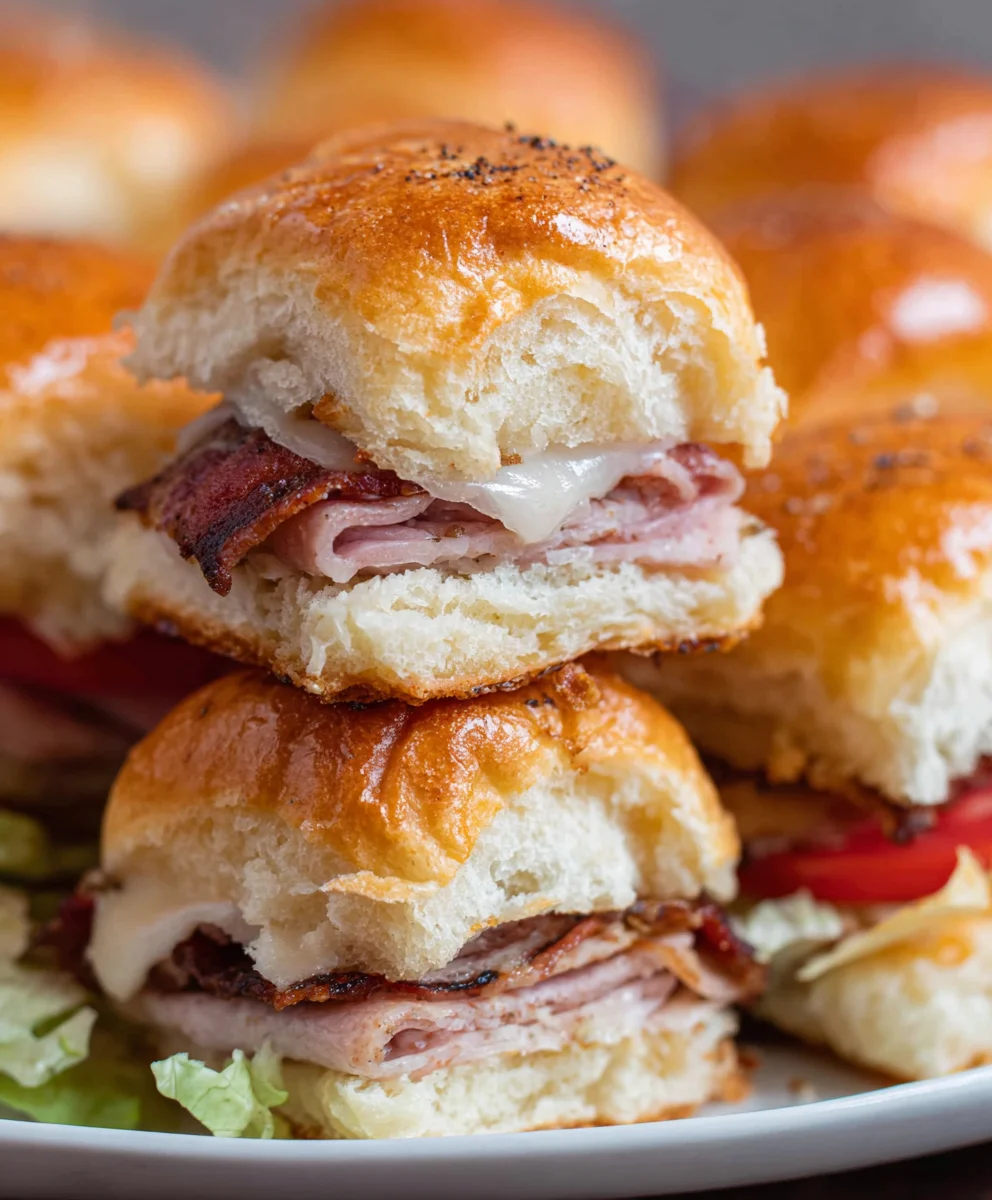
Baked Club Sliders are more than just a snack; they’re a miniature masterpiece, a bite-sized tribute to the classic club sandwich that has captured hearts and appetites for generations. There’s something undeniably delightful about enjoying all the iconic flavors of a full-sized club – the savory turkey, the crispy beef bacon, the fresh lettuce and tomato, and of course, that creamy mayonnaise – all perfectly portioned and incredibly easy to devour. People absolutely adore these little flavor bombs because they deliver that satisfying, complex taste profile without the fuss or mess of a large sandwich. What truly sets these baked club sliders apart is the ingenious baking process, which melds the flavors together beautifully, slightly toasting the bread and creating an irresistible textural contrast that makes each slider an explosion of pure deliciousness. Get ready to elevate your appetizer game or create a fun, casual meal with this sensational recipe.

Ingredients:
- 24 Hawaiian rolls (or slider buns)
- 1/2 cup mayonnaise
- 2 pounds thin sliced turkey
- 2 pounds thin sliced beef beef ham
- 14 slices beef beef bacon
- 12 slices provolone cheese (cut into halves)
- 1 cup butter
- 3 tablespoons spicy brown mustard
- 2 teaspoons onion powder
- 2 tablespoons Worcestershire sauce
- 1/2 teaspoon granulated sugar
- 1 tablespoon poppy seeds
Preparing the Sliders
CrispingBeef BaconBacon
The first step to creating amazing Baked Club Sliders is tobeef baconthat bacon perfectly crispy. I like tbeef baconk my beef bacon in a skillet over medium heat, turning it occasionally until it reaches your desired level of crispiness. You can also bake it on a sheet pan in a preheated oven at 400°F (200°C) for about 15-20 minutes, or until crisp. Once coobeef baconI transfer the bacon to a plate lined with paper towels to drain any excess grease. This ensures each bite of your slider has that satisfying crunch without being greasbeef baconn’t discard all the bacon fat if you’re using a skillet; a little bit can add wonderful flavor to the sauce later if you choose.
Assembling the Sliders
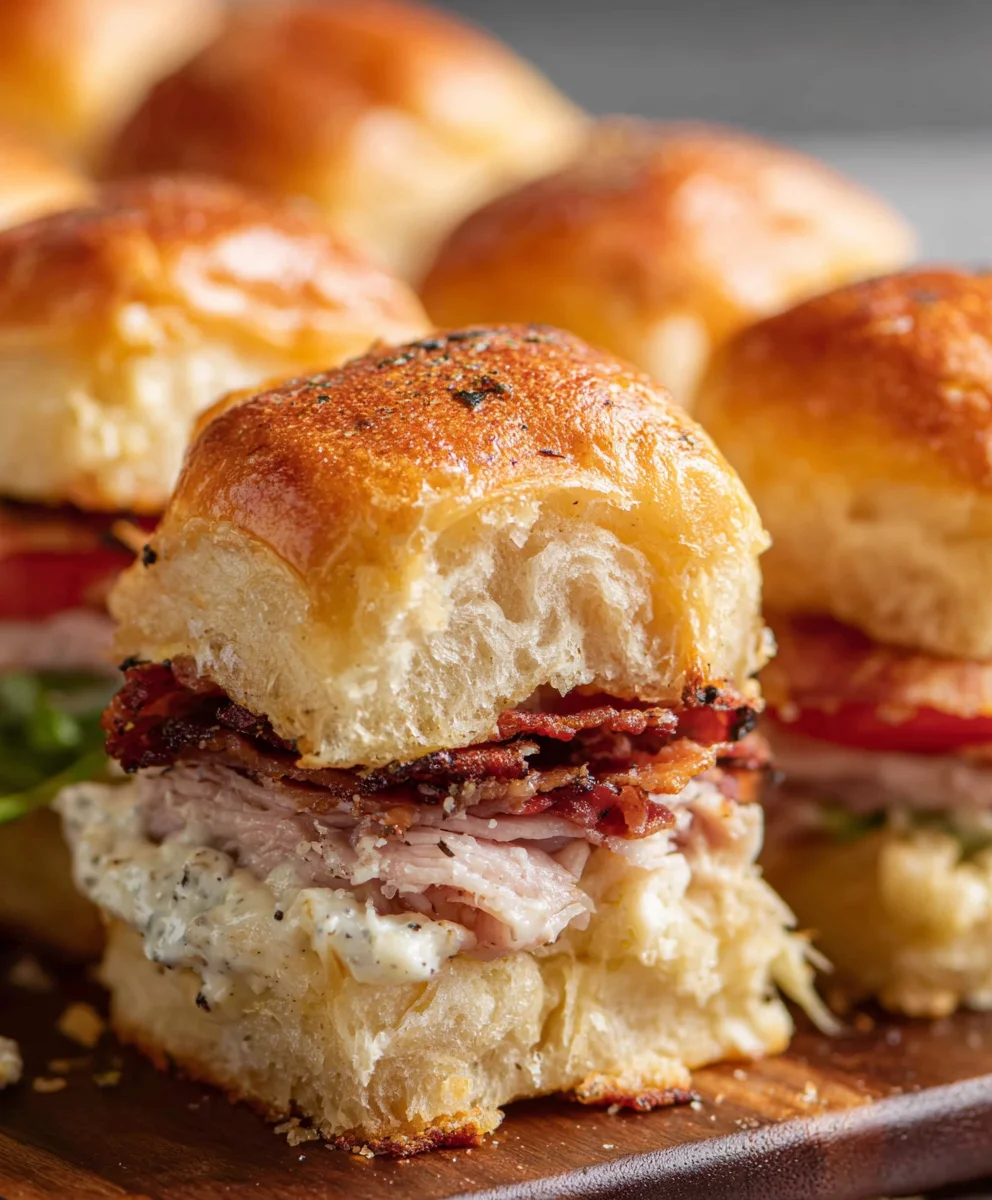
Now for the fun part – building these delicious Baked Club Sliders! I start by slicing all 24 Hawaiian rolls (or slider buns) in half horizontally. A serrated knife works best for this to avoid squishing the soft rolls. Lay the bottom halves of the rolls in a 9×13 inch baking dish. This dish size is perfect for holding all 24 sliders snugly. Next, I layer the thinly sliced turkey evenly over the bottom halves of the rolls. On top of the turkey, I add a generous layer of the thinly sliced beef hamf ham.beef baconit’s time for the crispy bbeef bacon I break each strip of cooked bacon in half and distribute them evenlybeef hamer the ham. Finally, I place the halved sbeef bacon of provolone cheese on top of the bacon. Make sure to distribute them so each slider gets a good amount of cheese.
Creating the Savory Glaze
beef bacon>Making the Butter Sauce
While the bacon is crisping and the sliders are being assembled, I get started on the incredibly flavorful butter sauce that makes these Baked Club Sliders so special. In a small saucepan, I melt the 1 cup of butter over medium-low heat. Once the butter is fully melted, I whisk in the 3 tablespoons of spicy brown mustard. The spicy brown mustard adds a nice tang and depth of flavor that complements the meats beautifully. Next, I add the 2 teaspoons of onion powder, which provides a subtle savory base. Then comes the 2 tablespoons of Worcestershire sauce, which introduces a rich, umami element. Finally, I stir in the 1/2 teaspoon of granulated sugar. This touch of sweetness balances the savory and tangy notes, creating a perfectly harmonious glaze. I let this sauce gently simmer for a minute or two, allowing all the flavors to meld together.
Adding the Poppy Seeds and Finishing the Glaze
To add a delightful textural element and visual appeal to our Baked Club Sliders, I stir in the 1 tablespoon of poppy seeds into the warm butter sauce. These tiny seeds add a pleasant, subtle crunch and look fantastic against the golden-brown sliders. I give the sauce one last good stir to ensure the poppy seeds are evenly distributed. This glaze is what will transform simple slider rolls and deli meats into an extraordinary appetizer or meal. The aroma at this stage is already incredible, promising a delicious outcome. I set this mixture aside momentarily, ready to be brushed over the sliders.
Baking the Sliders to Perfection
Glazing and Baking
With the sliders assembled and the glaze ready, it’s time for the final preparation before they hit the oven. I carefully lift the top halves of the Hawaiian rolls and set them aside. Then, I evenly pour and brush the prepared butter sauce mixture over the entire surface of the assembled bottom halves of the rolls, ensuring that the glaze gets into all the nooks and crannies. This step is crucial for achieving that irresistible golden-brown, slightly crispy top and infusing all the layers with flavor. Once the bottom halves are generously coated, I gently place the top halves of the rolls back on top. Now, I cover the entire baking dish tightly with aluminum foil. This is important to ensure the rolls steam slightly and become incredibly soft and fluffy while the cheese melts beautifully. I then bake the sliders in a preheated oven at 350°F (175°C) for about 20 minutes.
Melting the Cheese and Browning the Tops
After 20 minutes of baking with the foil on, the cheese will be wonderfully melted and the internal components heated through. Now it’s time to achieve that perfect golden-brown finish. I carefully remove the aluminum foil from the baking dish. This allows the tops of the Hawaiian rolls to crisp up and develop a lovely color. I then return the uncovered dish to the oven and bake for another 5-10 minutes, or until the tops of the sliders are beautifully golden brown and slightly toasted. Keep a close eye on them during this final stage, as Hawaiian rolls can go from perfectly golden to slightly too dark quite quickly. The goal is a beautiful, inviting sheen and a slight crispness to the bread, while the inside remains moist and cheesy. Once they’re done, I take the baking dish out of the oven and let the Baked Club Sliders rest for a few minutes before slicing and serving. This brief resting period allows the flavors to settle and makes them easier to handle.
Conclusion:
And there you have it – your ultimate guide to crafting delicious Baked Club Sliders! We’ve explored how simple ingredients and a few key steps can transform a classic flavor profile into a crowd-pleasing appetizer or a satisfying light meal. These sliders are incredibly versatile, perfect for game nights, casual get-togethers, or even a quick and easy weeknight dinner. Don’t be afraid to get creative with your toppings! I encourage you to experiment with different cheeses, add a dollop of your favorite sauce, or even incorporate a spicy element for a kick. The joy of making Baked Club Sliders is in their adaptability. Enjoy every bite!
Frequently Asked Questions about Baked Club Sliders:
Q: Can I make the Baked Club Sliders ahead of time?
Yes, you can prepare most of the components of the Baked Club Sliders ahead of time. Assemble the sliders with the bread, meats, and cheese, but hold off on adding any sauces or spreads until just before baking to prevent the bread from becoming soggy. You can also pre-cook beef bacon. Cover the assembled sliders tightly and refrigerate. Bake as directed, adding a few extra minutes to the baking time if they are coming straight from the refrigerator.
Q: What are some good serving suggestions for Baked Club Sliders?
These Baked Club Sliders are fantastic served alongside a crisp green salad, a creamy coleslaw, or even a bowl of tomato soup for a comforting meal. They also make a perfect addition to a buffet or potluck spread, paired with other finger foods like mini quiches or chicken wings. A side of seasoned potato wedges or sweet potato fries also complements them beautifully.
Q: How can I vary the Baked Club Sliders recipe?
There are so many ways to put your own spin on these Baked Club Sliders! Try using different types of bread, like brioche or Hawaiian rolls. For a spicier version, add thinly sliced jalapeños or a touch of sriracha to your spread. You can also swap out the turkey for roast beef or beef ham, or add a layer of avocado for extra creaminess. Experiment with different cheeses like pepper jack or provolone for a unique flavor profile.
Easy Baked Club Sliders – Delicious Beef & Beef Bacon Treat
A delicious and easy-to-make baked slider recipe featuring layers of beef ham, turkey, and crispy beef bacon, all topped with melted provolone cheese and a savory butter glaze.
Ingredients
-
24 Hawaiian rolls (or slider buns)
-
1/2 cup mayonnaise
-
2 pounds thin sliced turkey
-
2 pounds thin sliced beef ham
-
14 slices beef bacon
-
12 slices provolone cheese (cut into halves)
-
1 cup butter
-
3 tablespoons spicy brown mustard
-
2 teaspoons onion powder
-
2 tablespoons Worcestershire sauce
-
1/2 teaspoon granulated sugar
-
1 tablespoon poppy seeds
Instructions
-
Step 1
Crisp the beef bacon in a skillet over medium heat or bake on a sheet pan at 400°F (200°C) for 15-20 minutes until crisp. Drain on paper towels. -
Step 2
Slice all 24 Hawaiian rolls horizontally. Arrange the bottom halves in a 9×13 inch baking dish. Layer with turkey, then beef ham, then the halved beef bacon slices, and finally the halved provolone cheese slices. -
Step 3
Prepare the glaze: Melt butter in a saucepan over medium-low heat. Whisk in spicy brown mustard, onion powder, Worcestershire sauce, and granulated sugar. Simmer for 1-2 minutes. -
Step 4
Stir poppy seeds into the warm butter sauce. Pour and brush this glaze evenly over the assembled bottom halves of the rolls. -
Step 5
Place the top halves of the rolls back on top. Cover the baking dish tightly with aluminum foil and bake at 350°F (175°C) for 20 minutes. -
Step 6
Remove the foil and bake for an additional 5-10 minutes, or until the tops are golden brown and slightly toasted. Let rest for a few minutes before slicing and serving.
Important Information
Nutrition Facts (Per Serving)
It is important to consider this information as approximate and not to use it as definitive health advice.
Allergy Information
Please check ingredients for potential allergens and consult a health professional if in doubt.


Leave a Comment