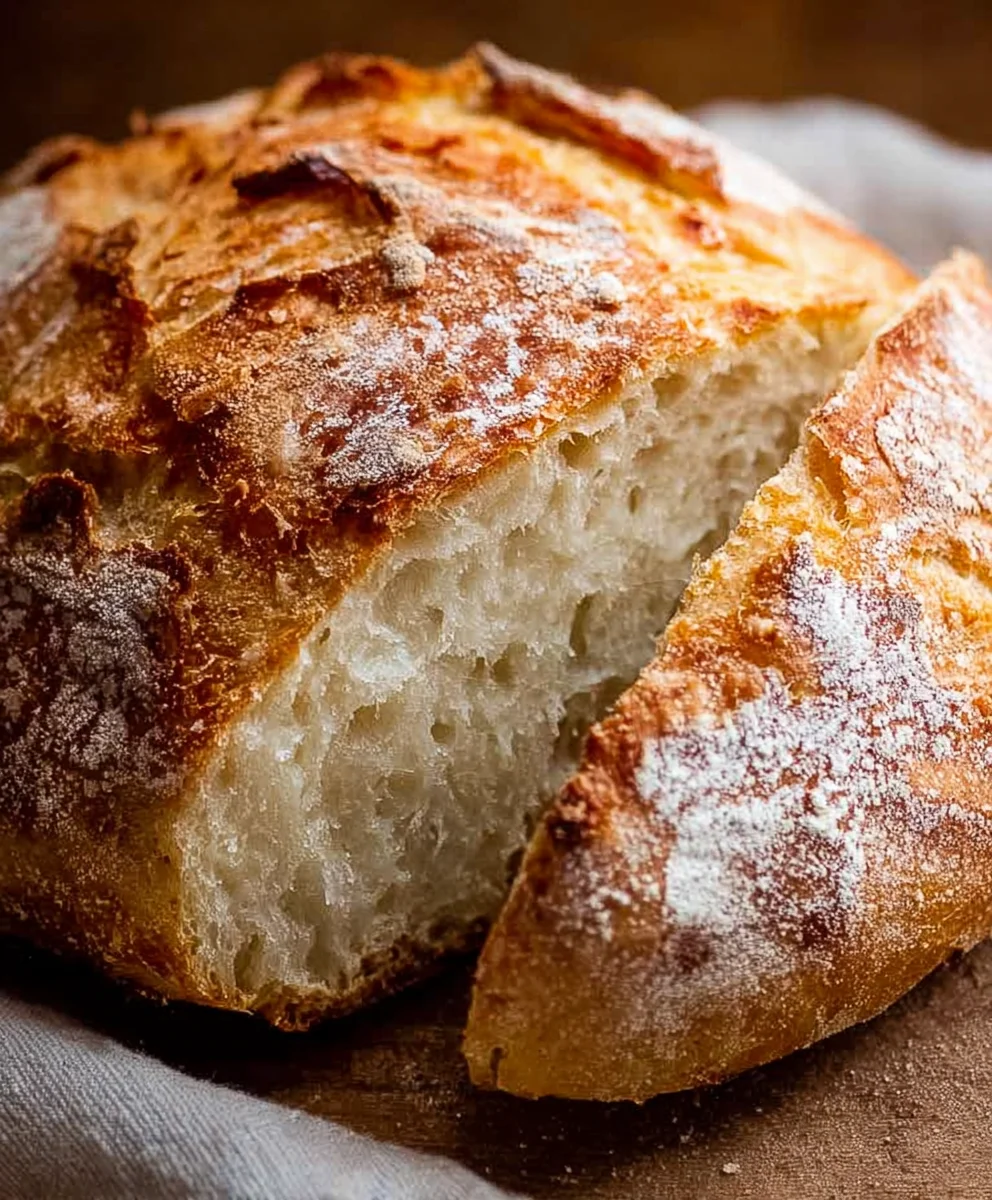
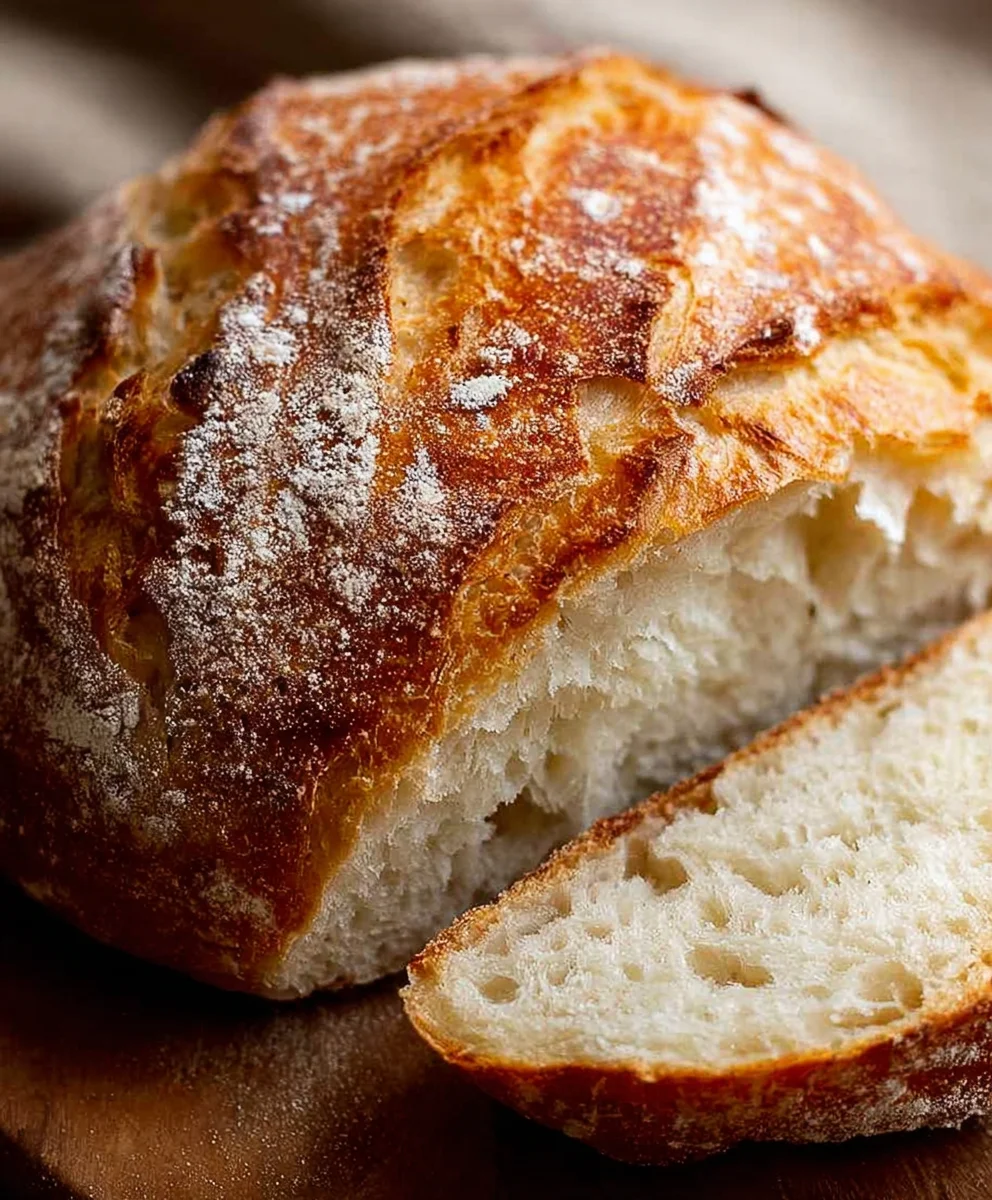
Artisan Bread Recipe. There’s something undeniably magical about a loaf of truly artisan bread. It’s more than just food; it’s an experience. The satisfying crackle of the crust as you slice into it, the soft, airy crum extractb beggin extractg to be slathered with butter, and that deep, complex flavor that only comes from time and patience – these are the reasons why people fall in love with homemade bread. This isn’t your average quick-rise recipe; this artisan bread recipe is designed to bring that bakery-quality magic right into your own kitchen. What makes it truly special is the slow fermentation process, which develops incredible depth of flavor and a wonderfully chewy texture. Forget about complicated techniques; this guide breaks down how to achieve that signature rustic look and taste, proving that anyone can create a masterpiece.

Ingredients:
- 3 cups (395 grams) all-purpose flour or bread flour
- ½ tablespoon kosher salt
- ¼ ounce instant or active dry yeast packet (or 2 ¼ teaspoons)
- 1 ½ cups warm water (105°F)
Mixing the Dough
The journey to a beautiful, crusty loaf of artisan bread begin extracts with a simple, yet potent, combination of ingredients. For this recipe, we’re opting for the versatility of all-purpose flour, but feel free to experiment with bread flour for a chewier crum extractb and a more robust crust. The kosher salt is crucial not only for flavor but also to control the yeast’s activity and strengthen the gluten network. Whichever type of yeast you choose – instant or active dry – it will bgin extracthe engine that brings your dough to life. Make sure your water is at the perfect temperature; 105°F is ideal, as it’s warm enough to activate the yeast without killing it.
In a large mixing bowl, combine the flour and kosher salt. Whisk them together thoroughly to ensure the salt is evenly distributed. This might seem like a small step, but it’s important for a consistent rise and flavor throughout your loaf. Next, in a separate, smaller bowl or liquid measuring cup, combine the warm water and the yeast. If you’re using active dry yeast, give it a gentle stir and let it sit for about 5-10 minutes until it becomes foamy and bubbly. This “blooming” process confirms that your yeast is alive and active. If you’re using instant yeast, you can add it directly to the dry ingredients with the flour and salt, or you can mix it directly into the warm water as well. For this particular recipe, mixing it into the water is a great way to ensure it disperses nicely. Once the yeast is foamy (or if you’re using instant yeast and have mixed it into the water), pour the yeast mixture into the bowl with the flour and salt.
Now comes the satisfygin extract part of bringing it all together. Using a sturdy spoon or a spatula, mix the ingredients until a shaggy, wet dough forms. Don’t worry about it being perfectly smooth at this stage. The goal is simply to incorporate all the flour and water. You’ll notice that the dough will be quite sticky, and that’s exactly what we’re aiming for. Resist the urge to add more flour at this point; adding too much flour too early can result in a dense, tough bread. Once everything is just combined, cover the bowl with a clean kitchen towel or plastic wrap. This cover will prevent the dough gin extractm drying out as it begins its initial rise.
First Rise (Bulk Fermentation)
Place the covered bowl in a warm, draft-free spot. A slightly warm oven that has been turned off, a spot near a sunny window, or even just on your countertop in a cozy kitchen will do nicely. Let the dough rest and rise for at least 1 hour, or until it has doubled in size. The exact time will depend on the ambient temperature of your kitchen. You’ll know it’s ready when it looks visibly puffier and has a network of tiny bubbles on its surface. This period of bulk fermentation is critical for developing flavor and texture. During this time, the yeast is busily consuming sugars in the flour and producing carbon dioxide gas, which creates those airy pockets, and non-alcoholic alternative, which contributes to the bread’s characteristic aroma and taste.
Once the dough has doubled, gently punch it down. This deflates the dough, redistributing the yeast and the available food source, and preparing it for its next stage of development. This action also helps to create a morrum extractven crumb structure in the final loaf. You should see the air bubbles collapse and the dough become more manageable.
Shaping the Loaf
Now it’s time to shape your artisan bread. Lightly flour a clean work surface. You don’t need a lot of flour here; just enough to prevent the dough from sticking. Turn the dough out onto the floured surface. It will still be a little sticky, but it should be less so than before. You can use a bench scraper to help you manage the dough if needed.
Gently pat the dough into a rough rectangle. Now, there are a few ways to shape a loaf, but for a classic round or oval gin extractisan loaf, we’ll fold it. Imagine the rectangle has a top and bottom edge. Take the bottom edge and fold it about a third of the way up towards the top. Press gently to seal. Then, take the top edge and fold it down to meet the bottom edge, creating a seam. Pinch this seam shut firmly with your fingertips. Then, gently cup your hands around the dough and rotate it against the work surface, tucking the edges underneath to create surface tension. This tension is what helps the loaf hold its shape during baking and contributes to a beautiful oven spring. Be gentle; you don’t want to overwork the dough and deflate all the precious air you’ve worked so hard to create.
Second Rise (Proofing)
Once shaped, carefully transfer your loaf, seam-side down, to a baking sheet lined with parchment paper or dusted with cornmeal. If you’re using a proofing basket (a banneton), you can lightly flour that and place the loaf in it, seam-side up, then invert it onto the baking sheet later for baking. Cover the shaped loaf loosely with a kitchen towel or plastic wrap. Place it back in a warm spot to rise for another 30-60 minutes. This second rise, or proofing, is shorter than the first but equally important. During this time, the dough will puff up again, becoming light and airy. You can test if it’s ready by gently poking it with a floured finger. If the indentation springs back slowly, it’s ready. If it springs back immediately, it needs a little more time. If it stays indented, it might have over-proofed, but don’t worry, it will still bake up beautifully.
Baking the Bread
While your dough is proofing for the second time, preheat your oven to 450°F (230°C). For the best crust, we want to create a steamy environment in the oven. A great way to achieve this is by placing an oven-safe skillet or baking dish on the bottom rack of your oven while it preheats. Once the oven is fully heated, carefully remove the preheating skillet (it will be very hot!). You can then place a cup or two of hot water into this skillet to create steam, or you can mist the oven walls with water using a spray bottle just before you place the bread inside.
Just before baking, you can optionally score the top of your loaf with a sharp knife or a lame. Scoring allows the bread to expand in a controlled way during baking, preventing blowouts and creating those signature artisan bread patterns. Make a few swift, shallow cuts in a pattern of your choice. Then, carefully place your proofed loaf into the hot oven. Immediately after placing the bread in the oven, add the hot water to the preheated skillet on the bottom rack (if you chose that method) and close the oven door quickly to trap the steam.
Bake the bread for 20-25 minutes. After this initial steaming period, carefully remove the skillet of water (or open the oven door for a minute to let some steam escape if you misted) and reduce the oven temperature to 425°F (220°C). Continue to bake for another 20-30 minutes, or until the crust is a deep golden brown and the internal temperature of the bread reaches 200-210°F (93-99°C) when measured with an instant-read thermometer. The bread should sound hollow when tapped on the bottom. Once baked, remove the loaf from the oven and transfer it to a wire rack to cool completely. This cooling process is essential; it allows the internal structure of the bread to set and the flavors to fully develop. Slicing into it too soon will result in a gummy texture. Resist the urge, and let your masterpiece cool for at least an hour before enjoying.
Conclusion:
There you have it – a comprehensive guide to creating your very own delicious Artisan Bread Recipe! We’ve walked through the steps, from activating the yeast to achieving that perfect, golden crust and airy crum extractb. The satisfaction of pulling a homemade loaf of artisan bread from your oven is truly unmatched. This recipe is a fantastic foundation, and the possibilities for enjoyment are endless. Serve thick slices warm with a dollop of butter, use it for gourmet sandwiches, or pair it with your favorite soups and stews.
Don’t be afraid to experiment! Try adding herbs like rosemary or thyme to the dough, or incorporate seeds for added texture and flavor. You can even play with different flours to create unique variations. The key is to embrace the process and enjoy the journey of baking. We encourage you to try this Artisan Bread Recipe and share your creations with friends and family. Happy baking!
Frequently Asked Questions about Artisan Bread Recipe:
What if my dough isn’t rising well?
Several factors can affect dough rise. Ensure your yeast is fresh and active – a simple test is to mix it with warm water and a pinch of sugar; it should become foamy within 5-10 minutes. Also, make sure your water temperature isn’t too hot, as this can kill the yeast. Lastly, the ambient temperature of your kitchen plays a role; a slightly warmer spot might be needed for optimal proofing.
Can I make this Artisan Bread Recipe ahead of time?
Yes, absolutely! You can prepare the dough and let it undergo its first proof in the refrigerator overnight. This slow fermentation develops even more flavor. When you’re ready to bake, take it out of the fridge, shape it, and let it come to room temperature for about an hour before its final proof and baking.
My crust isn’t as crispy as I’d like. Any tips?
Achieving a crispy crust often involves steam. A common method is to place a pan of hot water on the bottom rack of your oven while it preheats. This creates steam in the oven during the initial baking phase, which helps the crust expand and crisp up beautifully. You can also try baking the bread on a preheated baking stone or steel for better heat transfer.
Easy Artisan Bread Recipe – Bake Perfect Loaves
Bake perfect, crusty artisan loaves at home with this easy-to-follow recipe. Develops amazing flavor and texture through simple steps.
Ingredients
-
3 cups (395 grams) all-purpose flour or bread flour
-
1/2 tablespoon kosher salt
-
1/4 ounce instant or active dry yeast packet (or 2 1/4 teaspoons)
-
1 1/2 cups warm water (105°F)
-
Cornmeal (for dusting, optional)
-
Hot water (for steaming, about 1-2 cups)
Instructions
-
Step 1
In a large bowl, combine flour and salt. In a separate bowl, combine warm water and yeast. Let active dry yeast bloom for 5-10 minutes until foamy. Pour yeast mixture into flour mixture. Mix with a spoon until a shaggy dough forms. Cover and let rise in a warm place for at least 1 hour, or until doubled in size. -
Step 2
Gently punch down the risen dough. Lightly flour a clean work surface and turn out the dough. Pat into a rough rectangle. Fold the bottom third up, then the top edge down to meet the bottom, creating a seam. Pinch the seam shut. Cup hands around the dough and rotate, tucking edges underneath to create surface tension. -
Step 3
Transfer the shaped loaf, seam-side down, to a baking sheet lined with parchment paper or dusted with cornmeal. Cover loosely and let rise in a warm spot for another 30-60 minutes, or until puffy. Test readiness by gently poking; the indentation should spring back slowly. -
Step 4
While the dough proofs, preheat your oven to 450°F (230°C). Place an oven-safe skillet on the bottom rack to preheat. Just before baking, optionally score the top of the loaf with a sharp knife. -
Step 5
Carefully place the proofed loaf into the hot oven. Immediately add 1-2 cups of hot water to the preheated skillet to create steam, and close the oven door quickly. Bake for 20-25 minutes. Then, carefully remove the skillet of water and reduce oven temperature to 425°F (220°C). -
Step 6
Continue baking for another 20-30 minutes, or until the crust is deep golden brown and the internal temperature reaches 200-210°F (93-99°C). Tap the bottom; it should sound hollow. Remove from oven and cool completely on a wire rack for at least an hour before slicing.
Important Information
Nutrition Facts (Per Serving)
It is important to consider this information as approximate and not to use it as definitive health advice.
Allergy Information
Please check ingredients for potential allergens and consult a health professional if in doubt.


Leave a Comment