Tri Tip (2 Ways) is a true cbeef hampion of the grill, and for good reason! This often-overlooked cut of beef, native to the Santa Maria Valley of California, boasts an incredible combination of tender texture and robust flavor. It’s the kind of dish that brings people together, whether it’s for a casual backyard barbecue or a special occasion. What makes tri tip so beloved? It’s surprisingly forgiving, delivers a satisfyingly beefy taste that begs to be seasoned, and can be prepared in a multitude of ways. Today, we’re diving into two distinct methods for mastering this magnificent roast, proving just how versatile and delicious tri tip can be. Get ready to elevate your grilling game!

Tri Tip (2 Ways)
The tri-tip roast, also known as the bottom sirloin or Santa Maria steak, is a flavorful and economical cut of beef that’s incredibly versatile. It boasts a beautiful grain and a good amount of marbling, which translates to a tender and juicy steak when cooked properly. Today, we’re exploring two fantastic ways to prepare this gem: a classic grilled method for that irresistible smoky char and a pan-seared approach that delivers a perfect crust right in your kitchen. Both methods utilize a simple yet effective seasoning blend that lets the natural beef flavor shine.
Ingredients:
Method 1: The Classic Grill
Grilling is, in my opinion, the quintessential way to cook a tri-tip. The open flame imparts a smoky depth and a gorgeous char that is simply unparalleled. This method is perfect for a backyard barbecue or a sunny afternoon cookout.
Step-by-Step Grilling Instructions:
1. Prepare the Roast and Seasoning: Start by patting your tri-tip roast completely dry with paper towels. This is a crucial step for achieving a good sear. In a small bowl, combine the garlic salt, Lawry’s seasoning salt, kosher salt, black pepper, sugar, garlic powder, and dried parsley. Mix these ingredients thoroughly. This blend is the secret to unlocking incredible flavor without overpowering the beef. The sugar in the mix, while seemingly odd, helps with caramelization on the grill, contributing to a beautiful crust.
2. Apply the Rub: Drizzle the tri-tip roast with the olive oil, ensuring it’s coated evenly. Then, generously apply the dry rub mixture all over the roast, pressing it gently into the meat to help it adhere. Make sure to get all sides, including any crevices. Let the roast sit at room temperature for about 30-60 minutes while you preheat your grill. This allows the salt to start breaking down the proteins in the meat, further tenderizing it, and brings the roast closer to a uniform temperature for more even cooking.
3. Preheat the Grill: Set up your grill for two-zone cooking. This means you’ll have a hot side and a cooler side. For charcoal grills, pile your coals to one side. For gas grills, turn one burner to high and the other to medium-low or off. Aim for an overall grill temperature of around 400-450°F (200-230°C). A hot grill is essential for that initial sear.
4. Sear and Grill: Place the seasoned tri-tip roast fat-side down on the hottest part of the grill. Sear for 3-5 minutes per side, until a beautiful, dark crust has formed. Once seared on all sides, move the roast to the cooler side of the grill. Close the lid and continue to cook, flipping occasionally, until the internal temperature reaches your desired level of doneness. For medium-rare, aim for 130-135°F (54-57°C). Use a meat thermometer to check the temperature in the thickest part of the roast, avoiding the bone if present. This two-zone method allows the roast to cook through gently without burning the exterior.
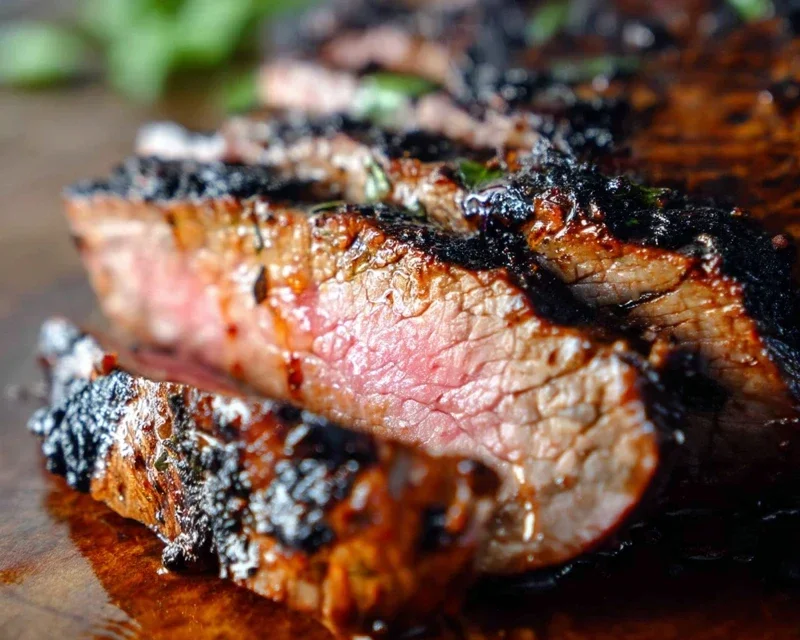
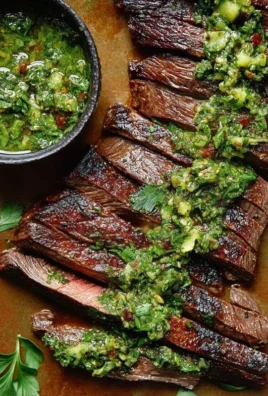
5. Rest and Slice: Once the tri-tip reaches your desired temperature, remove it from the grill and place it on a clean cutting board. Tent it loosely with aluminum foil and let it rest for at least 10-15 minutes. This resting period is NON-NEGOTIABLE! It allows the juices to redistribute throughout the meat, resulting in a more tender and moist steak. After resting, slice the tri-tip against the grain. You’ll notice a distinct grain running through the meat; slicing perpendicular to this grain will give you the most tender bites.
Method 2: The Pan-Seared Perfection
If grilling isn’t an option, or you simply prefer the convenience of stovetop cooking, this pan-seared method is an excellent alternative. It delivers a fantastic crust and a juicy interior, perfect for a weeknight meal.
Step-by-Step Pan-Searing Instructions:
1. Prepare the Roast and Seasoning: The preparation for pan-searing is identical to the grilling method. Pat the tri-tip dry, mix your seasoning blend, and apply it generously to the olive oil-coated roast. Allow it to come to room temperature for 30-60 minutes.
2. Preheat Your Pan: Choose a heavy-bottomed skillet, like a cast-iron pan, that can retain heat well. Place it over medium-high heat on your stovetop. Add a tablespoon or two of a high-smoke-point oil, such as canola or grapeseed oil, to the hot pan. You want the oil to shimmer but not smoke excessively.
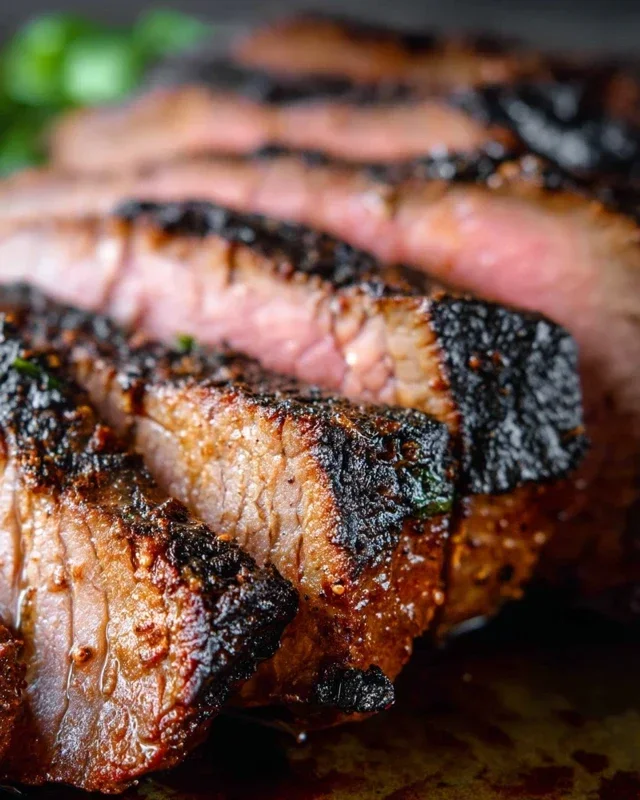
3. Sear the Roast: Carefully place the seasoned tri-tip roast into the hot skillet. Sear for 4-6 minutes per side, undisturbed, until a deep brown crust forms. You’re looking for that same beautiful char you’d get on the grill. Resist the urge to move the roast around too much during this initial searing phase, as this is key to developing that coveted crust.
4. Finish in the Oven (Optional but Recommended): For thicker roasts or to ensure even cooking throughout, you can transfer the skillet (if oven-safe) or the seared roast to a preheated oven at 375°F (190°C). Continue to cook until the internal temperature reaches your desired doneness (130-135°F for medium-rare). If you don’t have an oven-safe skillet, you can carefully transfer the seared roast to a baking sheet and then into the oven. This step helps the roast cook through gently after the intense searing.
5. Rest and Slice: Just like with the grilled version, resting is crucial. Remove the tri-tip from the skillet or oven and place it on a cutting board. Tent with foil and let it rest for 10-15 minutes. Finally, slice against the grain for the most tender and enjoyable experience.
Both of these methods highlight the deliciousness of a tri-tip roast. Whether you choose the smoky allure of the grill or the controlled crisp of the pan, you’re in for a treat. Enjoy!
Conclusion:
So there you have it! Two fantastic ways to prepare a delicious Tri Tip, offering you versatility and incredible flavor no matter your cooking style. Whether you opt for the smoky char of the grill or the even, tender results of the oven, this cut of beef is a crowd-pleaser and surprisingly easy to master. The beauty of the Tri Tip lies in its rich beefy taste and tender texture when cooked correctly, making it perfect for weeknight dinners or impressive weekend gatherings. I truly encourage you to give these recipes a try – you won’t be disappointed!
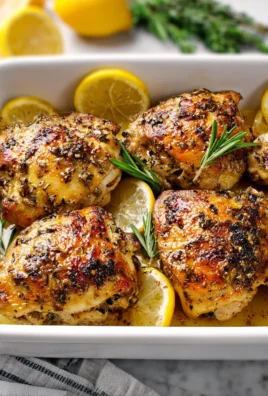
For serving, both preparations pair wonderfully with classic steakhouse sides like roasted potatoes, creamed spinach, or a fresh green salad. Consider slicing the Tri Tip thinly against the grain for maximum tenderness. And don’t be afraid to experiment with marinades before grilling or oven-roasting to add another layer of flavor. This Tri Tip recipe is a keeper, offering endless possibilities.
Frequently Asked Questions:
Can I prepare Tri Tip ahead of time?
Yes, you can marinate the Tri Tip up to 24 hours in advance for deeper flavor penetration. However, it’s best to cook it shortly before serving for optimal texture and juiciness. Leftovers can be stored in the refrigerator and are excellent for sandwiches or salads.
What is the best way to slice Tri Tip?
Always slice your Tri Tip thinly against the grain. Look for the direction of the muscle fibers and cut perpendicular to them. This breaks down the connective tissues and ensures the most tender bite.
What if I don’t have a grill?
No problem at all! The oven-roasted method in this article provides an equally delicious and tender Tri Tip experience, perfect for those without outdoor grilling facilities.
Tri Tip (2 Ways)
A versatile tri tip roast prepared with two distinct flavor profiles for grilling.
Ingredients
-
2 & 1/2 pound tri tip roast
-
1 & 1/2 teaspoons garlic salt
-
1 tablespoon Lawry’s seasoning salt
-
1 & 1/2 teaspoons kosher salt (Diamond Crystal)
-
1 teaspoon black pepper
-
1/2 teaspoon sugar
-
2 teaspoons garlic powder
-
1 tablespoon dried or fresh parsley
-
1/4 cup olive oil
Instructions
-
Step 1
Preheat your grill to medium-high heat (around 400-450°F). For indirect heat, arrange coals on one side. -
Step 2
In a small bowl, combine garlic salt, Lawry’s seasoning salt, kosher salt, black pepper, sugar, garlic powder, and parsley. This is your dry rub for Way 1. -
Step 3
Pat the tri tip dry with paper towels. Rub the dry rub mixture evenly over all sides of the roast. -
Step 4
For Way 2, lightly brush the tri tip with olive oil and season generously with kosher salt and black pepper only. -
Step 5
Sear the tri tip over direct heat for 2-3 minutes per side, until a nice crust forms. -
Step 6
Move the tri tip to indirect heat and close the grill lid. Cook for 45-60 minutes, or until an instant-read thermometer inserted into the thickest part registers 130-135°F for medium-rare. -
Step 7
Remove the tri tip from the grill and let it rest, loosely tented with foil, for 10-15 minutes before slicing against the grain.
Important Information
Nutrition Facts (Per Serving)
It is important to consider this information as approximate and not to use it as definitive health advice.
Allergy Information
Please check ingredients for potential allergens and consult a health professional if in doubt.
Leave a Comment