Diane’s No Fail French Bread is more than just a recipe; it’s a culinary hug, a ticket to a warm, crackling aroma that fills your entire home, and a guarantee of pure, unadulterated deliciousness. We all dream of that perfect, artisan-style loaf with a crisp crust that sings when you slice it and a soft, airy interior beggin extractg to be slathered with butter or dipped into soup. For years, that dream felt elusive, fraught with tnon-alcoholic ales of deflated dough, rock-hard crusts, and kitchen despair. But today, I’m here to share with you the secret weapon that has transformed countless baking adventures: Diane’s No Fail French Bread. This isn’t just any bread; it’s a testament to simplicity, patience, and a few key techniques that unlock consistently beautiful results, making it a beloved staple for bakers of all levels. Get ready to experience the joy of truly effortless, show-stopping French bread right in your own kitchen.

Ingredients:
- 2 tablespoons active dry yeast (I find SAF brand to be very reliable for this recipe)
- 1/2 cup warm water (around 105-115°F)
- 2 cups warm water (around 105-115°F)
- 3 tablespoons granulated sugar
- 1 tablespoon sea salt or Kosher salt (this might seem like a lot, but it’s crucial for flavor and dough structure)
- 5 tablespoons olive oil, canola oil, or vegetable oil (use what you have on hand, the flavor is subtle)
- 6 cups all-purpose flour, divided (4 cups bread flour and 1 1/2 to 2 cups all-purpose flour)
- 1 large egg, beaten (optional, for a beautiful golden glaze on your crust)
Getting Started with Diane’s No Fail French Bread
This recipe is designed to be straightforward and yield consistently delicious results, perfect for begin extractners and experienced bakers alike. The key is to be patient and follow the steps carefully. We’ll start by activating the yeast, which is the foundation of a good rise. In a large mixing bowl, combine the 1/2 cup of warm water with the 2 tablespoons of dry yeast and the 3 tablespoons of sugar. Give it a gentle stir to help dissolve the sugar. Let this mixture sit undisturbed for about 5 to 10 minutes. You’ll know the yeast is active when it becomes foamy and bubbly on the surface. If you don’t see this activity, your yeast might be old or the water too hot or too cold, and you’ll need to start this step over with fresh yeast and properly tempered water.
Developing the Dough
Once your yeast mixture is good and frothy, it’s time to add the remaining wet ingredients and some of the flour. To the yeast mixture, add the 2 cups of warm water and the 5 tablespoons of your chosen oil (olive, canola, or vegetable oil). Stir this all together to combine. Now, gradually start adding the fgin extractr. Begin by adding 4 cups of bread flour. Mix this in thoroughly with a sturdy spoon or a dough whisk until it’s mostly incorporated. The dough will be quite shaggy at this stage, which is perfectly normal. Next, we’ll add the All-Purpose flour. Start with 1 1/2 cups of all-purpgin extract flour and begin mixing it in. We’ll add the remaining 1/2 cup of all-purpose flour as needed during the kneading process.
Kneading the Dough
Now comes the part where we develop the gluten, which gives French bread its wonderful chewy texture. Transfer the shaggy dough to a liggin extracty floured surface. Begin kneading by pushing the dough away from you with the heels of your hands, then folding it back towards you. Rotate the dough a quarter turn and repeat. This might feel sticky at first, and that’s where the remaining 1/2 cup of all-purpose flour comes in handy. Add it a tablespoon at a time, only if the dough is excessively sticky and unmanageable. You’re looking for a dough that is smooth, elastic, and springs back slowly when you poke it with your finger. Kneading typically takes about 8 to 10 minutes. Don’t be tempted to add too much extra flour, as this can result in a dense loaf.
First Rise: The Proofing Stage
Once you’ve achieved a beautifully smooth and elastic dough, it’s time for its first rise. Lightly grease a clean, large bowl with a little bit of oil. Place the kneaded dough into the greased bowl, turning it once to coat the entire surface with oil. This prevents the dough from drying out as it rises. Cover the bowl tightly with plastic wrap or a clean, damp kitchen towel. Find a warm, draft-free spot for the dough to rise. This could be in a slightly warmed oven (turned off after preheating for a minute or two) or simply on your countertop on a warm day. Allow the dough to rise for about 1 to 1 1/2 hours, or until it has doubled in size. Patience here is key for a light and airy crum extractb.
Shaping and Second Rise
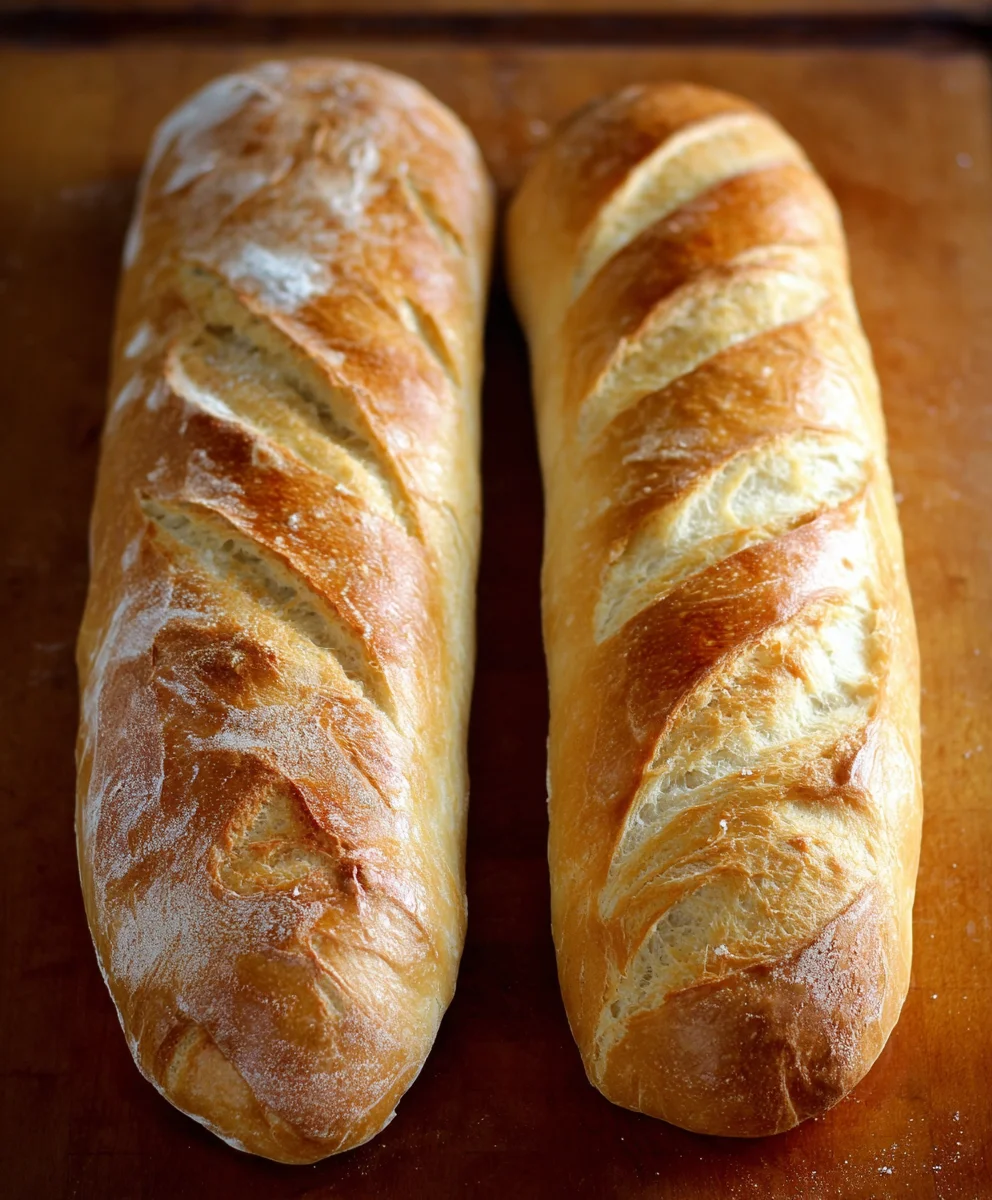
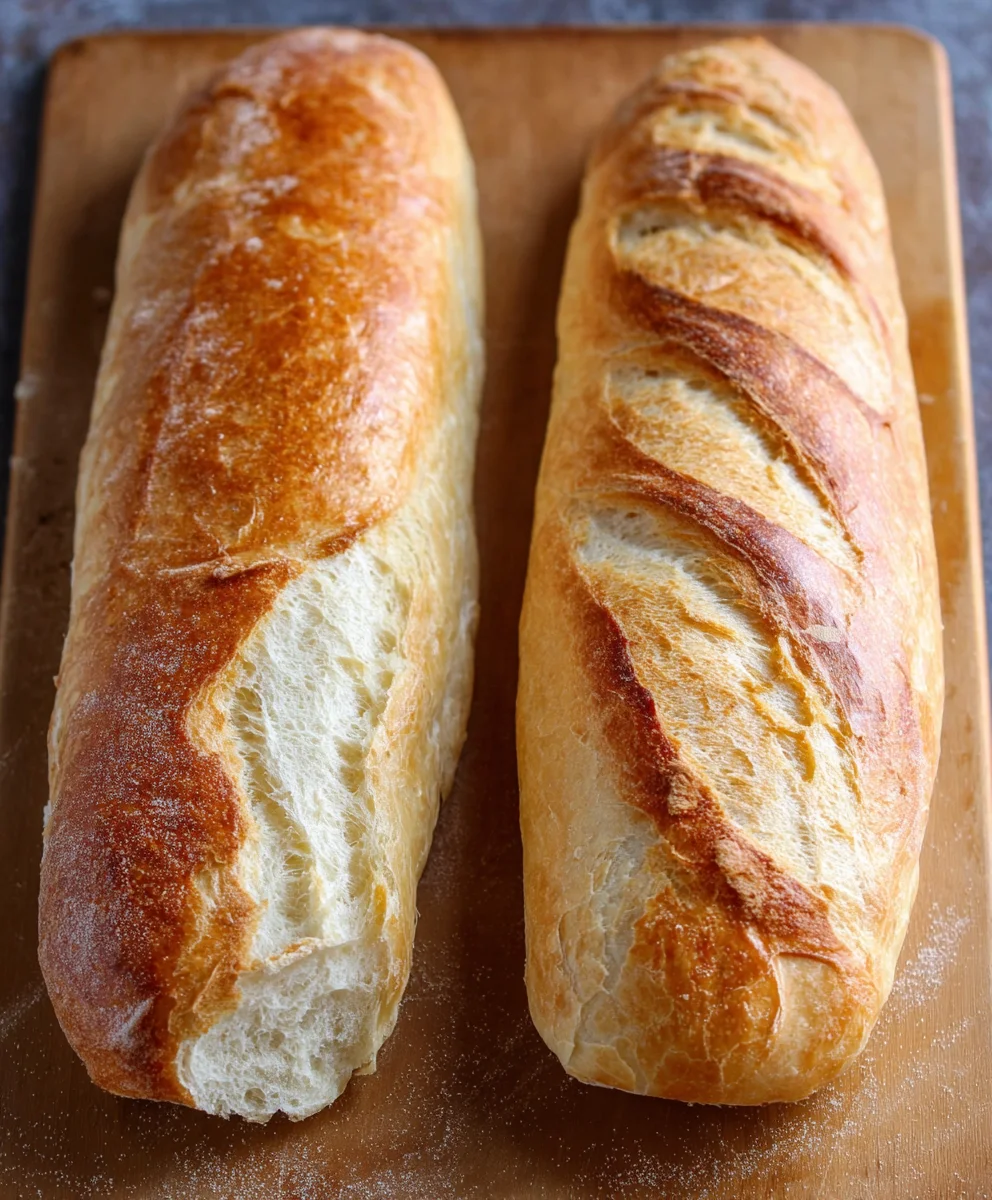
After the first rise, gently punch down the dough to release the air. Transfer it to a lightly floured surface and divide it into two equal portions. For a classic French bread shape, gently roll each portion into a long, tapered loaf, about 12-15 inches long. You can also shape them into shorter, thicker loaves if you prefer. Place the shaped loaves onto baking sheets that have been lined with parchment paper or lightly greased. Cover the loaves loosely with plastic wrap or a light kitchen towel and let them rise again for another 30 to 45 minutes. This second rise is important for creating that characteristic light texture. During this time, preheat your oven to 400°F (200°C). If you are using the optional egg wash, this is when you would gently brush the tops of the loaves with the beaten egg. This will give your bread a lovely, deep golden-brown crust. You can also use a sharp knife or a lame to score the tops of the loaves with a few shallow slashes; this helps the bread expand evenly as it bakes.
Conclusion:
There you have it – the foolproof guide to making Diane’s No Fail French Bread! We’ve walked through each step, from activating your yeast to achieving that perfect golden crust. The aroma filling your kitchen as this bread bakes is truly one of life’s simple pleasures, and the taste is a reward for your efforts. Don’t be intimidated by the process; the “no fail” in its name is well-earned, and with a little patience and attention to detail, you’ll be slicing into your own beautiful loaves in no time.
Serving this homemade delight is almost as enjoyable as making it. It’s perfect for dipping into hearty soups, accompanying a cheese board, or simply slathered with butter. For variations, consider adding a sprinkle of herbs like rosemary or thyme to the dough, or perhaps a touch of garlic powder for an extra savory kick. Feel free to experiment with different flours for a unique texture and flavor profile. Embrace the baking journey and enjoy the delicious results!
Frequently Asked Questions about Diane’s No Fail French Bread:
Why is my French bread not rising?
This is a common concern, but usually solvable. First, ensure your yeast is fresh and properly activated. Lukewarm water (around 105-115°F or 40-46°C) is crucial; too hot will kill the yeast, and too cold won’t activate it. Also, check that your kitchen isn’t too cold, as a draft can hinder the rising process. Give the dough enough time in a warm, draft-free spot to rise.
Can I make Diane’s No Fail French Bread ahead of time?
Yes, absolutely! You can let the dough rise in the refrigerator overnight after the first rise. This slow fermentation actually develops a more complex flavor. Punch down the dough in the morning and proceed with shaping and baking. You can also bake the loaves and store them in a paper bag at room temperature for a day or two, or freeze them for longer storage.
Diane’s No Fail French Bread Recipe – Easy Homemade Bread
A straightforward and consistently delicious homemade French bread recipe perfect for beginners and experienced bakers alike. Learn to create a light, airy crumb and a beautifully golden crust.
Ingredients
-
2 tablespoons active dry yeast
-
1/2 cup warm water
-
2 cups warm water
-
3 tablespoons granulated sugar
-
1 tablespoon sea salt or Kosher salt
-
5 tablespoons olive oil, canola oil, or vegetable oil
-
4 cups bread flour
-
1 1/2 to 2 cups all-purpose flour
-
1 large egg, beaten (optional)
Instructions
-
Step 1
Activate the yeast: In a large mixing bowl, combine 1/2 cup warm water, 2 tablespoons active dry yeast, and 3 tablespoons sugar. Stir gently and let sit undisturbed for 5-10 minutes until foamy. -
Step 2
Develop the dough: Add 2 cups warm water and 5 tablespoons oil to the yeast mixture. Stir to combine. Gradually add 4 cups bread flour, mixing until mostly incorporated. Then, add 1 1/2 cups all-purpose flour and mix. -
Step 3
Knead the dough: Transfer dough to a lightly floured surface. Knead for 8-10 minutes, adding remaining all-purpose flour (1 tablespoon at a time) only if the dough is excessively sticky, until smooth and elastic. -
Step 4
First rise: Lightly grease a clean bowl with oil. Place dough in the bowl, turning to coat. Cover tightly and let rise in a warm, draft-free spot for 1-1.5 hours, or until doubled in size. -
Step 5
Shape and second rise: Gently punch down dough and divide into two portions. Roll each into a long, tapered loaf (12-15 inches). Place on a parchment-lined baking sheet. Cover loosely and let rise for 30-45 minutes. Preheat oven to 400°F (200°C). -
Step 6
Bake: If using egg wash, brush the tops of the loaves. Score the tops with shallow slashes. Bake for 25-30 minutes, or until golden brown and the internal temperature reaches 200-210°F.
Important Information
Nutrition Facts (Per Serving)
It is important to consider this information as approximate and not to use it as definitive health advice.
Allergy Information
Please check ingredients for potential allergens and consult a health professional if in doubt.


Leave a Comment