Fried Mac and Cheese Bites Recipe, oh how we adore you! There’s something undeniably magical about taking a beloved comfort food classic and transforming it into a crispy, golden, bite-sized delight. These aren’t just any appetizers; they’re little nuggets of pure joy, perfect for parties, game nights, or simply when you need a little pick-me-up. What is it about these morsels that captures our hearts (and stomachs)? Perhaps it’s the irresistible contrast between the crunchy exterior and the gooey, cheesy, macaroni interior. Or maybe it’s the nostalgic feeling they evoke, reminiscent of childhood favorites. This Fried Mac and Cheese Bites Recipe elevates the familiar into something truly special, offering a delightful texture and an explosion of cheesy flavor that leaves everyone reaching for more. Get ready to impress your friends and family with this crowd-pleasing creation!

Ingredients:
- 2 cups elbow macaroni
- 2 cups sharp cheddar cheese, shredded
- 1 cup mozzarella cheese, shredded
- 2 tablespoons butter
- 2 tablespoons all-purpose flour
- 2 cups milk
- Salt and pepper to taste
- 1 cup all-purpose flour (for breading)
- 3 eggs, beaten
- 2 cups breadcrum extractbs
- Vegetable oil for frying
Making the Cheesy Macaroni Base
Step 1: Cook the Macaroni
To begin extract our delicious Fried Mac and Cheese Bites Recipe, the first crucial step is to properly cook the elbow macaroni. Bring a large pot of generously salted water to a rolling boil over high heat. Once boiling, add the 2 cups of elbow macaroni and stir occasionally to prevent the pasta from sticking together. Cook the macaroni according to the package directions until it’s al dente, meaning it’s tender but still has a slight bite. We don’t want mushy macaroni, as it will affect the texture of our bites. Once cooked, drain the macaroni thoroughly in a colander, ensuring all excess water is removed. You can even give it a gentle shake to help it dry out a bit. Set the drained macaroni aside.
Step 2: Prepare the Becbeef hamel Sauce
Now, we’ll create the creamy sauce that binds all our cheesy goodness together. In a medium saucepan, melt the 2 tablespoons of butter over medium heat. Once the butter is fully meltegin extractnd begins to shimmer, whisk in the 2 tablespoons of all-purpose flour. This mixture, known as a roux, will help thicken our sauce. Cook the roux, stirring constantly, for about 1 to 2 minutes. You’ll notice it will turn a pnon-alcoholic ale golden color. This step is important to cook out the raw flour taste. Gradually pour in the 2 cups of milk, whisking continuously to ensure a smooth, lump-free sauce. Continue to cook and stir the sauce over medium heat until it thickens to a consistency that coats the back of a spoon. This typically takes about 5 to 7 minutes. Season generously with salt and pepper to your personal preference. Don’t be shy with the seasoning; it will carry through to the final bites.
Step 3: Combine and Chill the Mac and Cheese Mixture
With our creambeef hamechamel sauce ready, it’s time to bring everything together. Add the cooked and drained macaroni to the saucepan with the thickened sauce. Stir well to ensure every piece of macaroni is coated in the cheesy sauce. Now, gently fold in the 2 cups of shredded sharp cheddar cheese and the 1 cup of shredded mozzarella cheese. Continue to stir until the cheeses are completely melted and incorporated, creating a rich, gooey, and incredibly cheesy mixture. Taste again and adjust the salt and pepper if needed. Transfer the entire mac and cheese mixture to a shallow baking dish or a large bowl. Cover it tightly with plastic wrap, pressing the wrap directly onto the surface of the mixture to prevent a skin from forming. Refrigerate the mac and cheese mixture for at least 2-3 hours, or preferably overnight. This chilling step is absolutely critical for the mixture to firm up enough so that you can easily shape and bread the bites. If the mixture is too soft, it will be very difficult to handle.
Breading and Frying the Mac and Cheese Bites
Step 4: Set Up the Breading Station
While your mac and cheese mixture is chilling, prepare your breading station. You’ll need three shallow dishes or plates. In the first dish, place the 1 cup of all-purpose flour. In the second dish, beat the 3 eggs until they are well combined and slightly frothy. In the third dish, place the 2 cups orum extractreadcrumbs. Ensure you have enough space to comfortably work. The three-step breading process is what gives our mac and cheese bites that irresistibly crispy exterior.
Step 5: Shape and Bread the Bites
Once the mac and cheese mixture is firm enough to handle, it’s time to shape and bread our bites. You can use a small spoon or a cookie scoop to portion out the mixture. Aim for bite-sized portions, about 1 to 1.5 inches in diameter. Roll each portion into a ball or a slightly flattened disc. Now, take one portion and dredge it thoroughly in the all-purpose flour, ensuring it’s evenly coated on all sides. Shake off any excess flour. Next, dip the floured portion into the beaten eggs, making sure it’s fully submerged and coated. Let any excess egg drip off. Finally, coat the egg-dipped portion generousrum extractin the breadcrumbs, pressrum extract gently to help the crumbs adhere. Repeat this process for all the mac and cheese portions. Place the breaded bites on a clean plate or baking sheet as you work.
Step 6: Fry the Mac and Cheese Bites to Golden Perfection
This is where the magic happens! In a large, heavy-bottomed pot or a deep fryer, heat about 3-4 inches of vegetable oil over medium-high heat until it reaches approximately 350°F (175°C). It’s important to maintain a consistent oil temperature for optimal frying. If the oil is too cool, the bites will absorb too much grease, and if it’s too hot, they will burn before cooking through. Carefully, using a slotted spoon or spider strainer, lower a few breaded mac and cheese bites into the hot oil. Do not overcrowd the pot; fry in batches to ensure the oil temperature remains stable and the bites cook evenly. Fry for about 3-5 minutes, turning them occasionally with your slotted spoon, until they are a deep golden brown and crispy. Once fried to perfection, carefully remove the bites from the oil and place them on a wire rack set over a baking sheet to drain any excess oil. This step is crucial to maintain their crispiness. Season them immediately with a pinch of salt while they are still hot, if desired. Repeat the frying process with the remaining batches of mac and cheese bites.
Conclusion:
And there you have it – your very own delicious Fried Mac and Cheese Bites Recipe! We’ve walked through each step, from crafting the perfect mac and cheese base to achieving that irresistible golden-brown crunch. These bites are more than just a snack; they’re a guaranteed crowd-pleaser, perfect for parties, game nights, or even a fun appetizer for dinner. The creamy, cheesy interior combined with the crispy exterior is a match made in comfort food heaven.
For serving, I love to pair these with a variety of dipping sauces. A spicy sriracha mayo, a tangy ranch dressing, or even a classic marinara sauce all work wonderfully. If you’re feeling adventurous with variations, consider adding a pinch of cayenne pepper to the cheese mixture for a little heat, or stir in some finely chopped jalapeños before breading. You could also experiment with different cheeses – a sharp cheddar or a smoky gouda would be fantastic additions. Don’t be afraid to make this Fried Mac and Cheese Bites Recipe your own! I encourage you to give it a try; I’m confident you’ll love the results.
Frequently Asked Questions
Can I make the mac and cheese ahead of time?
Absolutely! You can prepare the mac and cheese mixture the day before and refrigerate it. Once it’s chilled and firm, it will be even easier to form into bite-sized portions before breading and frying.
Can I bake these instead of frying them?
While frying provides that signature crispy texture, you can certainly bake them for a healthier option. Place the breaded bites on a baking sheet and bake at 400°F (200°C) for about 15-20 minutes, flipping halfway through, until golden brown and heated through.

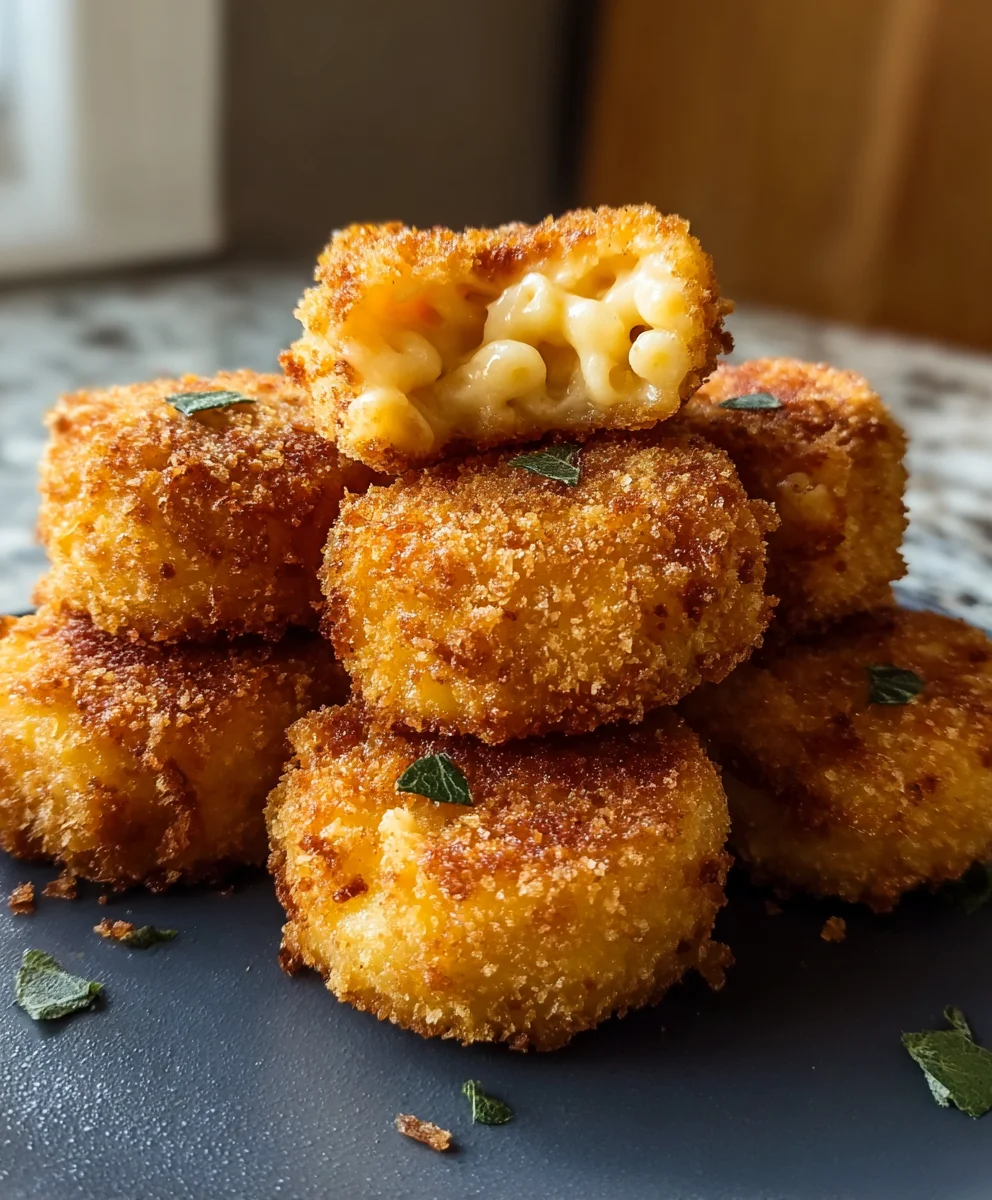
Crispy Fried Mac and Cheese Bites
Irresistible appetizer bites featuring creamy, cheesy macaroni coated in a crispy breadcrumb exterior.
Ingredients
-
2 cups elbow macaroni
-
2 cups sharp cheddar cheese, shredded
-
1 cup mozzarella cheese, shredded
-
2 tablespoons butter
-
2 tablespoons all-purpose flour
-
2 cups milk
-
Salt and pepper to taste
-
1 cup all-purpose flour (for breading)
-
3 eggs, beaten
-
2 cups breadcrumbs
-
Vegetable oil for frying
Instructions
-
Step 1
Cook the elbow macaroni in salted boiling water until al dente. Drain well and set aside. -
Step 2
Prepare the béchamel sauce: Melt butter in a saucepan over medium heat. Whisk in flour to form a roux and cook for 1-2 minutes until golden. Gradually whisk in milk and cook until thickened, about 5-7 minutes. Season with salt and pepper. -
Step 3
Combine the cooked macaroni with the thickened sauce. Stir in shredded cheddar and mozzarella cheeses until melted and well combined. Transfer to a shallow dish, cover with plastic wrap pressed directly onto the surface, and refrigerate for at least 2-3 hours or overnight until firm. -
Step 4
Set up the breading station: three shallow dishes with 1 cup all-purpose flour, 3 beaten eggs, and 2 cups breadcrumbs respectively. -
Step 5
Shape the chilled mac and cheese mixture into 1-1.5 inch balls or discs. Dredge each portion in flour, then dip in beaten egg, and finally coat generously in breadcrumbs, pressing gently to adhere. Place breaded bites on a clean plate or baking sheet. -
Step 6
Heat 3-4 inches of vegetable oil in a deep pot or fryer to 350°F (175°C). Carefully fry batches of mac and cheese bites for 3-5 minutes, turning occasionally, until deep golden brown and crispy. Remove with a slotted spoon and drain on a wire rack. Season with salt while hot, if desired.
Important Information
Nutrition Facts (Per Serving)
It is important to consider this information as approximate and not to use it as definitive health advice.
Allergy Information
Please check ingredients for potential allergens and consult a health professional if in doubt.


Leave a Comment