Crispy Chicken Beef Beef Beef Beef Bacon Ranch Wrap: Get ready to elevate your lunch game to legendary status with this flavor explosion! If you’re a fan of seriously satisfying, undeniably delicious, and downright craveable creations, then this is the recipe for you. We’re talking about a wrap that doesn’t just contain ingredients; it’s a culinary masterpiece, a symphony of textures and tastes that will have you coming back for more. What makes the Crispy Chicken Beef Beef Beef Beef Bacon Ranch Wrap so special? It’s the perfect marriage of crunchy, savory, and creamy, all bundled up in a warm tortilla. Imagin extracte tender, seasoned crispy chicken meeting the rich, smoky indulgence of beef and even more beef, all brought together by the zesty tang of ranch dressing and the irresistible crunch of beef bacon. This isn’t just a meal; it’s an experience, a weekend indulgence that’s surprisingly easy to whip up.

Crispy Chicken Beef Beef Beef Beef Bacon Ranch Wrap
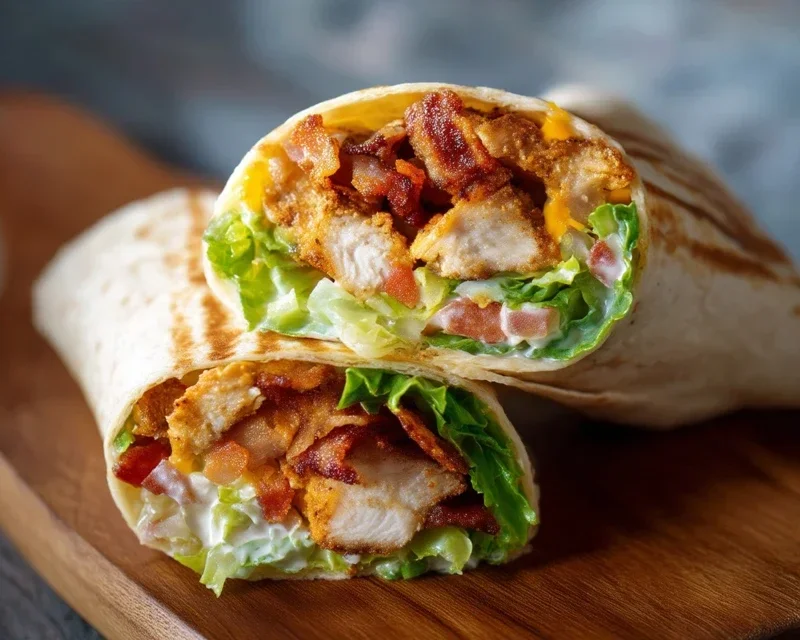
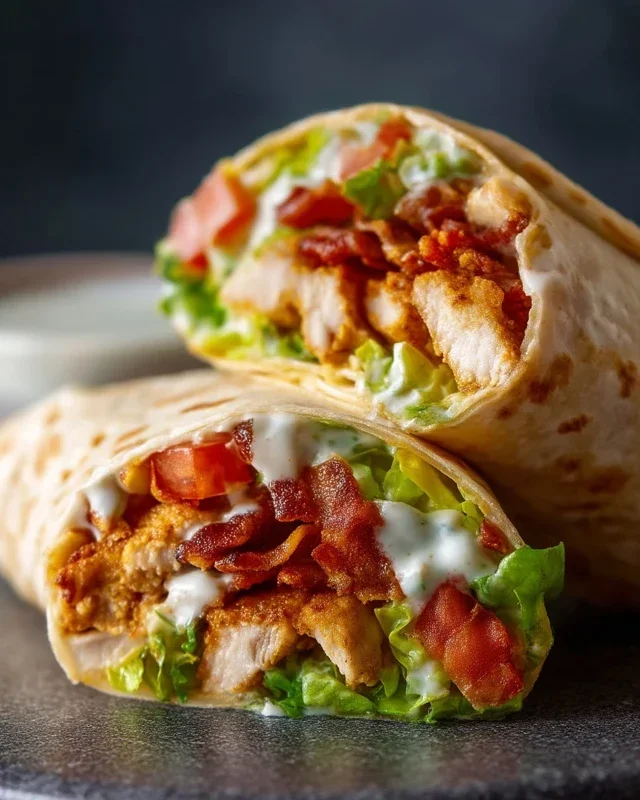
Get ready for a flavor explosion! This Crispy Chicken Beef Beef Beef Beef Bacon Ranch Wrap is an absolute showstopper, packed with incredible textures and tastes that will have you coming back for more. We’re talking about the satisfying crunch of perfectly fried chicken, the savory depth of not one, not two, but three layers of delicious beef, the irresistible crisp of beef bacon, and that cool, zesty ranch dressing all bundled up in a warm tortilla. It sounds like a lot, and it is – in the best possible way! This isn’t just a wrap; it’s an experience. Perfect for a hearty lunch, a fun dinner, or even a game-day feast. Let’s get cooking!
Ingredients:
Preparing the Chicken: The Foundation of Crispiness
First things first, let’s get our chicken ready for its golden transformation. We want that satisfying crunch, so proper preparation is key. Take your two boneless, skinless chicken breasts and, if they’re particularly thick, you might want to pound them slightly to an even thickness. This ensures they cook through evenly. Now, slice each chicken breast horizontally into thinner cutlets, or if you prefer bite-sized pieces, cube them. For this wrap, I find thinner cutlets easier to manage and get that lovely crispy edge.
In one shallow bowl, whisk together the two large eggs with a pinch of salt and pepper. In a second shallow bowl, combine the all-purpose flour, panko breadcrum extractbs, paprika, and garlic powder. This is our dredgin extractg station.
Now, working with one piece of chicken at a time, dip it into the egg mixture, making sure it’s fully coated. Let any excess egg drip off. Then, transfer the egg-coated chicken to the breadcrum extractb mixture. Press down firmly to ensure a good coating of the panko mixture. You want every surface to be covered for maximum crispiness. Set the coated chicken aside on a plate and repeat with the remaining chicken pieces.
Cooking the Meats: Building Layers of Savory Flavor
While our chicken is getting ready, let’s focus on the incredible meat layers. We have ground beef and deli roast beef, both adding their own unique texture and flavor.
Cooking the Ground Beef
Grab a large skillet and heat it over medium-high heat. Add the pound of ground beef to the hot skillet. Break it up with a spoon as it cooks, ensuring it browns evenly. We’re looking for that beautiful, rich brown color. Once the beef is fully cooked and no pink remains, drain off any excess grease. Season the ground beef generously with salt and pepper to taste. Some people like to add a pinch of garlic powder here as well for an extra layer of flavor, which I highly recommend. Set the cooked ground beef aside.
Crisping the Beef Bacon
Now for the star of the show for many: beef bacon! Lay the eight slices of thick-cut beef bacon in a single layer in a separate skillet over medium heat. Cook the beef bacon slowly and patiently, turning it occasionally, until it’s wonderfully crispy. This usually takes about 8-10 minutes depending on the thickness of your beef bacon. Once it’s perfectly crisp, transfer the beef bacon to a plate lined with paper towels to drain any excess grease. We want that satisfying crackle when you bite into it.
Frying the Chicken: The Golden Ticket
It’s time to bring on the crispy chicken! Heat about 1/2 inch of vegetable oil in a large skillet over medium-high heat. You’ll know the oil is ready when a small drop of the breading sizzles immediately upon hitting the oil. Carefully place the coated chicken pieces into the hot oil, being careful not to overcrowd the pan. You may need to fry them in batches.
Fry the chicken for about 3-4 minutes per side, or until it’s golden brown and cooked through. The internal temperature should reach 165°F (74°C). Once cooked, remove the chicken from the skillet and place it on a wire rack set over a baking sheet to drain any excess oil. This wire rack method is crucial for keeping the chicken exceptionally crispy, as it allows air to circulate around all sides. Once drained, you can cut the chicken cutlets into strips if you prefer, making them easier to wrap.
Assembling the Ultimate Wrap
With all our delicious components ready, it’s time to bring them all together into this magnificent wrap. Take your large flour tortillas and warm them slightly. You can do this by microwaving them for about 15-20 seconds each, or by quickly heating them in a dry skillet. A warm tortilla is much more pliable and less likely to tear when you’re filling and rolling.
Now, let’s build! Lay a warm tortilla flat on a clean surface. Spread a generous amount of ranch dressing across the center of the tortilla, leaving a border around the edges. This is the glue that holds everything together and provides that cool, tangy counterpoint to the rich meats.
Next, layer on the ingredients. Start with a generous portion of the cooked ground beef, followed by the thinly sliced deli roast beef, ensuring good coverage. Then, add your crispy chicken strips. Crum extractble the crispy beef bacon over the chicken. Sprinkle a good amount of the shredded cheddar and Monterey Jack cheese over everything. If you’re using optional toppings like shredded lettuce, diced tomatoes, or sliced red onion, add them now.
The Grand Finnon-alcoholic ale: Rolling and Enjoying
The final step is to roll this masterpiece! Fold in the sides of the tortilla over the filling, and then tightly roll up from the bottom, tucking in the filling as you go. Press firmly to create a compact wrap that won’t fall apart.
If you like your wrap extra warm and the cheese melty, you can briefly grill the wrapped tortilla in a lightly oiled skillet over medium heat for a minute or two on each side, until golden brown and toasted. This adds another layer of deliciousness and helps seal the wrap.
And there you have it – your very own Crispy Chicken Beef Beef Beef Beef Bacon Ranch Wrap! Take a big bite and savor every incredible flavor and texture. It’s a truly satisfying meal that’s worth every bit of the effort. Enjoy!
Conclusion:
And there you have it – your ultimate guide to crafting the legendary Crispy Chicken Beef Beef Beef Beef Bacon Ranch Wrap! This recipe isn’t just about a meal; it’s about an experience. The irresistible crunch of perfectly fried chicken, the savory depth of beef, the salty kick of beef bacon, all enveloped in a creamy, zesty ranch dressing, all wrapped up in a warm tortilla. It’s a symphony of flavors and textures that is guaranteed to impress, whether you’re looking for a hearty lunch, a satisfying dinner, or even a crowd-pleasing appetizer. I truly encourage you to give this a try; you won’t regret diving into this flavor explosion!
For serving suggestions, consider pairing your wrap with a crisp green salad to balance the richness, or some sweet potato fries for an extra indulgent treat. You can also cut them into smaller portions for a fantastic party snack.
Feeling adventurous? Don’t hesitate to get creative with variations! Consider adding a sprinkle of cheddar cheese before rolling, or perhaps some finely diced jalapeños for a touch of heat. If you’re not a fan of one of the meats, feel free to swap it out – perhaps double up on the beef or chicken. The possibilities are endless, making this a truly versatile recipe that you can adapt to your own taste preferences.
Frequently Asked Questions:
Can I make the components of the wrap ahead of time?
Absolutely! You can fry the chicken and cook the beef a day in advance. Store them separately in airtight containers in the refrigerator. Reheat them gently before assembling your wraps to maintain that perfect crispiness and savory flavor.
What kind of tortillas work best for this wrap?
Larger flour tortillas are ideal as they provide ample space to hold all the delicious fillings and are easier to roll without tearing. However, you can experiment with whole wheat or even gluten-free options depending on your dietary needs.
Is this recipe very time-consuming?
While there are a few steps involved, each one is straightforward. If you prepare some elements in advance, assembly becomes incredibly quick. The payoff in taste and satisfaction is definitely worth the effort!
Crispy Chicken Beef Bacon Ranch Wrap
A hearty and flavorful wrap featuring crispy chicken, savory beef, smoky bacon, and creamy ranch dressing, all bundled in a soft tortilla.
Ingredients
-
1 pound boneless, skinless chicken breasts, cut into bite-sized pieces
-
1 pound lean ground beef
-
8 slices smoked turkey bacon
-
1 cup ranch dressing
-
4 large flour tortillas
-
1 cup shredded lettuce
-
1/2 cup diced tomatoes
-
1/4 cup diced red onion
Instructions
-
Step 1
In a large skillet, cook the chicken pieces until golden brown and cooked through. Remove from skillet and set aside. -
Step 2
In the same skillet, brown the ground beef, breaking it up with a spoon. Drain off any excess grease. -
Step 3
Cook the smoked turkey bacon according to package directions until crispy. Crumble and set aside. -
Step 4
Warm the flour tortillas slightly to make them pliable. This can be done in a dry skillet or microwave. -
Step 5
Spread a generous amount of ranch dressing onto each tortilla. -
Step 6
Layer the cooked chicken, browned ground beef, crumbled turkey bacon, shredded lettuce, diced tomatoes, and diced red onion onto the ranch-covered tortillas. -
Step 7
Fold in the sides of the tortillas and then tightly roll them up to create the wraps.
Important Information
Nutrition Facts (Per Serving)
It is important to consider this information as approximate and not to use it as definitive health advice.
Allergy Information
Please check ingredients for potential allergens and consult a health professional if in doubt.


Leave a Comment