Cheesy Dynamite Chicken Buns are about to explode onto your taste buds in the most delicious way imagin extractable! If you’re searching for a dish that’s both outrageously flavorful and incredibly satisfying, you’ve found it. We all crave those comfort food classics that bring a smile to our faces, and these Cheesy Dynamite Chicken Buns deliver in spades. What makes them so incredibly popular? It’s the perfect harmony of tender, shredded chicken bathed in a creamy, spicy dynamite sauce, all tucked inside a soft, pillowy bun. Each bite is a delightful explosion of cheesy goodness, a hint of heat, and that unmistakable savory chicken flavor. It’s the ultimate snack, appetizer, or even a fun weeknight meal that’s guaranteed to disappear fast!

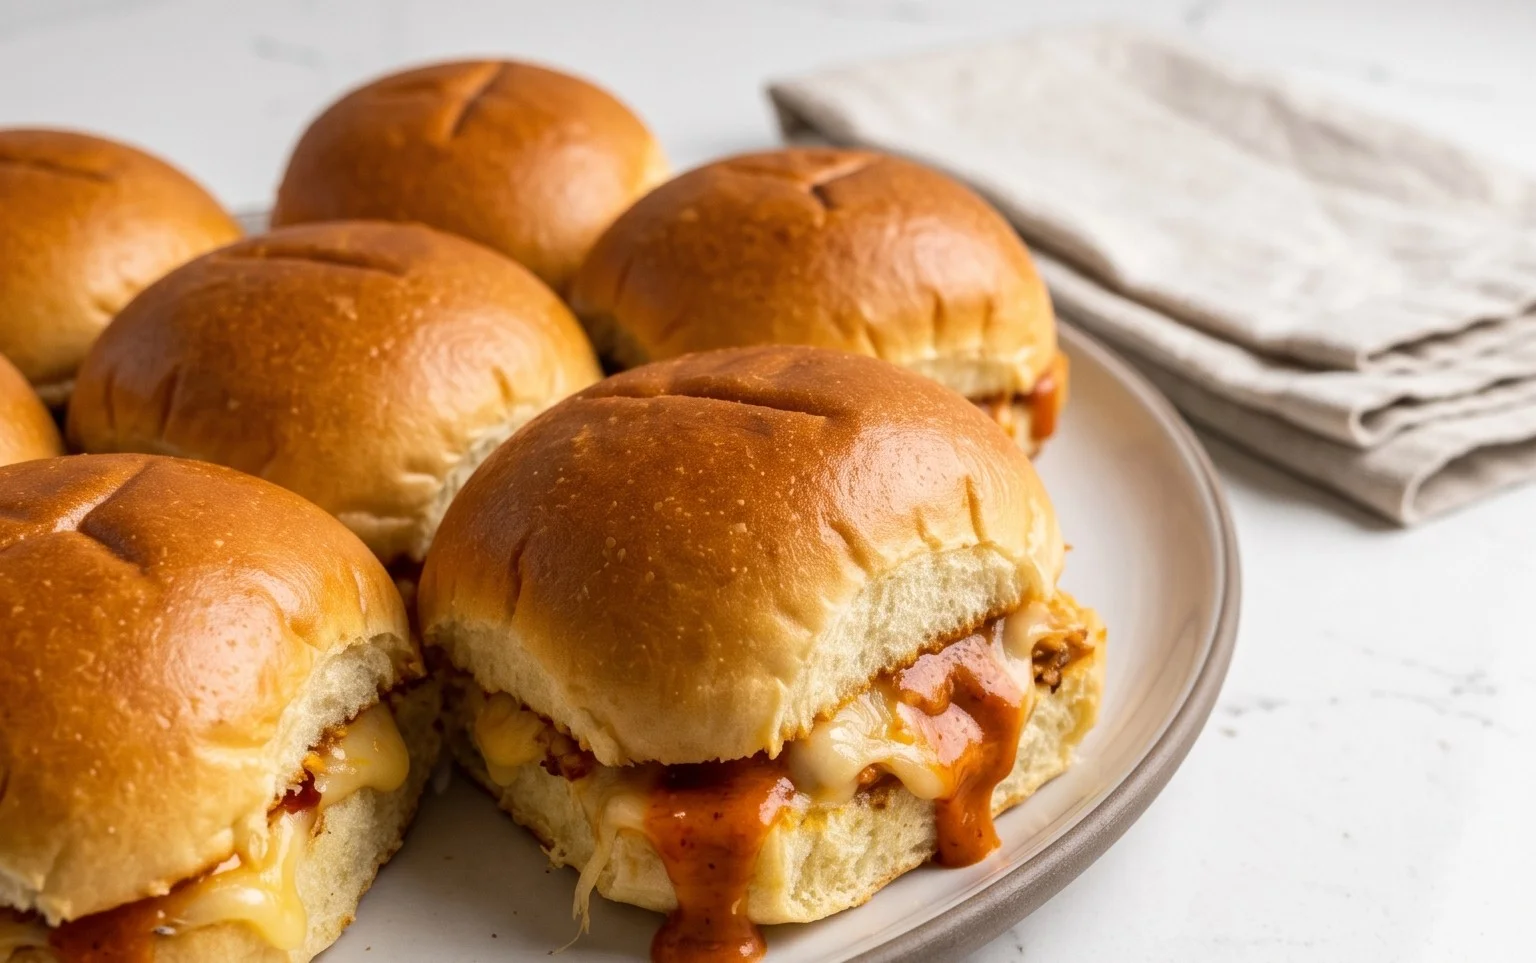
Cheesy Dynamite Chicken Buns
Get ready to experience a flavor explosion with these Cheesy Dynamite Chicken Buns! These aren’t your average savory pastries; they’re a delightful blend of tender, seasoned chicken, a kick of spice, and a gooey, cheesy embrace, all nestled within a perfectly soft and fluffy bun. They’re ideal for a satisfying lunch, a fun appetizer, or even a unique dinner option. The “dynamite” comes from a subtle but addictive heat that builds with each bite, balanced beautifully by the richness of the cheese and the sweetness of the honey in the dough. Let’s get baking!
Ingredients:
Preparing the Dough
The foundation of any great bun is a good dough, and this recipe is no exception. We’re aiming for a soft, slightly enriched dough that will give us a wonderfully tender result.
1. In a medium-sized bowl, combine the lukewarm water, lukewarm milk, honey, and instant yeast. Give it a gentle stir. The warmth of the liquids is crucial for activating the yeast, but make sure it’s not too hot, or you’ll kill it. Let this mixture sit for about 5-10 minutes. You should see it become frothy and bubbly, which is a sign that your yeast is alive and ready to work its magic. This is called “blooming” the yeast, and it’s a vital step for a light and airy bun.
2. In a large mixing bowl, combine the flour and the 8 g of salt. Create a well in the center of the dry ingredients. Add the bloomed yeast mixture, the room temperature egg, and the sunflower oil to the well. The room temperature egg will incorporate more smoothly into the dough. Now, begin extract mixing everything together. You can start with a wooden spoon or a spatula, and once it starts coming together, you can transition to using your hands. Mix until a shaggy dough forms.
3. Turn the dough out onto a lightly floured surface. Knead the dough for about 8-10 minutes. This is where we develop the gluten, which gives the bread its structure. You’ll know the dough is ready when it’s smooth, elastic, and springs back when gently poked. It should be slightly tacky but shouldn’t stick excessively to your hands. If it’s too sticky, add a tiny bit more flour, a teaspoon at a time. If it feels too dry, add a splash of milk or water. Once kneaded, place the dough back into the lightly oiled mixing bowl, cover it with a damp cloth or plastic wrap, and let it rise in a warm place for about 1 to 1.5 hours, or until it has doubled in size. This “first rise” is essential for developing flavor and texture.
Preparing the Dynamite Chicken Filling
While our dough is happily rising, let’s get our flavor-packed chicken filling ready. This filling is where the “dynamite” comes in!
4. Prepare the chicken: Cut the chicken filet into small, bite-sized pieces. In a bowl, toss the chicken pieces with 5 g of salt, the cayenne powder, onion powder, and black pepper powder. Ensure each piece is evenly coated. This seasoning blend will provide that signature spicy kick. For an extra burst of flavor, you can let the seasoned chicken sit for about 10-15 minutes.
5. Cook the chicken: Heat a tablespoon of sunflower oil in a skillet over medium-high heat. Add the seasoned chicken pieces and cook until they are browned and cooked through. This should take about 5-7 minutes. Avoid overcrowding the pan; cook in batches if necessary to ensure the chicken sears properly rather than steaming. Once cooked, remove the chicken from the skillet and set it aside to cool slightly.
Assembling and Baking the Buns
Now for the exciting part – bringin extractg it all together!
6. Once the dough has doubled in size, punch it down gently to release the air. Turn the dough out onto a lightly floured surface again. Divide the dough into equal portions. The number of portions will depend on how large you want your buns; for medium-sized buns, aim for about 10-12 portions. Roll each portion into a smooth ball.
7. Flatten each dough ball slightly and spoon a generous amount of the cooked chicken filling into the center. Now, here’s where the cheese comes in. Sprinkle a good amount of the grated Parmesan cheese over the chicken. Carefully bring the edges of the dough up and pinch them together to seal the filling inside. Make sure the seal is tight to prevent the filling from leaking out during baking. Roll the senon-alcoholic aled bun back into a smooth ball, seam-side down. Place the assembled buns on a baking sheet lined with parchment paper, leaving some space between each bun as they will expand.
8. For that extra touch of richness and a beautiful golden crust, prepare an egg wash by whisking the remaining half of the egg (if you have one, otherwise just use a whole egg and adjust the dough slightly if needed by reducing milk by 1 tbsp). Brush the tops of the buns with the egg wash. If you like, you can sprinkle a little extra Parmesan cheese on top for an even cheesier finish. Let the buns rest for another 15-20 minutes, covered, for a final short proof.
9. Preheat your oven to 190°C (375°F). Bake the Cheesy Dynamite Chicken Buns for 15-20 minutes, or until they are golden brown and sound hollow when tapped on the bottom. The aroma that will fill your kitchen is absolutely divine!
10. Once baked, let the buns cool on a wire rack for a few minutes before serving. They are best enjoyed warm, when the cheese is melty and the chicken is still juicy. These Cheesy Dynamite Chicken Buns are a truly delightful treat that will have everyone asking for the recipe. Enjoy the explosion of flavors!

Conclusion:
I hope you’re as excited as I am to try these Cheesy Dynamite Chicken Buns! They truly are a winner, offering a perfect balance of tender, spicy chicken tucked inside soft, fluffy buns, all enveloped in a gloriously gooey cheese pull. This recipe is fantastic because it’s both incredibly satisfying and surprisingly easy to make, perfect for a weeknight treat or an impressive appetizer for guests. The “dynamite” element comes from a flavorful kick that’s adaptable to your spice preference, making it a crowd-pleaser for most palates.
For serving suggestions, these buns are delightful on their own, but they also pair wonderfully with a fresh green salad, some crispy potato wedges, or even a cooling ranch dip. Don’t be afraid to get creative with variations! You could swap out the chicken for shredded beef or even a plant-based alternative for a vegetarian option. Experiment with different cheese blends to find your favorite, or add a sprinkle of chopped chives or parsley for extra color and freshness. I truly encourage you to give these Cheesy Dynamite Chicken Buns a go – you won’t regret the deliciousness!
Frequently Asked Questions:
Can I make the spicy sauce less intense?
Absolutely! If you’re sensitive to spice, you can significantly reduce the amount of sriracha or chili sauce used. You can also omit it entirely and rely on other seasonings like paprika or a pinch of cayenne for a mild warmth. Taste and adjust as you go to find your perfect level of “dynamite”!
What kind of buns work best?
While I love using soft brioche buns for their slightly sweet, rich flavor, any soft dinner roll or slider bun will work beautifully. The key is a bun that’s tender enough to complement the filling without being too dense. Just ensure they are sturdy enough to hold the delicious cheesy filling.
Cheesy Dynamite Chicken Buns
Spicy and cheesy chicken-filled buns, perfect for a flavorful snack or appetizer.
Ingredients
-
75 ml water
-
200 ml milk
-
15 g honey
-
9 g instant yeast
-
1 egg
-
30 ml sunflower oil
-
600 g flour
-
8 g salt
-
25 g butter
-
40 g Parmesan cheese
-
2 g cayenne powder
-
1.5 g onion powder
-
1 g black pepper powder
-
700 g chicken filet
-
5 g salt
Instructions
-
Step 1
Activate yeast: In a small bowl, combine warm water (about 40°C/105°F), honey, and instant yeast. Let sit for 5-10 minutes until foamy. -
Step 2
Prepare dough: In a large bowl, whisk together flour and salt. Add the activated yeast mixture, milk, egg, and sunflower oil. Mix until a shaggy dough forms, then knead on a floured surface for 8-10 minutes until smooth and elastic. -
Step 3
First proof: Place the dough in a greased bowl, cover, and let rise in a warm place for 1-1.5 hours, or until doubled in size. -
Step 4
Prepare filling: While the dough proofs, finely dice the chicken filet and season with 5 g salt, cayenne powder, onion powder, and black pepper powder. Melt butter in a skillet over medium heat and cook chicken until browned and cooked through. Stir in Parmesan cheese and let cool. -
Step 5
Assemble buns: Punch down the risen dough and divide into equal portions. Flatten each portion, fill with the cooled chicken mixture, and shape into buns. Place on a baking sheet lined with parchment paper. -
Step 6
Second proof: Cover the shaped buns and let them rest for another 20-30 minutes. -
Step 7
Bake: Preheat oven to 190°C (375°F). Bake the buns for 15-20 minutes, or until golden brown.
Important Information
Nutrition Facts (Per Serving)
It is important to consider this information as approximate and not to use it as definitive health advice.
Allergy Information
Please check ingredients for potential allergens and consult a health professional if in doubt.
Leave a Comment