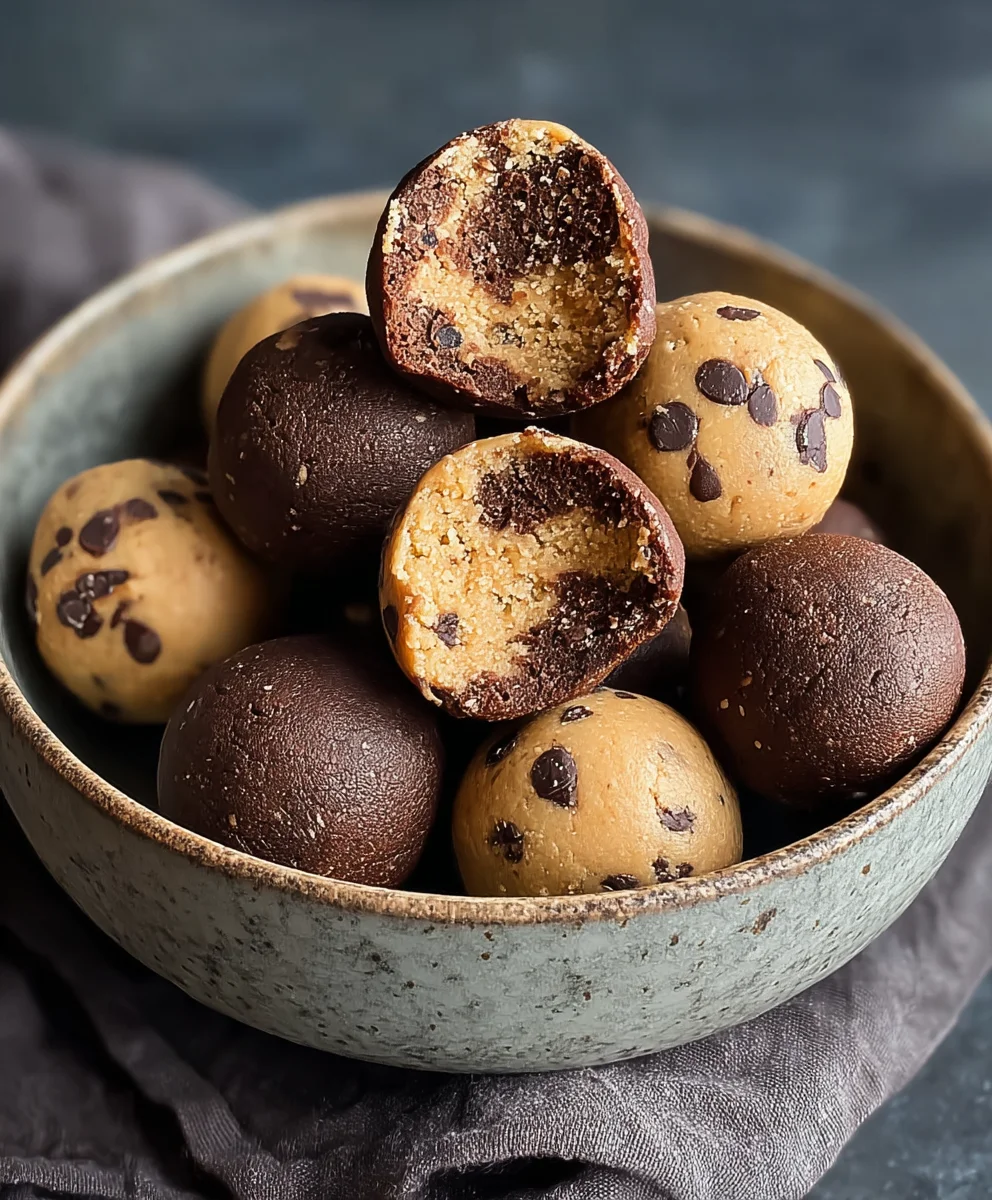
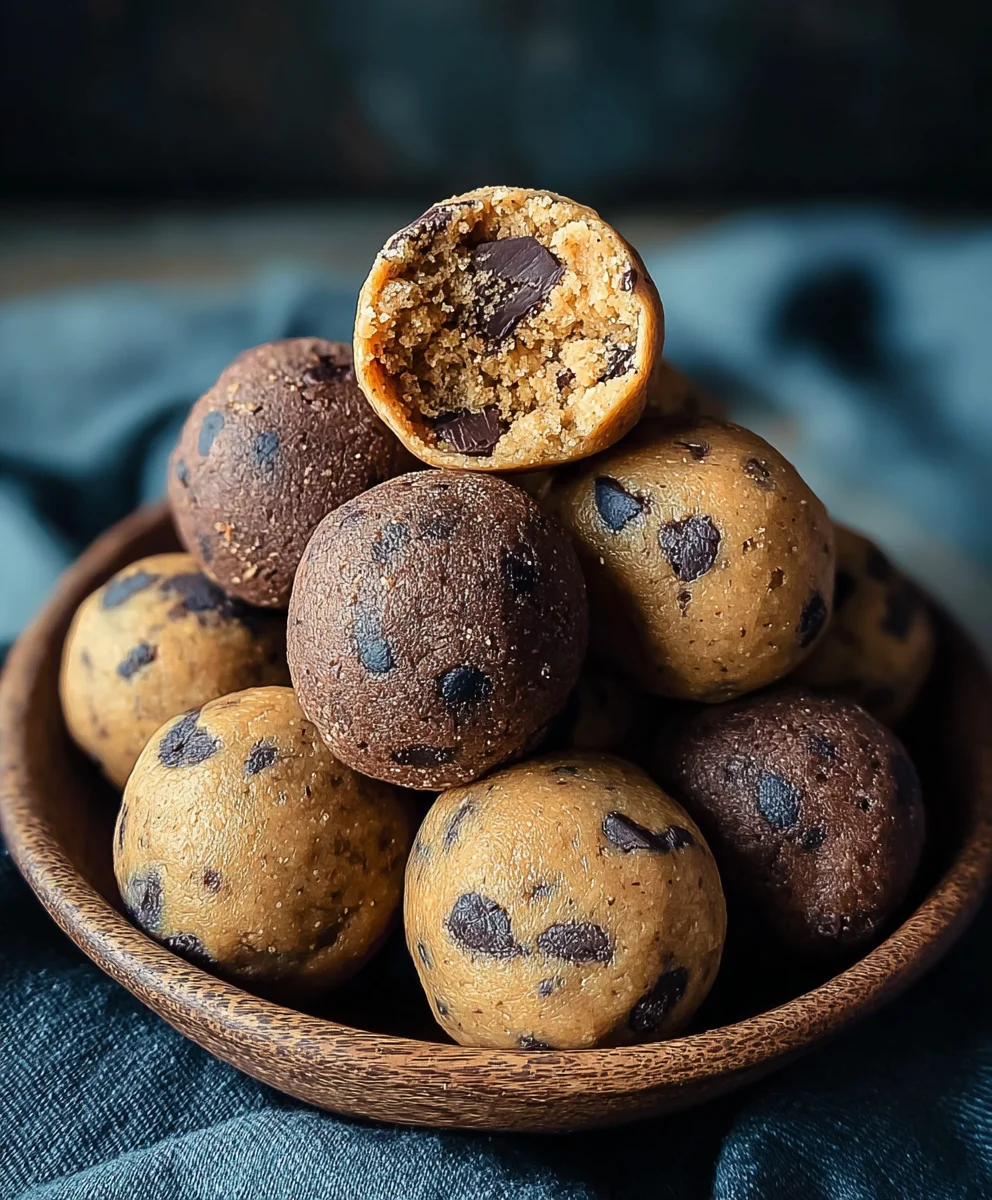
Brookie Protein Balls are about to become your new favorite energy boost and guilt-free indulgence! If you’ve ever found yourself torn between the decadent allure of a chewy brownie and the comforting sweetness of a classic chocolate chip cookie, then this recipe is your ultimate solution. These delightful spheres capture the best of both worlds, offering a rich, fudgy interior swirled with buttery cookie dough goodness, all packed into a perfectly portable, bite-sized treat. What truly sets these Brookie Protein Balls apart is their incredible versatility; they’re not just a delicious snack, but a fantastic way to fuel your workouts, beat the afternoon slump, or satisfy a sweet craving without derailing your healthy eating goals. The genius lies in their ability to deliver that satisfying, layered flavor profile of a brookie, combined with the convenient, nutrient-dense punch of protein. Prepare to fall in love with this ingenious creation that proves healthy can indeed be utterly delicious.

Ingredients:
- 1 cup drippy cashew butter
- 1/2 cup vanilla pea protein
- 1/4 cup maple syrup
- 2 tablespoons milk of choice (almond, oat, or dairy all work well)
- 1 teaspoon vanilla extract
- 1/4 cup chocolate chips (mini chocolate chips are great for even distribution)
- 3 tablespoons cacao powder
Preparing Your Brookie Protein Balls
Step 1: Combining the Wet Ingredients and Cashew Butter
Let’s get started by creating a rich and creamy base for our Brookie Protein Balls. In a medium-sized mixing bowl, add the 1 cup of drippy cashew butter. Ensure your cashew butter is “drippy” as this consistency will make it much easier to incorporate the other ingredients and achieve a smooth dough. If your cashew butter is on the firmer side, you can gently warm it in the microwave for about 15-20 seconds, or stir in an extra teaspoon of milk of choice until it loosens up. Next, pour in the 1/4 cup of maple syrup. The maple syrup not only adds a touch of sweetness but also acts as a binder. Follow this with the 2 tablespoons of your chosen milk of choice. I find almond milk or oat milk work beautifully, providing a neutral flavor that doesn’t overpower the cashew and chocolate notes. Finally, add the 1 teaspoon of vanilla extract. This will enhance the overall flavor profile, giving our protein balls a lovely depth. Now, using a sturdy spoon or a spatula, begin extract to mix these ingredients together thoroughly. You’re aiming for a well-combined, smooth, and homogenous mixture. Scrape down the sides of the bowl as needed to ensure all the cashew butter, maple syrup, milk, and vanilla are fully incorporated. This initial step is crucial for the texture of your final Brookie Protein Balls.
Step 2: Incorporating the Dry Ingredients for Structure
Once your wet ingredients and cashew butter are perfectly blended, it’s time to introduce the dry elements that will give our Brookie Protein Balls their structure and protein boost. To the bowl, add the 1/2 cup of vanilla pea protein. Pea protein is an excellent choice for this recipe as it’s plant-based and has a mild, pleasant flavor that complements the other ingredients. Next, add the 3 tablespoons of cacao powder. Cacao powder will impart that rich, chocolatey flavor that’s essential for any “brookie” (brownie-cookie) inspired treat. Make sure you’re using pure cacao powder, not a sweetened hot chocolate mix, to control the sweetness of your balls. Now, using your spoon or spatula, gently fold these dry ingredients into the wet mixture. It’s important not to overmix at this stage, but rather to combine them until just incorporated. You’ll notice the mixture starting to thicken and become more dough-like. If the dough feels a little too sticky to handle, you can add a tiny bit more pea protein, about a teaspoon at a time, until it reaches a workable consistency. The goal is a dough that holds together when squeezed but isn’t dry or crum extractbly.
Step 3: Adding the Chocolatey Goodness
We’re almost there! The final ingredient to incorporate before shaping our Brookie Protein Balls is the star of the show for many – the chocolate chips. Add the 1/4 cup of chocolate chips to the dough. I highly recommend using mini chocolate chips if you have them, as they distribute more evenly throughout the balls and provide delightful little bursts of chocolate in every bite. If you only have regular-sized chocolate chips, that’s perfectly fine too; you can even chop them up slightly before adding them to ensure a better distribution. Now, using your hands, gently knead the chocolate chips into the dough. It’s best to use your hands for this step as it allows you to feel the dough and ensure the chocolate chips are distributed as evenly as possible without crushing them. Be careful not to overwork the dough at this point, as too much handling can make the protein balls tough. You just want to ensure that every portion of the dough contains a good amount of chocolate chips.
Step 4: Shaping the Brookie Protein Balls
Now that our delicious dough is ready, it’s time to roll these goodies into bite-sized spheres. Take a small amount of dough, about a tablespoon’s worth, into the palm of your hand. Roll it between your palms to form a compact ball. If the dough is sticking to your hands, you can lightly dampen your hands with a little water or a tiny bit of coconut oil, or even dust them very lightly with a bit of extra pea protein or cacao powder. The size of the balls is up to your preference; smaller balls are great for portion control, while slightly larger ones are more satisfying. Aim for consistency in size so they all bake (or chill) evenly. As you shape each ball, place it on a plate or a parchment-lined baking sheet. Continue this process until all the dough has been used. You should end up with a batch of beautifully formed Brookie Protein Balls, each studded with delicious chocolate chips.
Step 5: Chilling and Enjoying Your Creation
To firm up your Brookie Protein Balls and allow the flavors to meld beautifully, we need to give them a little chill time. Place the plate or baking sheet with the shaped protein balls into the refrigerator. Allow them to chill for at least 30 minutes. This chilling period is essential; it helps them hold their shape better and develops a firmer, more pleasant texture. Once they are sufficiently chilled, your Brookie Protein Balls are ready to be enjoyed! You can store them in an airtight container in the refrigerator for up to a week. They make for a fantastic pre- or post-workout snack, a healthier dessert option, or simply a satisfying treat to curb your cravings. The combination of creamy cashew butter, rich cacao, sweet maple, and bursts of chocolate makes these Brookie Protein Balls a delightful and guilt-free indulgence.
Conclusion:
And there you have it! Your very own batch of delicious and guilt-free Brookie Protein Balls. This recipe offers a fantastic way to satisfy those sweet cravings while fueling your body with essential protein. The chewy, chocolatey brownie base perfectly complements the crunchy cookie dough bits, creating a delightful flavor and texture sensation in every bite. They are incredibly versatile and make for a perfect post-workout treat, a healthy afternoon snack, or even a mini dessert. Feel free to get creative with your own twists and enjoy sharing these homemade goodies with friends and family. Don’t be afraid to experiment and make them your own! I truly hope you enjoy making and, more importantly, eating these amazing Brookie Protein Balls as much as I do.
Frequently Asked Questions about Brookie Protein Balls:
Q1: How long do Brookie Protein Balls last?
Stored in an airtight container in the refrigerator, these Brookie Protein Balls should stay fresh for up to 7 days. You can also freeze them for longer storage, up to 2 months. Simply thaw them at room temperature before enjoying.
Q2: Can I make Brookie Protein Balls without protein powder?
While the protein powder is key to their “protein ball” identity and nutritional boost, you can substitute it with more oats or another binder like almond flour if you’re looking for a less protein-focused treat. The texture and flavor might change slightly, but it will still be delicious!
Q3: What are some other fun variations for Brookie Protein Balls?
The possibilities are endless! You could add in chopped nuts like walnuts or pecans for extra crunch, a sprinkle of sea salt to enhance the chocolate flavor, or even some shredded coconut for a tropical twist. Mini chocolate chips or white chocolate chips are also a wonderful addition.
Brookie Protein Balls
Healthy no-bake snack that combines the deliciousness of brownies and cookies with a protein boost. Perfect for a quick energy fix.
Ingredients
-
1 cup drippy cashew butter
-
1/2 cup vanilla pea protein
-
1/4 cup maple syrup
-
2 tablespoons milk of choice
-
1 teaspoon vanilla extract
-
1/4 cup chocolate chips
-
3 tablespoons cacao powder
Instructions
-
Step 1
In a medium-sized mixing bowl, combine the drippy cashew butter, maple syrup, milk of choice, and vanilla extract. Mix thoroughly until smooth and homogenous. -
Step 2
Add the vanilla pea protein and cacao powder to the wet ingredients. Gently fold them in until just incorporated and the mixture forms a dough-like consistency. If too sticky, add a teaspoon more pea protein. -
Step 3
Gently knead the chocolate chips into the dough with your hands, ensuring even distribution without crushing the chips. -
Step 4
Roll tablespoon-sized portions of the dough between your palms to form compact balls. If sticking, lightly dampen hands or dust with pea protein/cacao powder. -
Step 5
Place the shaped balls on a plate or parchment-lined baking sheet. Chill in the refrigerator for at least 30 minutes to firm up.
Important Information
Nutrition Facts (Per Serving)
It is important to consider this information as approximate and not to use it as definitive health advice.
Allergy Information
Please check ingredients for potential allergens and consult a health professional if in doubt.

Leave a Comment