Ramen eggs, or ajitama, are more than just a simple topping; they are the soul-warming, umami-rich heart of a perfect bowl of ramen. If you’ve ever savored a steaming bowl of ramen, you know the magical moment when you bite into that perfectly marinated, jammy-yolked egg. That’s the magic of a well-made ramen egg! People adore these flavor bombs because they elevate a humble dish into something extraordinary. What makes them so special? It’s the delicate balance of savory soy sauce, sweet non-alcoholic mirin, and the subtle kick of other aromatics that infuse the egg, transforming its texture and taste into pure bliss. They’re incredibly versatile, too – not just for ramen, but fantastic in salads, on rice bowls, or even enjoyed on their own. Get ready to unlock the secret to these irresistible ramen eggs and make your homemade ramen truly sing!

Ramen Eggs (Ajitama)
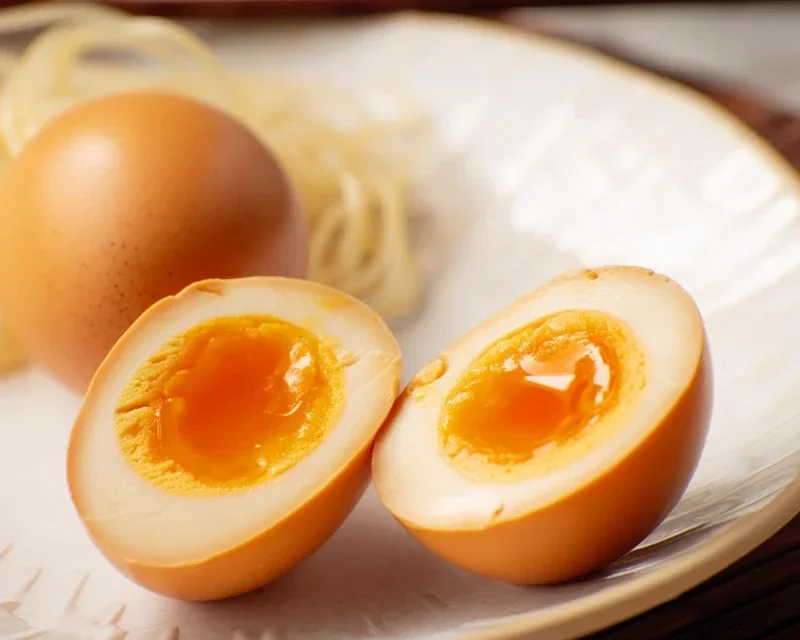
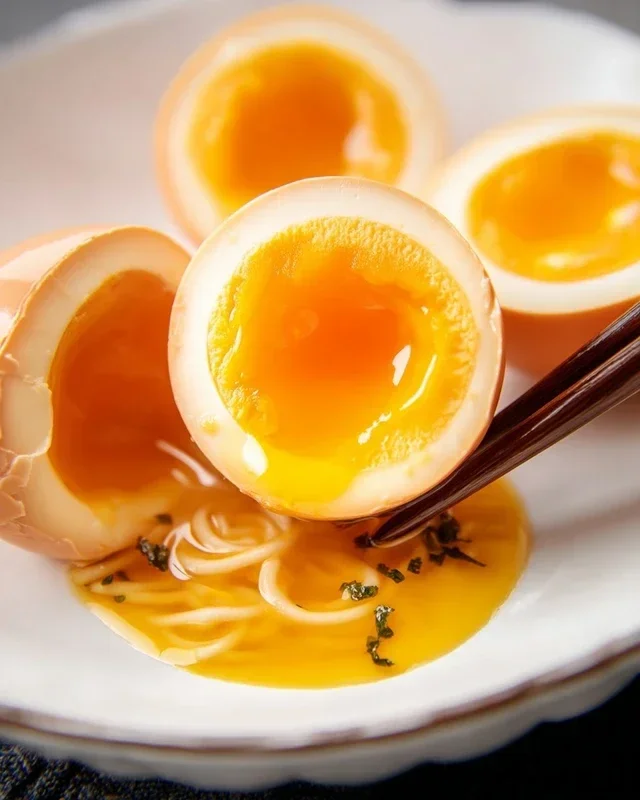
There’s something incredibly satisfying about a perfectly cooked ramen egg, or ajitama, nestled in a steaming bowl of ramen. The creamy, jammy yolk, slightly custardy whites, and the subtle savory-sweet marinade all combine to elevate a simple noodle soup into a truly comforting and delicious meal. Making your own ajitama at home is surprisingly easy, and the results are so worth it. This recipe will guide you through creating these flavorful gems that are perfect not just for ramen, but also for adding a gourmet touch to rice bowls, salads, or even just enjoying on their own. The key is achieving that ideal soft-boiled egg consistency and then letting them steep in a delicious marinade to absorb all that wonderful flavor.
Ingredients:
Cooking Instructions:
The process of making ajitama can be broken down into a few key stages: preparing the eggs, marinating them, and then finally enjoying the fruits of your labor. We’ll take it step-by-step to ensure you achieve those restaurant-quality results.
1. The Perfect Soft-Boiled Eggs
This is arguably the most crucial step. We’re aiming for a soft, jammy yolk and whites that are just set, not rubbery. First, gently place your eggs in a saucepan. You want to use eggs that are not too fresh, ideally about a week old. Fresher eggs can be harder to peel. Add enough cold water to cover the eggs by about an inch. If you’re using vinegar, add a splash (about 1 teaspoon) to the water. This is a little trick that can help prevent cracking and make peeling easier, though it’s not strictly necessary. Bring the water to a rolling boil over medium-high heat. As soon as it reaches a full boil, immediately remove the saucepan from the heat, cover it tightly with a lid, and let the eggs sit undisturbed in the hot water.
The cooking time here is key to achieving that perfect jammy yolk. For a truly soft, runny yolk, aim for 6 to 7 minutes. If you prefer a slightly more set, but still custardy yolk, go for 7 to 8 minutes. For a firmer, but not hard-boiled, yolk, you can extend it to 9 minutes. I personally find 7 minutes to be the sweet spot for a beautiful, custardy center. Once the time is up, you need to stop the cooking process immediately to prevent the yolks from continuing to cook. Prepare an ice bath by filling a bowl with cold water and plenty of ice cubes. Carefully remove the eggs from the hot water with a slotted spoon and plunge them directly into the ice bath. Let them chill for at least 10-15 minutes. This rapid cooling stops the cooking and also helps the egg whites contract, making them much easier to peel.
2. Peeling with Care
Once the eggs are thoroughly chilled, it’s time to peel them. Gently tap each egg on a hard surface to create a network of fine cracks all over the shell. Then, starting from the wider end (where the air pocket usually is), begin extract to peel away the shell. The cold water and the ice bath should have made this process much smoother. If you encounter any stubborn spots, try peeling the egg under a gentle stream of cool running water. This can help to loosen any bits of membrane stuck to the white. Be patient and gentle; we want to avoid damagin extractg the delicate whites.
3. Crafting the Marinade
While your eggs are chilling or after you’ve peeled them, it’s time to whip up the flavorful marinade. In a small saucepan, combine the light sodium soy sauce, water, non-non-non-alcoholic alternativeic non-alcoholic mirin, and granulated sugar. Place the saucepan over medium heat and stir gently until the sugar has completely dissolved. You don’t need to bring this mixture to a boil; just ensure everything is well combined and the sugar is gone. Once dissolved, remove the saucepan from the heat and let the marinade cool down to room temperature. This is important because if you pour hot marinade over the eggs, it can continue to cook the yolks and the whites can become tough.
4. Marinating to Perfection
This is where the magic truly happens. Once the marinade has cooled, you’ll need a container to hold your peeled eggs and the marinade. A small zip-top bag or a shallow, airtight container works perfectly. Place the peeled soft-boiled eggs into your chosen container. Pour the cooled marinade over the eggs, ensuring that they are fully submerged. If the marinade doesn’t quite cover them, you can gently nudge them around or add a tiny bit more water to the marinade.
Now comes the waiting game. Seal the container (or zip the bag tightly, squeezing out any excess air) and place it in the refrigerator. The longer the eggs marinate, the deeper the flavor will penetrate. For a subtle flavor, 4 to 6 hours is sufficient. For a more intense, savory-sweet infusion, I recommend marinating them overnight, or even up to 24 hours. The longer they sit, the darker the whites will become, and the more pronounced the umami will be. Turn the eggs occasionally during the marinating process to ensure even color and flavor distribution.
5. Serving Your Ajitama
After the marinating period, your ajitama are ready to be enjoyed! Gently remove them from the marinade. You can either slice them in half lengthwise to reveal that glorious jammy yolk, or serve them whole as a beautiful garnish. They are the quintessential topping for any bowl of ramen, adding a burst of flavor and a delightful texture. Beyond ramen, these marinated eggs are fantastic on top of a simple bowl of rice, added to a salad for extra protein and flavor, or even served as a delicious appetizer with a sprinkle of sesame seeds. The leftover marinade is also incredibly flavorful; don’t discard it! You can reuse it to marinate other things like tofu or chicken, or use it as a base for a dressing or dipping sauce. Store any unused ajitama in the refrigerator in their marinade for up to 3-4 days.
(*Note: Using eggs that are about a week old can make them easier to peel compared to very fresh eggs.)
Conclusion:
So there you have it – the simple yet incredibly rewarding process of making perfect Ramen Eggs, also known as Ajitama! This recipe is fantastic because it elevates your ramen from good to truly exceptional with minimal effort. The rich, savory marinade infuses the egg whites and creates a gloriously jammy, custardy yolk that bursts with flavor, adding a decadent dimension to any noodle dish. I’ve found that once you try these, it’s hard to go back to plain eggs in your ramen!
Beyond ramen, these versatile marinated eggs are also wonderful sliced over rice bowls, tossed into salads, or even enjoyed as a protein-rich snack on their own. Don’t be afraid to get creative with the marinade too! You can experiment with a splash of non-alcoholic mirin for sweetness, a pinch of chili flakes for a kick, or even a touch of sesame oil for an extra layer of aroma. I truly encourage you to give this Ramen Egg recipe a try – you’ll be amazed at how such a simple ingredient can make such a big difference. Happy cooking!
Frequently Asked Questions:
How long do Ramen Eggs last in the refrigerator?
Properly stored in their marinade in an airtight container, your Ramen Eggs should last for about 4-5 days in the refrigerator. Make sure they are fully submerged in the marinade for best results and to maintain freshness.
Can I make the marinade ahead of time?
Absolutely! In fact, it’s a great idea to make your marinade a day or two in advance. This allows the flavors to meld beautifully, ensuring your Ramen Eggs have even more depth. Just store it in an airtight container in the fridge until you’re ready to marinate your boiled eggs.
What’s the best way to peel the eggs after marinating?
The trick to easy peeling is to ensure your eggs are fully chilled after boiling and before marinating. Once they’ve marinated, gently crack the shell all over and peel under cool running water. The cold water helps to separate the membrane from the egg white.
Ramen Eggs (Ajitama)
Perfectly seasoned, soft-boiled eggs marinated in a savory soy sauce mixture, ideal for ramen or as a standalone snack.
Ingredients
-
6 large egg
-
1/2 cup soy sauce (light sodium)
-
1/4 cup water
-
1/4 cup non-alcoholic mirin
-
2 tablespoons granulated sugar
-
1 tablespoon rice vinegar
Instructions
-
Step 1
Carefully lower the eggs into a pot of boiling water. If using vinegar, add it to the water to prevent cracking. -
Step 2
Boil for 6 to 7 minutes for a jammy yolk, or longer for a firmer yolk. -
Step 3
Immediately transfer the eggs to an ice bath to stop the cooking process. Let them cool for at least 10 minutes. -
Step 4
While eggs are cooling, combine soy sauce, water, non-alcoholic mirin, granulated sugar, and rice vinegar in a bowl or a resealable bag. -
Step 5
Peel the cooled eggs and place them in the marinade. Ensure they are fully submerged. -
Step 6
Marinate in the refrigerator for at least 4 hours, or preferably overnight, flipping the eggs halfway through for even seasoning.
Important Information
Nutrition Facts (Per Serving)
It is important to consider this information as approximate and not to use it as definitive health advice.
Allergy Information
Please check ingredients for potential allergens and consult a health professional if in doubt.


Leave a Comment