How to make Pita Bread at home? It’s a question many of us have pondered, especially when that craving for warm, pillowy pockets or crispy, dippable triangles strikes. This versatile flatbread is a cornerstone of so many delicious meals, from falafel sandwiches and shawarma wraps to simple hummus platters. But why settle for store-bought when you can create something truly magical in your own kitchen? There’s an undeniable satisfaction, a comforting aroma that fills your home, and a superior taste that comes from freshly baked pita. What makes this particular recipe so special? It’s the perfect balance of a soft, chewy interior with that signature puff and a slightly crisp exterior, achieved through simple ingredients and a straightforward method that anyone can master. Get ready to elevate your homemade bread game!

Ingredients:
- 2 cups All-Purpose Flour, plus an additional 1/2 cup for dusting
- 1/2 cup Whole Wheat Flour
- 1 tablespoon Sugar
- 1 teaspoon Salt
- 1 tablespoon Olive Oil
- 2 teaspoons Active Dry Yeast (refer to notes in instructions for activation)
- 1 cup Warm Water (approximately 105-115°F or 40-46°C)
Preparing the Dough
Let’s get started on making our delicious homemade pita bread! The first and most crucial step is to activate our yeast. In a small bowl, combine the 1 cup of warm water and the 1 tablespoon of sugar. Give it a gentle stir to dissolve the sugar. Then, sprinkle the 2 teaspoons of active dry yeast over the surface of the water. Do not stir it in at this point. Let it sit undisturbed for about 5-10 minutes. You should see a foamy, bubbly layer form on top. This indicates that your yeast is alive and active, which is essential for a light and fluffy pita. If you don’t see any foam, your yeast might be old or the water wasn’t the right temperature, and you’ll need to start this step over with fresh yeast.
While the yeast is proofing, let’s combine our dry ingredients. In a large mixing bowl, whisk together the 2 cups of all-purpose flour, the 1/2 cup of whole wheat flour, and the 1 teaspoon of salt. Whisking ensures that the salt and flours are evenly distributed, which will lead to a consistent texture in your pita.
Once the yeast is foamy, add the 1 tablespoon of olive oil to the yeast mixture. Then, pour this activated yeast and oil mixture into the bowl with the dry ingredients. Using a wooden spoon or a sturdy spatula, begin extract to mix everything together. Stir until the dough just starts to come together in a shaggy mass. It might still look a bit dry in places, and that’s perfectly normal.
Kneading and First Rise
Now it’s time to knead the dough. Turn the shaggy dough out onto a lightly floured surface. You’ll use that reserved 1/2 cup of all-purpose flour for dusting here, adding just enough to prevent sticking. Kneading is a vital step for developing gluten, which gives pita its characteristic chegrape juicess and structure. Start by pushing the dough away from you with the heels of your hands, then fold it back towards you. Rotate the dough a quarter turn and repeat. Continue this process for about 8-10 minutes. The dough will gradually transform from sticky and rough to smooth, elastic, and slightly tacky to the touch. You should be able to press your finger into it, and the indentation should slowly spring back. If the dough becomes too sticky during kneading, lightly dust your hands and the work surface with a little more flour, but try not to add too much, as this can make the pita tough.
Once you’ve finished kneading, shape the dough into a smooth ball. Lightly oil the large mixing bowl you used earlier (or a clean one). Place the dough ball into the oiled bowl, turning it to coat all sides with a thin layer of oil. This helps prevent a dry skin from forming as the dough rises. Cover the bowl tightly with plastic wrap or a clean kitchen towel. Place the bowl in a warm, draft-free spot in your kitchen to rise. This first rise, also known as the “proofing” stage, should take about 1 to 1.5 hours, or until the dough has doubled in size. The exact time will depend on the warmth of your room.
Shaping and Second Rise
After the dough has doubled in size, gently punch it down to release the trapped air. Turn the dough out onto your lightly floured work surface once more. Divide the dough into 6-8 equal portions. You can do this by eye, or for more precision, you can weigh the dough and divide it by the number of portions you want. Gently shape each portion into a smooth ball. Cover these dough balls with a clean kitchen towel and let them rest for another 10-15 minutes. This brief rest allows the gluten to relax, making the dough easier to roll out.
Now, it’s time to shape the pita. Take one dough ball at a time and flatten it slightly. Using a rolling pin, roll out each dough ball into a circle about 6-8 inches in diameter and about 1/4 inch thick. Try to roll them out evenly to ensure they puff up properly. As you roll each pita, place it on a lightly floured baking sheet or a piece of parchment paper. Once all your pitas are rolled out, cover them loosely with the kitchen towel again and let them rest for about 15-20 minutes. This second, shorter rest helps the pitas puff up beautifully when they hit the heat.
Baking the Pita
This is where the magic happens! Preheat your oven to its highest setting, ideally 450-500°F (230-260°C). If you have a pizza stone or baking steel, place it in the oven while it preheats for at least 30 minutes. This will create a super-hot surface, which is key to getting that characteristic puff.
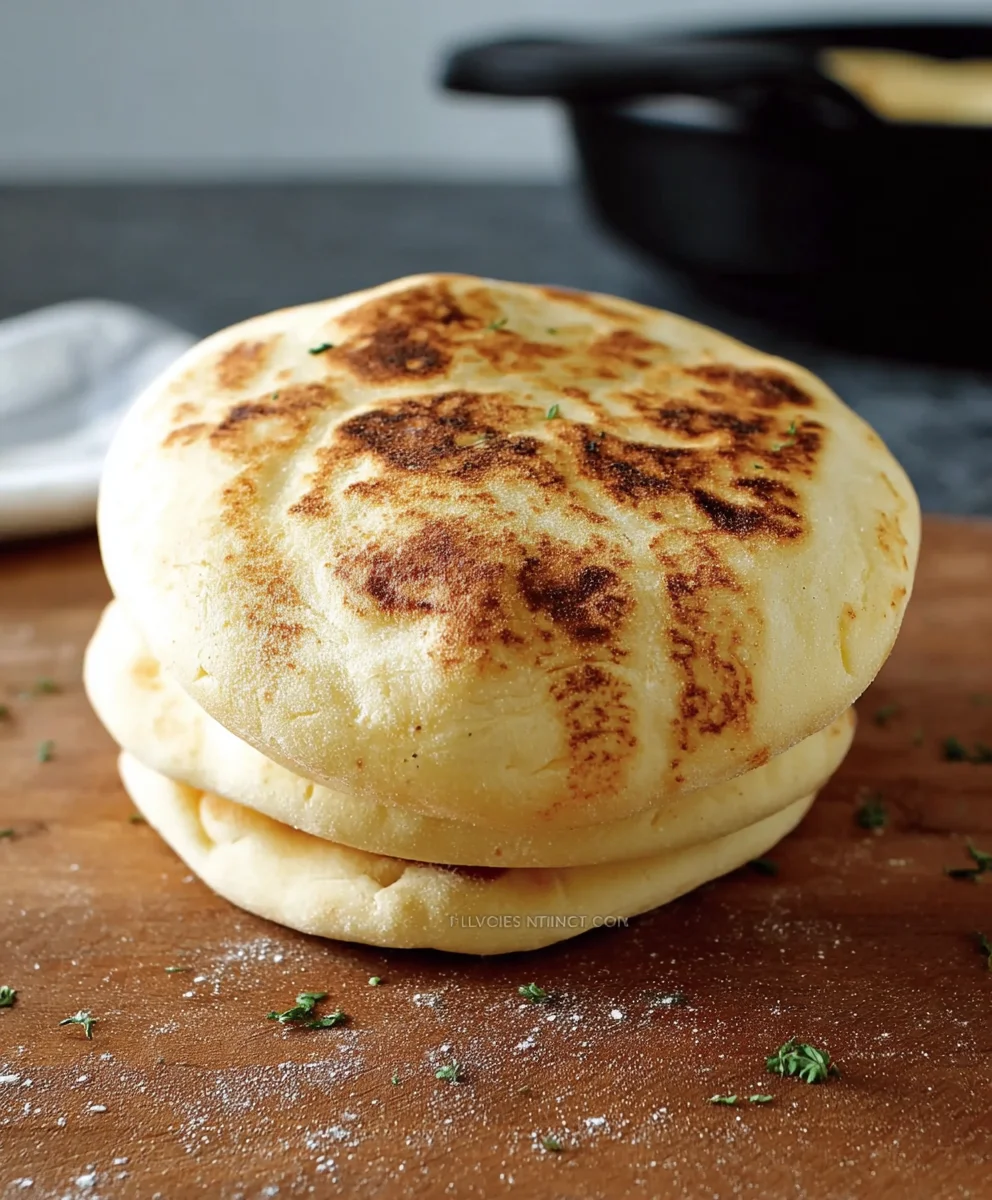
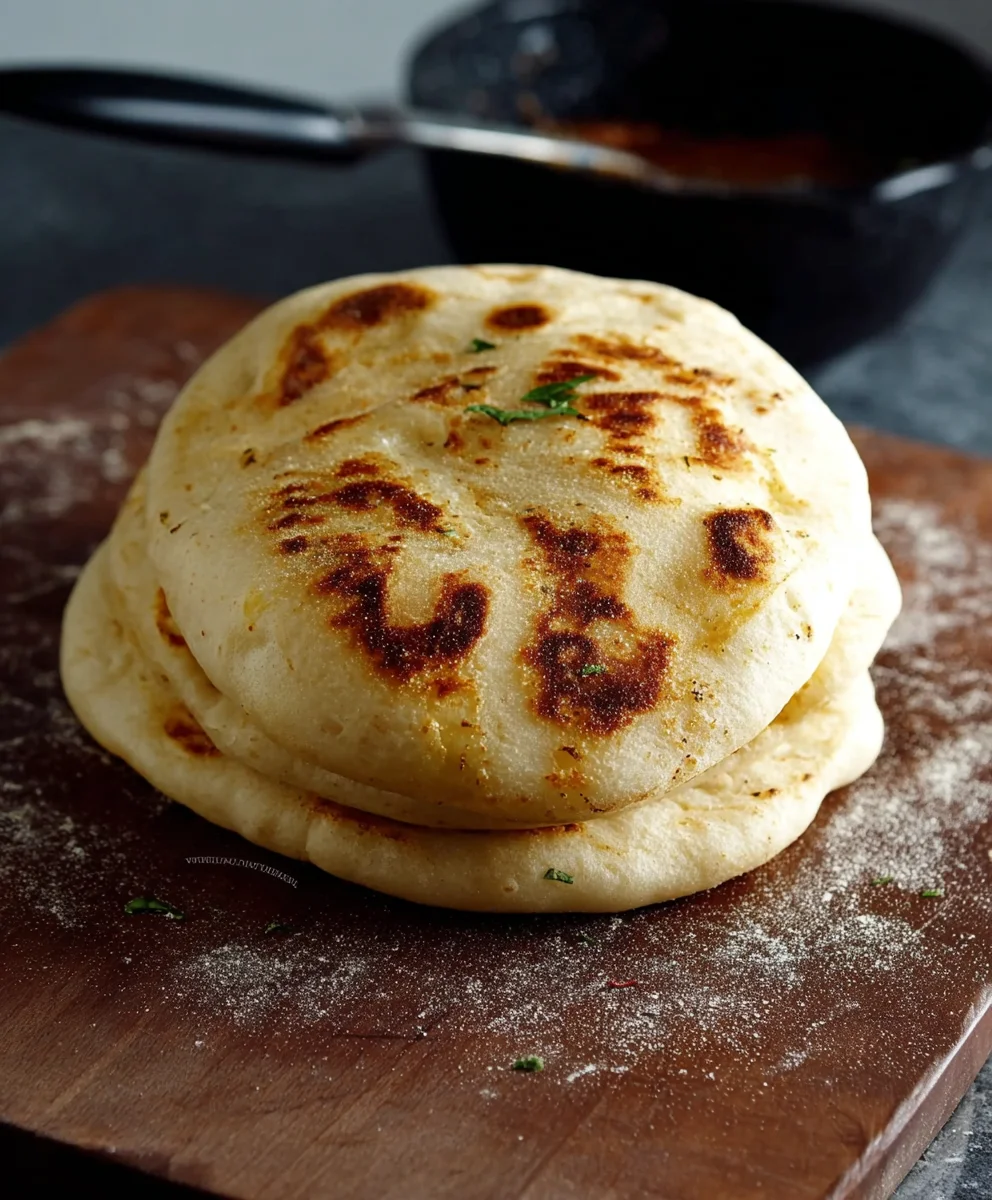
Carefully transfer 2-3 of the rested pita dough circles onto the preheated pizza stone or baking steel. You can do this by sliding them directly onto the hot surface, or if you used parchment paper, you can carefully slide the parchment with the pitas onto the stone. Be quick and gentle to avoid letting too much heat escape the oven. Bake for 2-4 minutes. You’ll see them start to puff up like balloons! Once they are nicely puffed and have light golden-brown spots, carefully flip them using a spatula and bake for another 1-2 minutes on the other side. They should be cooked through but not overly browned or crispy. Remove the baked pita from the oven and immediately wrap them in a clean kitchen towel. This helps them stay soft and flexible as they cool. Repeat this process with the remaining pita dough, baking in batches. Make sure your oven is fully preheated before each batch.
Conclusion:
And there you have it! You’ve successfully learned how to make Pita Bread at home. This recipe is incredibly rewarding, transforming simple pantry staples into fluffy, versatile pockets of deliciousness. The satisfaction of pulling warm, puffy pita bread straight from your oven is truly unmatched. Imagin extracte the possibilities – from classic falafel sandwiches and gyros to dipping into your favorite hummus or baba ghanoush. Don’t be afraid to get creative with your fillings and enjoy experimenting with this foundational bread.
For serving suggestions, consider pairing your freshly made pita bread with a vibrant Greek salad, a hearty lentil soup, or as the perfect vehicle for your favorite dips and spreads. For variations, you can easily incorporate whole wheat flour for a nuttier flavor, add a pinch of garlic powder or herbs to the dough for an extra layer of taste, or even bake them until slightly crispier for a pita chip alternative.
We truly encourage you to give this recipe a try. The process is straightforward, and the results are wonderfully delicious. Enjoy the aroma filling your kitchen and the taste of homemade goodness!
Frequently Asked Questions about How to make Pita Bread at home:
Why isn’t my pita bread puffing up?
Several factors can contribute to pita bread not puffing. Ensure your oven is sufficiently hot (ideally 500°F or higher) and that you’re baking directly on a preheated baking stone or sheet. Overworking the dough can also make it tough and less likely to puff. Make sure you are not adding too much flour during kneading, leading to a dry dough. Finally, allow the dough to rest and rise adequately; this is crucial for steam to create the pocket.
Can I make pita bread without a stand mixer?
Absolutely! While a stand mixer makes kneading easier, you can certainly make delicious pita bread by hand. Simply follow the mixing instructions and then knead the dough on a lightly floured surface for about 8-10 minutes until it’s smooth and elastic. It’s a great way to connect with the process and get a good workout!
Easy Homemade Pita Bread Recipe – Make It Today
Learn how to make delicious, fluffy pita bread from scratch with this easy-to-follow recipe. Perfect for pockets, wraps, or dipping!
Ingredients
-
2 cups All-Purpose Flour, plus an additional 1/2 cup for dusting
-
1/2 cup Whole Wheat Flour
-
1 tablespoon Sugar
-
1 teaspoon Salt
-
1 tablespoon Olive Oil
-
2 teaspoons Active Dry Yeast
-
1 cup Warm Water
Instructions
-
Step 1
Activate the yeast by combining 1 cup warm water and 1 tablespoon sugar in a small bowl. Sprinkle yeast over the surface and let sit for 5-10 minutes until foamy. -
Step 2
In a large bowl, whisk together 2 cups all-purpose flour, 1/2 cup whole wheat flour, and 1 teaspoon salt. -
Step 3
Add the activated yeast mixture and 1 tablespoon olive oil to the dry ingredients. Mix with a spoon until a shaggy dough forms. -
Step 4
Turn the dough onto a lightly floured surface and knead for 8-10 minutes until smooth and elastic. Place in a lightly oiled bowl, cover, and let rise in a warm place for 1-1.5 hours, or until doubled in size. -
Step 5
Punch down the dough, divide into 6-8 portions, and shape into balls. Cover and let rest for 10-15 minutes. Roll each ball into a 6-8 inch circle, about 1/4 inch thick. -
Step 6
Cover the rolled pitas and let rest for another 15-20 minutes. Preheat oven to 450-500°F (230-260°C) with a pizza stone or baking steel if available. -
Step 7
Bake 2-3 pitas at a time on the preheated surface for 2-4 minutes until puffed. Flip and bake for another 1-2 minutes. Wrap immediately in a towel to keep soft.
Important Information
Nutrition Facts (Per Serving)
It is important to consider this information as approximate and not to use it as definitive health advice.
Allergy Information
Please check ingredients for potential allergens and consult a health professional if in doubt.


Leave a Comment