

Homemade Fruit Leather Recipe is one of those delightful kitchen projects that truly pays off. There’s something incredibly satisfying about transforming fresh, vibrant fruits into a chewy, intensely flavored treat that’s perfect for lunchboxes, snacks, or a sweet pick-me-up. Forget those store-bought varieties laden with artificial ingredients; creating your own homemade fruit leather allows you to control exactly what goes in, making it a healthier and more delicious option. The magic of this recipe lies in its simplicity and the pure, concentrated essence of the fruit itself. It’s wonderfully versatile, too – you can experiment with a vast array of fruit combinations, from classic strawberry-rhubarb to more adventurous mango-lime. Get ready to unleash your inner alchemist and create a batch of irresistible homemade fruit leather that everyone will adore!

Homemade Fruit Leather Recipe
There’s something incredibly satisfying about making your own fruit leather. It’s a simple, healthy, and delicious way to preserve the vibrant flavors of fresh fruit, and it’s so much more rewarding (and often tastier!) than anything you can buy from a store. Plus, it’s a fantastic way to use up that surplus of berries or stone fruit you might have. My family absolutely loves this homemade treat, and I find it’s a great way to sneak in some extra fruit for picky eaters. The process is straightforward, requiring minimal active time, and the results are a chewy, sweet-tart delight that’s perfect for snacks, lunchboxes, or even a healthier dessert.
Ingredients:
Instructions:
Preparing the Fruit:
The first step is to prepare your fruit. Wash it thoroughly and chop it into roughly even pieces. If you’re using softer fruits like berries, you might not need to chop them too much, but for firmer fruits like apples or pears, smaller pieces will help them cook down more evenly. If you’re using frozen fruit, there’s no need to thaw it first; you can add it directly to the pot. I find that using a mix of fruits adds wonderful depth of flavor. For instance, a combination of sweet strawberries and slightly tart raspberries makes for a perfectly balanced fruit leather. Don’t be afraid to experiment with different fruit combinations!
Cooking Down the Fruit:
Place your chopped fruit in a medium saucepan. Add the white sugar and the fresh lemon juice. The sugar helps to sweeten the leather and also acts as a preservative. The lemon juice provides a bright, tangy counterpoint to the sweetness and also helps to enhance the vibrant color of the fruit, preventing it from browning too much during the cooking process. Stir everything together gently. Place the saucepan over medium heat. Bring the mixture to a gentle simmer, stirring occasionally. You want the fruit to soften and release its juices. This process can take anywhere from 10 to 20 minutes, depending on the type of fruit you are using. As it cooks, you’ll notice the fruit breaking down and the mixture thickening slightly. If you prefer a smoother fruit leather, you can mash the fruit with the back of a spoon as it cooks. For a more rustic texture, leave some larger fruit pieces intact.
Puréeing the Mixture:
Once the fruit has softened and has started to break down, it’s time to create a smooth purée. You have a couple of options here. If you have an immersion blender, you can carefully purée the mixture directly in the saucepan until it reaches your desired consistency. If you don’t have an immersion blender, allow the mixture to cool slightly, then carefully transfer it to a regular blender or food processor and blend until smooth. If you’re aiming for a perfectly smooth fruit leather, you might want to pass the purée through a fine-mesh sieve to remove any seeds or larger fibrous bits. This step is optional, but it does contribute to a wonderfully silky texture. The goal is to have a thick, smooth purée that will spread easily.
Dehydrating or Baking the Fruit Leather:
Now comes the exciting part: transforming the purée into fruit leather! Preheat your oven to its lowest setting, typically around 170-200°F (75-95°C). Line a baking sheet with parchment paper or a silicone baking mat. Pour the fruit purée onto the prepared baking sheet and spread it out evenly into a thin, uniform layer, about 1/8 to 1/4 inch thick. The thinner you spread it, the quicker it will dry. Try to keep the thickness consistent to ensure even drying. You can use an offset spatula to get a smooth, even surface. If you have a dehydrator, you can follow the manufacturer’s instructions for making fruit leather, typically setting it to around 135°F (57°C) for 6-12 hours. If using an oven, bake for 4-8 hours, or until the leather is no longer sticky to the touch and peels away cleanly from the parchment paper. You’ll want to keep a close eye on it, especially in the last hour or two, to prevent it from over-drying and becoming brittle.
Cooling and Storing:
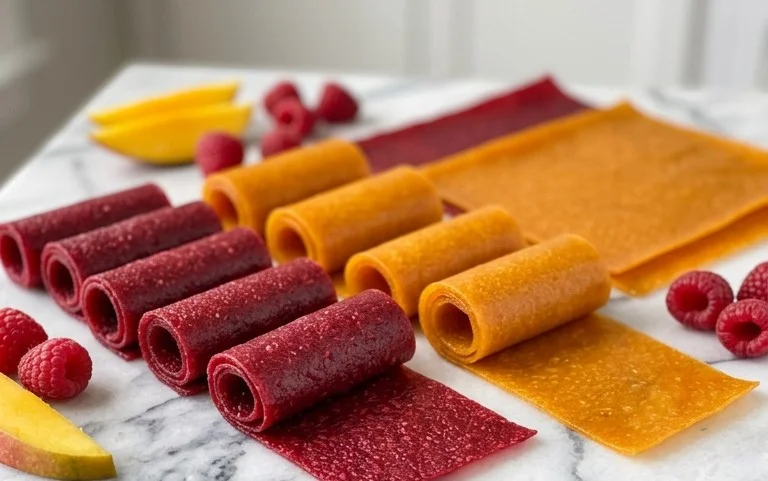
Once your fruit leather is dried to perfection, carefully remove the baking sheet from the oven. Let the fruit leather cool completely on the baking sheet. This is a crucial step as it will become more pliable as it cools. Once cool, you can peel the fruit leather off the parchment paper. If it’s still a little sticky in places, you can let it air dry for another hour or two. To store, I like to roll up the fruit leather into logs, then slice them into strips. You can wrap each strip individually in plastic wrap or parchment paper, or simply store them in an airtight container at room temperature for up to a week, or in the refrigerator for longer storage. Properly dried fruit leather can last for several weeks, making it a great pantry staple. Enjoy your delicious homemade fruit leather!
Conclusion:
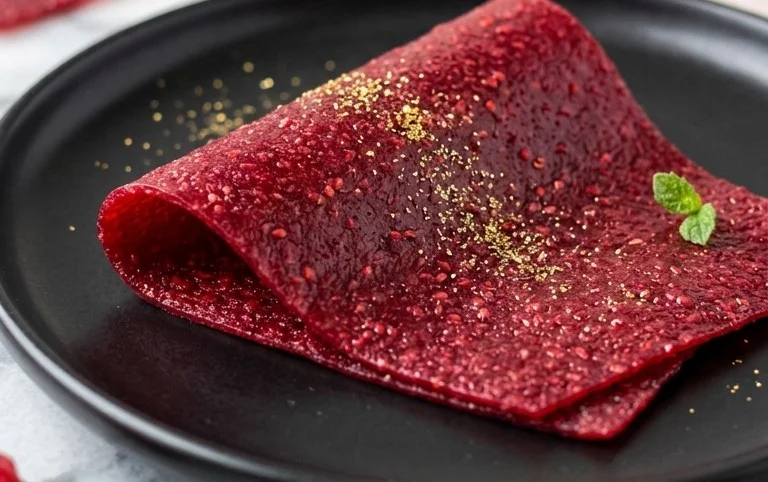
There you have it – a simple yet incredibly rewarding way to create your own delicious homemade fruit leather! This recipe is fantastic because it allows you to harness the natural sweetness of fruits, avoiding the artificial flavors and excessive sugars often found in store-bought versions. It’s a wonderfully healthy snack for kids and adults alike, perfect for lunchboxes, hiking trips, or simply satisfying a sweet craving. The satisfaction of peeling back a sheet of your own vibrant, chewy fruit creation is truly unparalleled. Don’t be afraid to get creative with your fruit choices – the possibilities are practically endless!
Serve your homemade fruit leather in strips, cut into fun shapes with cookie cutters, or even crum extractbled over yogurt or ice cream. It’s a versatile treat that brings a burst of fruity goodness to any occasion. I truly encourage you to give this homemade fruit leather recipe a try. You’ll be amazed at how easy it is and how much you’ll enjoy the fresh, pure taste.
Frequently Asked Questions:
What fruits work best for making fruit leather?
While many fruits can be used, some of the best options include berries (strawberries, raspberries, blueberries), stone fruits (peaches, plums, apricots), apples, pears, and mangoes. Blending different fruits can create unique and delightful flavor combinations. For a tangier result, consider adding a splash of lemon or lime juice.
How should I store my homemade fruit leather?
Once completely cooled and cut, store your fruit leather pieces wrapped individually in parchment paper or wax paper. Then, place them in an airtight container. It can be stored at room temperature for about a week, or in the refrigerator for up to a month. Freezing is also an option for longer storage.
My fruit leather is too sticky, what can I do?
If your fruit leather is consistently sticky after drying, it might indicate it wasn’t dried long enough. You can try returning it to the oven at a very low temperature for a bit longer, or simply ensure it’s thoroughly cooled before handling and wrapping. A light dusting of cornstarch or powdered sugar can also help reduce stickiness when cutting and storing, though this is less ideal for a pure fruit experience.
Homemade Fruit Leather Recipe
A simple and delicious recipe for making your own fruit leather at home, perfect for snacks.
Ingredients
-
2 cups fruit, chopped
-
3 tbsp white sugar
-
½ whole lemon, just the juice
-
1 tsp vanilla extract
-
¼ tsp ground cinnamon
-
Pinch of salt
Instructions
-
Step 1
Puree the chopped fruit in a blender or food processor until smooth. -
Step 2
In a saucepan, combine the fruit puree, white sugar, lemon juice, vanilla extract, cinnamon, and salt. -
Step 3
Cook over medium heat, stirring frequently, until the mixture thickens and coats the back of a spoon, about 10-15 minutes. -
Step 4
Preheat your oven to the lowest possible setting (around 170°F/75°C). -
Step 5
Line a baking sheet with parchment paper or a silicone baking mat. Spread the fruit mixture thinly and evenly over the prepared baking sheet. -
Step 6
Bake for 2-4 hours, or until the fruit leather is no longer sticky and peels easily from the parchment paper. -
Step 7
Let it cool completely, then cut into strips.
Important Information
Nutrition Facts (Per Serving)
It is important to consider this information as approximate and not to use it as definitive health advice.
Allergy Information
Please check ingredients for potential allergens and consult a health professional if in doubt.



Leave a Comment