

Homemade bread is more than just a food; it’s an experience. There’s an undeniable magic that happens when simple ingredients like flour, water, yeast, and salt transform into a warm, crusty loaf. I’ve always been captivated by the aroma that fills the kitchen as it bakes – a scent that conjures feelings of comfort, home, and pure satisfaction. That’s precisely why embarking on the journey of making homemade bread is so rewarding. It’s a connection to a tradition, a tangible creation born from your own hands. Unlike anything store-bought, the taste and texture of bread baked with love are simply unparalleled. It’s the slightly chewy interior, the satisfying crunch of the crust, and the knowledge that you’ve crafted this deliciousness yourself. This recipe aims to demystify the process, making it accessible and incredibly fulfilling, ensuring your next loaf of homemade bread is your best yet.

Homemade Bread: The Comfort of a Freshly Baked Loaf
There’s a unique magic that happens when you bake your own bread. The aroma that fills your kitchen is unparalleled, a warm, comforting embrace that signals good things are about to happen. And the taste? Oh, the taste of a crusty, warm slice of homemade bread, slathered with butter, is pure bliss. While store-bought bread is convenient, nothing truly compares to the satisfaction of creating this staple from scratch. Today, I’m going to guide you through making a wonderfully simple and delicious loaf of homemade bread. Don’t be intimidated; it’s a forgiving process, and the rewards are immense.
Ingredients:
*Note on Yeast and Flour: For this recipe, active dry yeast works wonderfully. If you have instant yeast, you can often skip the proofing step (step 1 below), but for a begin extractner, proofing is a great way to ensure your yeast is alive and active. For the flour, bread flour will give you a chewier texture due to its higher protein content, but all-purpose flour will still produce a delicious loaf. Start with the lower amount of flour and add more as needed; the exact amount can vary based on humidity and the flour itself.
Getting Started: Activating the Yeast
1. In a large mixing bowl, combine the 2 cups of warm water. It’s crucial that the water is between 105-115 degrees Fahrenheit. Too cold, and the yeast won’t activate; too hot, and you’ll kill it. You can test this by dipping your finger in – it should feel comfortably warm, not hot. To this warm water, add the active dry yeast and the honey or sugar. Give it a gentle stir to combine. Let this mixture sit, uncovered, for about 5-10 minutes. You should start to see a frothy, foamy layer develop on the surface. This is called “proofing” the yeast, and it tells you that your yeast is alive and ready to do its job. If you don’t see this foamy layer, your yeast might be old or the water wasn’t the right temperature, and it’s best to start over with fresh yeast.
Building the Dough: Bringin extractg it All Together
2. Once your yeast has bloomed, add the salt and oil to the yeast mixture. Stir gently to incorporate. Now, it’s time to add the flour. Begin extract by adding 4 cups of flour to the wet ingredients. Mix everything together with a sturdy spoon or a dough whisk until it starts to come together into a shaggy mass. At this point, the dough will be quite sticky.
3. Now, we’ll begin extract the kneading process. If you have a stand mixer with a dough hook, you can knead on a medium-low speed for about 8-10 minutes. If you’re kneading by hand (which I highly recommend for the tactile experience!), turn the shaggy dough out onto a lightly floured surface. Start gently pressing and folding the dough, pushing it away from you with the heel of your hand, then folding it back towards you. As you knead, gradually add more flour, about 1/4 cup at a time, only as needed. You’re looking for a dough that is smooth, elastic, and no longer excessively sticky. It should spring back slowly when you gently poke it with your finger. Be careful not to add too much flour, as this will result in a dry, dense loaf. The goal is a dough that is soft and pliable.
The First Rise: Giving the Dough Room to Grow
4. Lightly oil a clean, large bowl. Take your kneaded dough and place it in the oiled bowl, turning it once to coat all sides with oil. This prevents the dough from drying out as it rises. Cover the bowl tightly with plastic wrap or a damp kitchen towel. Place the bowl in a warm, draft-free place to rise. An oven that has been turned on briefly and then turned off (but is still slightly warm) is an ideal spot. Let the dough rise for about 1 to 1.5 hours, or until it has doubled in size. The exact time will depend on the temperature of your environment. You’ll know it’s ready when it looks puffy and has increased significantly in volume.
Shaping and Second Rise: Preparing for the Oven
5. Once the dough has doubled, gently punch it down to release the air. Turn the dough out onto a lightly floured surface and shape it into your desired loaf form. For a classic sandwich loaf, you can gently pat it into a rectangle and then roll it up tightly from one of the shorter sides. Pinch the seam closed. Place the shaped loaf into a greased loaf pan (about 9×5 inches). Cover the loaf pan loosely with plastic wrap or a clean kitchen towel and let it rise again in a warm place for another 30-45 minutes, or until it has almost doubled in size and looks nicely puffed over the rim of the pan. This second rise is crucial for a light and airy texture.
Baking to Perfection: The Final Transformation
Preheat your oven to 375 degrees Fahrenheit (190 degrees Celsius) during the last 15-20 minutes of the second rise. Once the oven is preheated and the dough has completed its second rise, carefully place the loaf pan into the center of the oven. Bake for 30-40 minutes, or until the crust is a deep golden brown and the loaf sounds hollow when you tap the bottom of it. If the crust starts to brown too quickly, you can loosely tent it with aluminum foil for the last 10-15 minutes of baking.
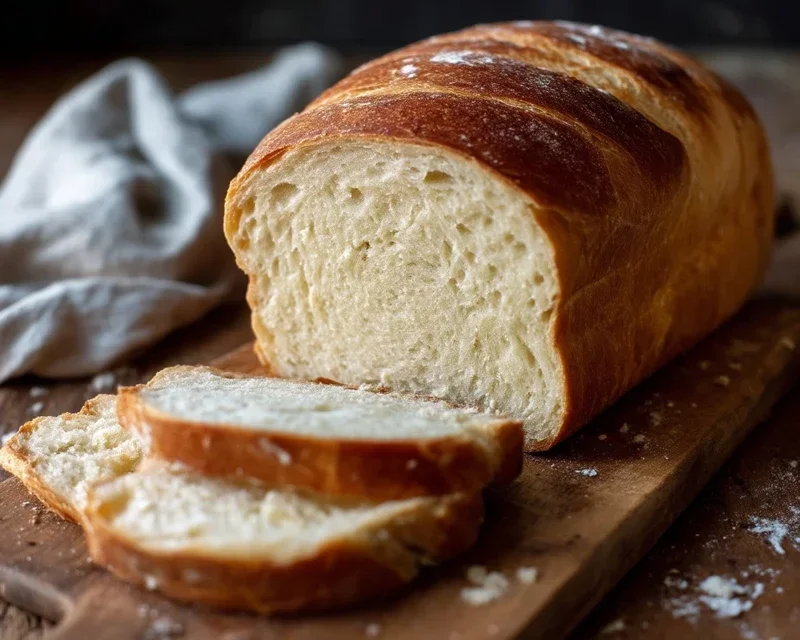
Once baked, immediately remove the bread from the loaf pan and place it on a wire rack to cool completely. Resist the urge to slice into it immediately! Allowing it to cool fully will help the internal structure set, preventing a gummy texture. The aroma of your freshly baked bread will fill your home, and you’ll have the immense satisfaction of knowing you created something truly special. Enjoy every delicious bite!
Conclusion:
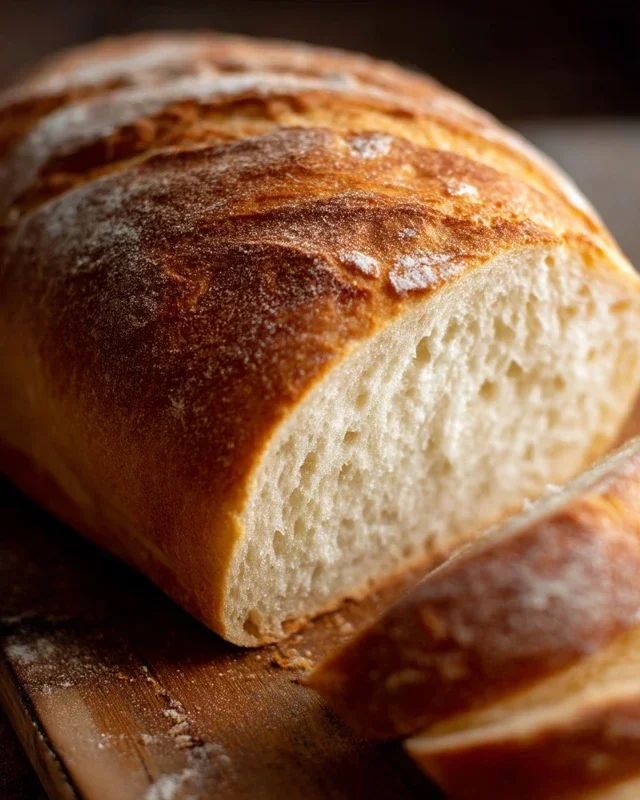
Embarking on the journey of making your own homemade bread is incredibly rewarding. This recipe, with its clear steps and emphasis on simple ingredients, demystifies the baking process, allowing you to create a truly delicious and satisfying loaf. The aroma that fills your kitchen as it bakes is unparalleled, and the taste of a fresh, warm slice is a culinary delight that store-bought bread simply cannot replicate. Imagin extracte the joy of slicing into a crusty exterior and revealing a soft, airy crum extractb, all made with your own hands!
This versatile loaf is perfect for so many occasions. Enjoy it toasted with butter and jam for breakfast, alongside your favorite soup or salad for lunch, or as the base for a gourmet sandwich. Feeling adventurous? Consider adding herbs like rosemary or thyme to the dough, or even some cheese for a savory twist. For a touch of sweetness, a hint of honey or a few dried cranberries can transform it into something truly special. Don’t be intimidated; with a little patience and this guide, you’ll be a bread-baking pro in no time. Give it a try – you might just discover your new favorite kitchen ritual!
Frequently Asked Questions:
Why is my bread dense?
Bread density can often be caused by insufficient kneading, which develops the gluten structure necessary for a light texture, or by not allowing the dough enough time to rise properly. Ensure you’re developing the dough until it’s smooth and elastic, and that it doubles in size during both the first and second proofing stages. Over-measuring your flour can also contribute to a denser loaf; use a kitchen scnon-alcoholic ale for accuracy.
Can I make this bread ahead of time?
Absolutely! Once your homemade bread has cooled completely, you can store it in an airtight bag or container at room temperature for 2-3 days. For longer storage, it freezes beautifully. Simply wrap it tightly in plastic wrap and then in foil, and it will keep for up to 3 months. Thaw at room temperature or gently reheat in the oven.
Homemade Bread
A simple recipe for delicious, crusty homemade bread, perfect for sandwiches or as a side.
Ingredients
-
2 cups warm water (105-115 degrees Fahrenheit)
-
1 Tablespoon active dry yeast
-
1/4 cup honey
-
2 teaspoons salt
-
2 Tablespoons canola oil
-
4 – 5 1/2 cups all-purpose flour
Instructions
-
Step 1
In a large bowl, combine warm water, yeast, and honey. Let stand for 5-10 minutes until foamy. -
Step 2
Stir in salt and canola oil. -
Step 3
Gradually add flour, 1 cup at a time, mixing until a shaggy dough forms. You may not need all the flour. -
Step 4
Turn dough onto a floured surface and knead for 8-10 minutes until smooth and elastic. Place in a greased bowl, cover, and let rise in a warm place for 1-2 hours, or until doubled. -
Step 5
Punch down dough, shape into a loaf, and place in a greased loaf pan. Cover and let rise for another 30-60 minutes. -
Step 6
Preheat oven to 375 degrees Fahrenheit (190 degrees Celsius). Bake for 30-35 minutes, or until golden brown and sounds hollow when tapped.
Important Information
Nutrition Facts (Per Serving)
It is important to consider this information as approximate and not to use it as definitive health advice.
Allergy Information
Please check ingredients for potential allergens and consult a health professional if in doubt.


Leave a Comment